In this manual: Heating, Ventilation and Air Conditioning
32steps
~192min
5/5difficulty
Tightening torque found on this page
Done 0 of 32
Components and Component Location
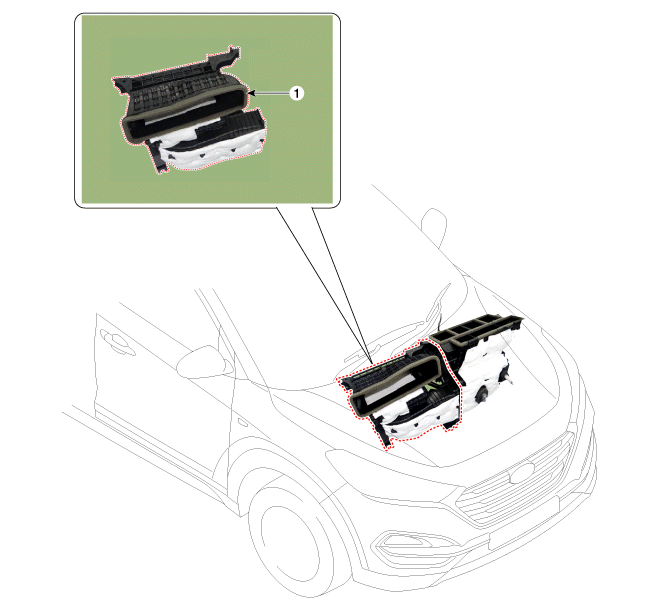
COMPONENT LOCATION
1. Blower Assembly
COMPONENTS
1. Gasket 2. Intake Duct Housing 3. Intake Actuator 4. Intake Air 5. Intake Duct Housing (A) 6. Air Filter 7. Air Filter Cover
8. Upper Blower Housing 9. Blower Unit 10. Instrument Cluster Ionizer 11. Resistor 12. Power MOSFET 13. Lower Blower Housing 14. Blower Motor
Repair Procedures
REPLACEMENT
Disconnect the negative (-) battery terminal.
Recover refrigerant using a refrigerant recovery/recycling unit (recovery/recycling station).
When the engine has cooled, drain the coolant from the radiator. (Refer to Engine Cooling System - "Coolant")
Remove the upper hood cover. (Refer to Body group - "Upper Cowl Cover")
After loosening the retaining nut, remove the control cover (B).
Tightening torque: 7.8~11.8 N·m
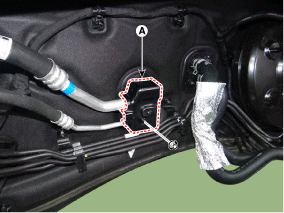
Remove the bolts and the expansion valve (A) from the evaporator core.
Tightening torque: 7.8~11.8 N·m
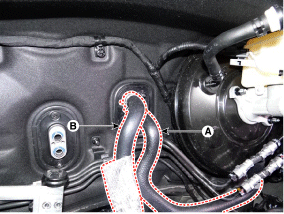
Disconnect the inlet (A) and outlet (B) heater hoses from the heating system.
Loosen the hood crossmember mounting bolts.
Remove the floor console assembly. (Refer to Body group - "Floor Console")
Remove the lower airbag panel. (Refer to Body - "Lower Instrument Panel")
Remove both sides of the front pillar garnish. (Refer to Body - "Front Pillar Garnish")
Remove the hood side moulding. (Refer to Body - "Hood Side Moulding")
Remove the lower panel from the steering column trim. (Refer to Body - "Steering Column Cover")
Remove the steering wheel. (Refer to Steering System - "Steering Wheel")
Remove the multifunction connector. (Refer to Body Electrical System - "Multifunction Switch.")
Lower the steering column after loosening the column mounting bolts. (Refer to Steering System group - Steering Column and Shaft)
Remove the shift lever assembly. (Refer to Automatic Transaxle System - "Shift Lever")
Remove the under-dash cover [D].
Remove the accelerator pedal. (Refer to Fuel System / Engine Control - "Accelerator Position Sensor (APS)")
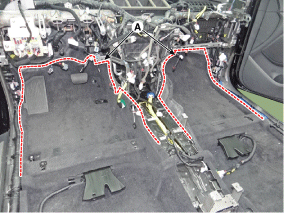
Separate the floor carpet (A) to create more space for removal from the rear heater duct.
Loosen the retaining nut, then remove the rear duct (B).
Disconnect the connector (A) from the SRS control module (SRSCM).
Disconnect the connectors from the junction box (A).
Disconnect the multi-box connectors (A). (Driver side)[Passenger Side]
Disconnect the connectors (A) and the retaining clips on the pillar. (Driver side)[Passenger Side]
Remove the drain hose (A).
After loosening the nuts and bolts, remove the front edge of the instrument panel and the crossmember (A) at the same time.
Disconnect the blower and heater unit connectors.
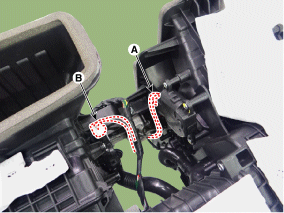
Disconnect the automatic heating actuator connector (A), the intake actuator connector (B), and remove the wire clamps.
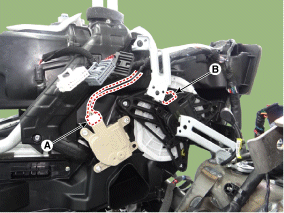
Disconnect the driver side temperature control actuator (A), the mode control actuator connectors (B), and remove the wire clamps.
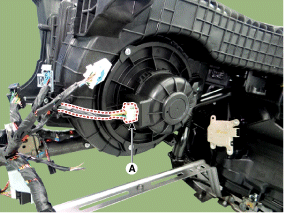
Disconnect the blower motor connector (A) and remove the wire clamps.
Disconnect the passenger side temperature control actuator (A), the instrument cluster ionizer connector (B), the power MOSFET connectors (C), then remove the wire clamps.
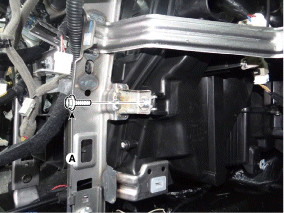
Loosen the heater and blower mounting bolt (A).
After loosening the retaining nuts, remove the blower and heater unit (A) from the instrument panel (B).
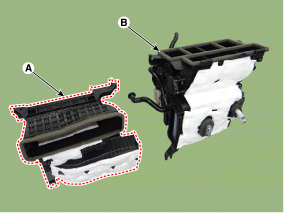
Separate the blower unit (A) from the heater unit (B) after loosening the screws.
To install, perform the removal procedure in reverse order.
?
Test yourself
A quick Hyundai Tucson quiz: every answer comes with an explanation and a link to the manual page.