Headlight Aiming Adjustment
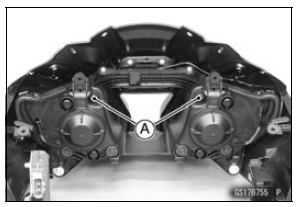
NOTE
Do not turn the bolts [A] because the reflector in the headlight comes off.
(In the photo, the headlight unit has been removed for clarity.)
NOTE
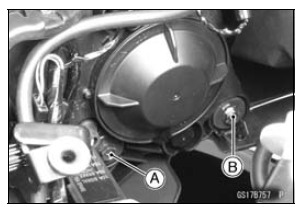
The left adjuster [A] and right adjuster [B] can move the direction of the headlight beam to up, down, left and right by turning each adjuster itself as the below table.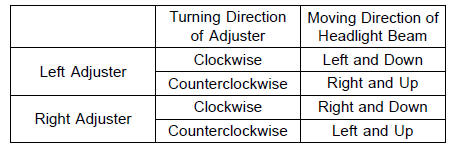
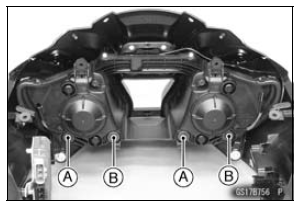
- To move the headlight beam leftward, turn the left adjuster [A] clockwise and turn the right adjuster [B] counterclockwise same number as the left adjuster was turned until the beam points straight ahead.
- To move the headlight beam rightward, turn the left adjuster counterclockwise and turn the right adjuster clockwise same number as the left adjuster was turned until the beam points straight ahead.
- To move the headlight beam upward, turn the both adjusters counterclockwise same number
- To move the headlight beam downward, turn the both adjusters clockwise same number.
NOTE
On high beam, the brightest points should be slightly below horizontal with the motorcycle on its wheels and the rider seated. Adjust the headlight to the proper angle according to local regulations.
NOTE
For US model, the proper angle is 0.4В° below horizontal.
This is 50 mm (2 in.) drop at 7.6 m (25 ft) measured from the center of the headlight with the motorcycle on its wheels and the rider seated.
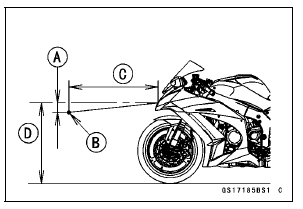
50 mm (2 in.) [A] Center of Brightest Spot [B] 7.6 m (25 ft) [C] Height of Headlight Center [D]
Test yourself
A quick Kawasaki Ninja ZX-10R quiz: every answer comes with an explanation and a link to the manual page.