Automatic Transmission
Valve Body Repair Procedures
In this manual: Automatic Transmission
8steps
~48min
2/5difficulty
Done 0 of 8
Removal
- Remove the under cover. (Refer to Engine Mechanical System - Under Engine Room Cover.)
- Remove the ATF drain plug (A), allow the fluid to drain, then reinstall the drain plug.
Tightening torque: 33.3 ~ 43 N·m
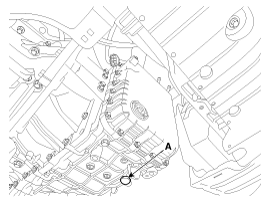
The existing ATF drain plug gasket must be replaced with a new one. (Do not reuse.)
- Remove the battery and battery tray. (Refer to Engine Electrical System - "Battery")
- Remove the wire harness bracket (A) and breather hose (B).
Tightening torque: 9.8 ~ 11.8 N·m
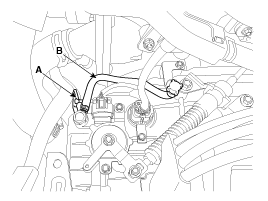
- Raise the vehicle after loosening the upper valve body cover bolts.
- Remove the valve body cover (A) by loosening the bolts.
Tightening torque: 11.8 ~ 13.7 N·m
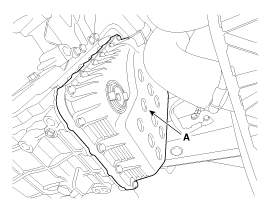
- Remove the solenoid valve wire harness connector (A) and the oil temperature sensor (B) by removing the bolts.
Tightening torque: 9.8 ~ 11.8 N·m
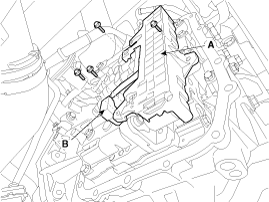
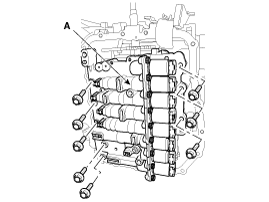
- Remove the valve body assembly (A).
Tightening torque: 9.8 ~ 11.8 N·m
Installation
- Install in the reverse order of removal.
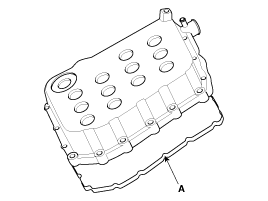
- The existing valve body cover gasket (A) must be replaced with a new one. (Do not reuse.)
- Perform the procedures described below after replacing the valve body assembly.
- Fill the automatic transmission with fluid. (Refer to Hydraulic System — "Fluid").
- Reset the automatic transmission adaptive values using GDS.
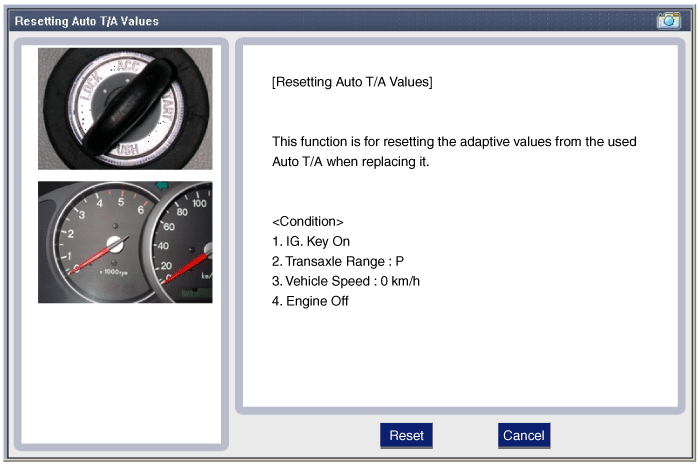
- Perform the procedure to store the TCM adaptive values. (Refer to "Automatic Transmission Control System - Repair Procedures")
- Check for fluid leaks at the connections after repair.
- The existing valve body cover gasket (A) must be replaced with a new one. (Do not reuse.)
Test yourself
A quick Kia Cadenza VG Owner's Manual quiz: every answer comes with an explanation and a link to the manual page.
Was this page helpful?