Body Electrical System
Audio Unit Repair Procedures
In this manual: Body Electrical System
26steps
~156min
4/5difficulty
Done 0 of 26
Removal
|
- Disconnect the negative (-) battery terminal.
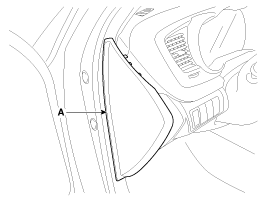
- Using a screwdriver or pry tool, remove the crash pad side cover (A).
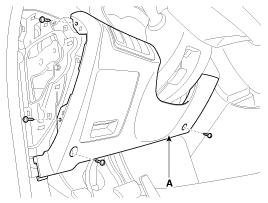
- After loosening the mounting screws, remove the airbag lower panel (A).
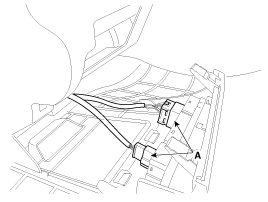
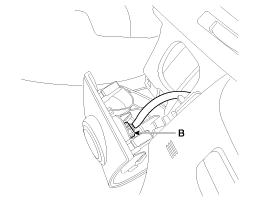
- Disconnect the switch connector (A) and SSB connector (B) from the airbag lower panel.
- After removing the screws, remove the left garnish (A).
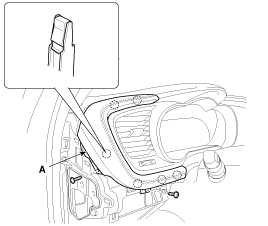
- Using a screwdriver or removal tool, remove the right garnish (A).
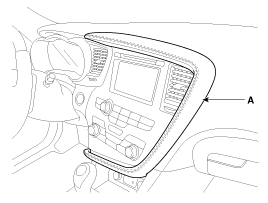
Apply protective tape to the airbag trim and related components.
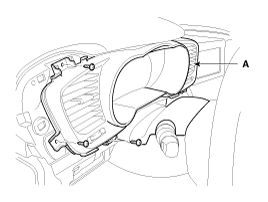
- After loosening the screws, remove the instrument cluster front panel (A).
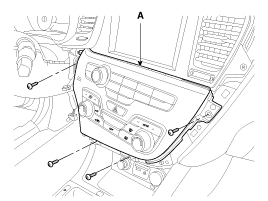
- After loosening the screws, remove the center fascia lower panel (A).
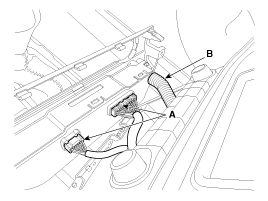
- Disconnect the connectors (A) and hose (B).
- After loosening the screws, remove the center fascia upper panel (A).
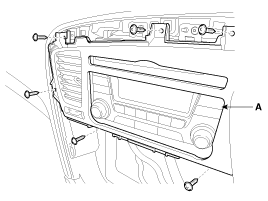
- Remove the audio system (A) after loosening the mounting screws.
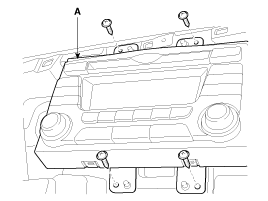
- Disconnect the audio connectors and cable (A), then remove the audio unit completely.
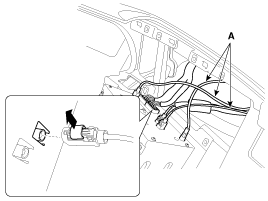
Lift the connector lock in the direction of the arrow, then disconnect the connector. When installing, fully seat the connector and connector lock.
If the CD cannot be ejected, do not attempt to force it out, as the audio system may be damaged. Contact an authorized dealer for assistance.
Disassembly
|
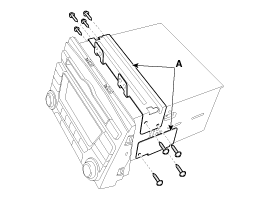
- If necessary, separate the CD drive by removing the brackets (A) after loosening the screws (8EA).
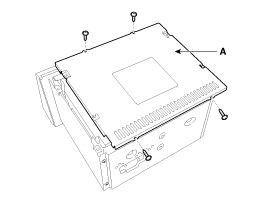
- Remove the screws (4 pcs.) from the head unit, then remove the upper cover (A).
- After loosening the screws (2EA), remove the head unit front panel (A).
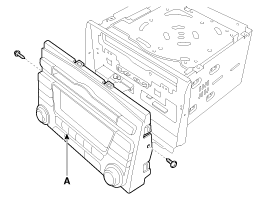
Be careful not to damage the cable when removing the front panel. - Remove the screws (4EA).
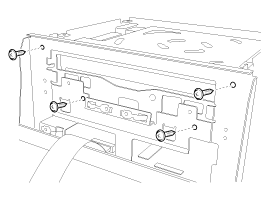
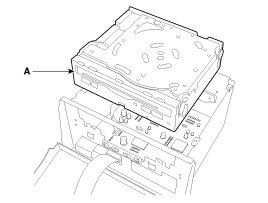
- Remove the CD drive (A).
Installation
- Install the CD drive on the audio unit.
- Assemble the upper cover and front panel.
Make sure the ribbon connector and cable connector are connected correctly.
Installation
- Connect the audio unit connectors and cables.
- Install the audio unit.
- Install the center fascia upper panel.
- Install the heater control unit.
- Install the airbag left garnish and the instrument cluster front panel.
- Install the airbag lower panel and side cover.
- Install the airbag right garnish.
Make sure the head unit connectors are connected correctly and the antenna cable is connected correctly.
Test yourself
A quick Kia Optima Hybrid Owner's Manual quiz: every answer comes with an explanation and a link to the manual page.
Was this page helpful?