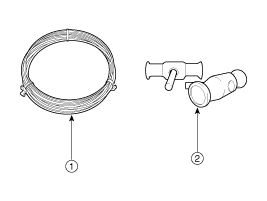
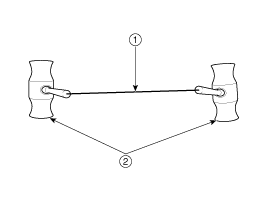
To remove the sunroof assembly, use the tools shown in the following illustration: [Tool Illustration]Piano WireInsert-Type Wire Retainer [Tool Assembly Illustration]
Insert and secure the piano wireinto the wire retainer insertion hole .
Remove the roof side molding. (Refer to Body Moldings - "Roof Side Moldings")
Remove the windshield. (Refer to Sunroof - "Windshield")
Remove the headliner. (Refer to Headliner - "Headliner Assembly")
Remove the curtain airbag (CAB) module. (Refer to Passive Safety System - "Curtain Airbag (CAB) Module")
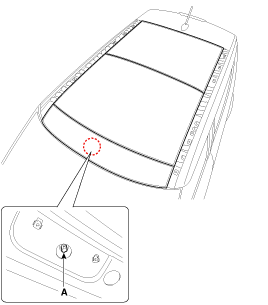
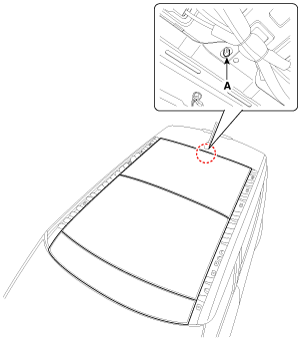
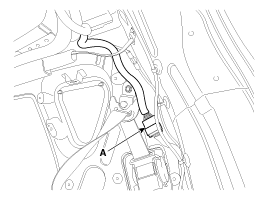
Disconnect the sunroof motor connector (A) by pressing the locking pin.
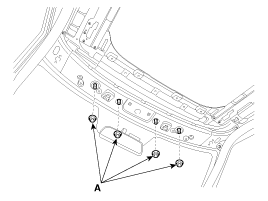
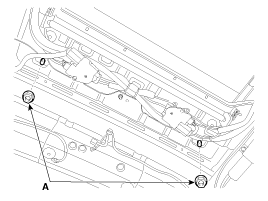
Loosen the sunroof mounting nuts (A). [Front]
Tightening torque: 9.8 ~ 14.7 N·m
[Rear]
Tightening torque: 9.8 ~ 14.7 N·m
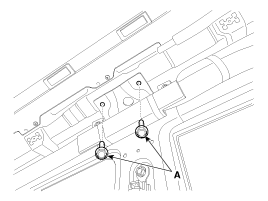
Loosen the bolts (A) on the side of the panoramic sunroof.
Tightening torque: 19.6 - 29 N·m
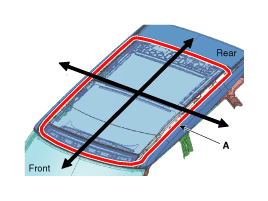
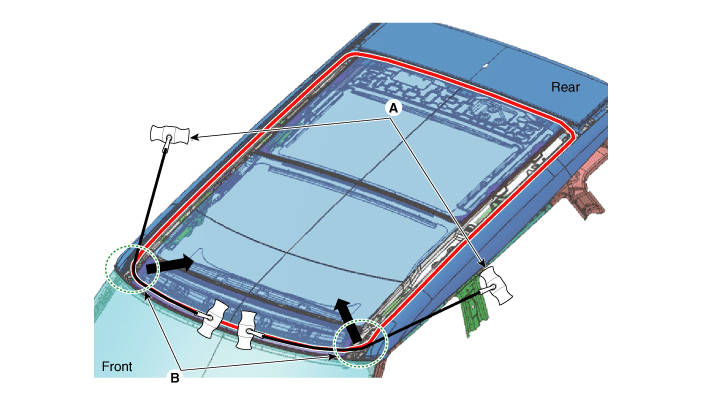
Pull the square wire (A) to the left and right, then pull in the direction of the arrow to cut the remaining sealant on the front edge (B).
Make sure to wear gloves to protect your hands from possible injury.
Be careful not to burn your hands from the heat generated by the wire.
Be careful when working with the wiring harness, as it may be cut.
Be careful not to damage the body.
Make sure that two or more people work together when using the wire.
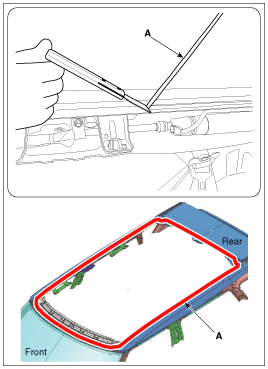
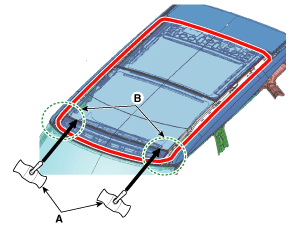
Push the wire (A) from the outside of the housing toward the face of the edge (B) in the direction indicated by the arrow.
When the wire is visible inside the body, pull the wire (A) inward.
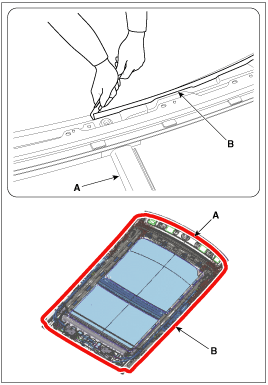
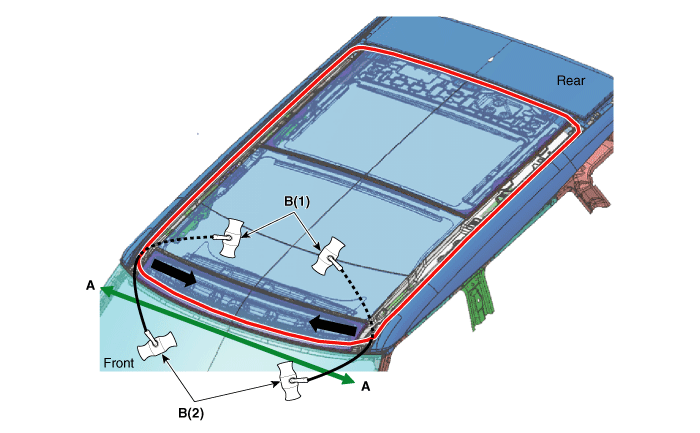
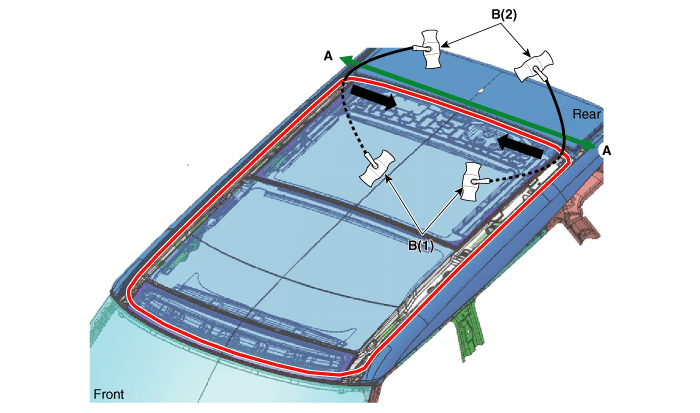
Pull the square wire (B) to the left and right, then pull in the direction of the arrow to cut the remaining sealant on the front section (A-A).
B(1): Work inside the vehicle
B(2): Work outside the vehicle
Make sure to wear gloves to protect your hands from possible injury.
Be careful not to burn your hands from the heat generated by the wire.
Be careful when working with the wiring harness, as it may be cut.
Be careful not to damage the body.
Make sure that two or more people work together when using the wire.
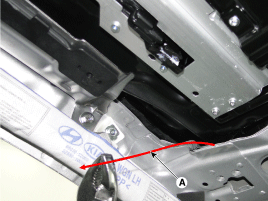
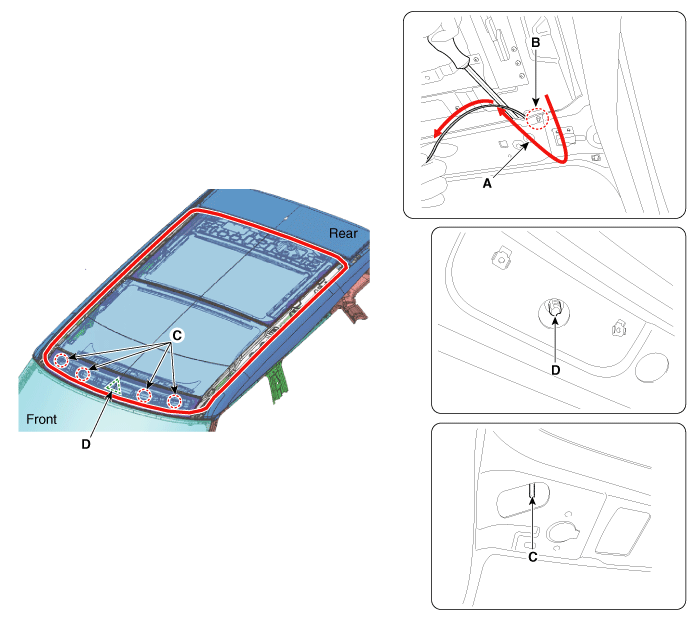
When using the wire to remove the sealant, interference may occur between the nut hole and the device hole. In this case, remove the sealant as shown in the following illustration:Use a scraper or a flat-tip screwdriver to pry up the area between the body and the sunroof.Turn and pull out the wire (A) between the nut hole and the device hole (B) in the direction indicated by the arrow. Then cut off the remaining sealant again.
Be careful not to damage the nut hole (C).
Be careful not to damage the device hole (D).
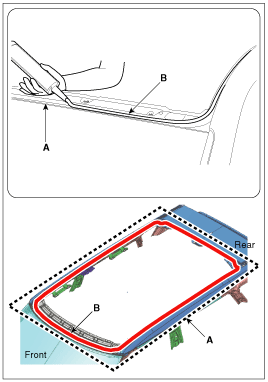
Pull the square wire (B) to the left and right, then pull in the direction of the arrow to cut the remaining sealant on the side section (A-A).
B(1): Work inside the vehicle
B(2): Work outside the vehicle
Make sure to wear gloves to protect your hands from possible injury.
Be careful not to burn your hands from the heat generated by the wire.
Be careful when working with the wiring harness, as it may be cut.
Be careful not to damage the body.
Make sure that two or more people work together when using the wire.
Pull the square wire (B) to the left and right, then pull in the direction of the arrow to cut the remaining sealant on the rear section (A-A).
B(1): Work inside the vehicle
B(2): Work outside the vehicle
Make sure to wear gloves to protect your hands from possible injury.
Be careful not to burn your hands from the heat generated by the wire.
Be careful when working with the wiring harness, as it may be cut.
Be careful not to damage the body.
Make sure that two or more people work together when using the wire.
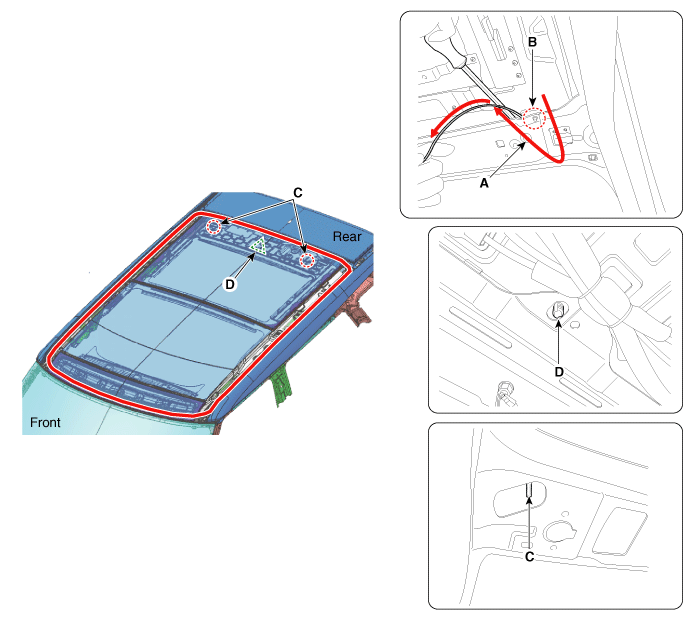
When using the wire to remove the sealant, interference may occur between the nut hole and the device hole. In this case, remove the sealant as shown in the following illustration:Use a scraper or a flat-tip screwdriver to pry up the area between the body and the sunroof.Turn and pull out the wire (A) between the nut hole and the device hole (B) in the direction indicated by the arrow. Then cut off the remaining sealant again.
Be careful not to damage the nut hole (C).
Be careful not to damage the device hole (D).
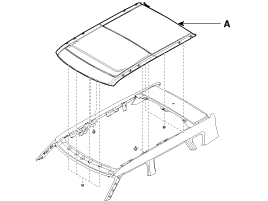
Cut off the remaining sealant on each surface and remove the sunroof assembly (A).
Be careful not to damage the sunroof assembly when removing it.
Installation
To install the sunroof assembly, use the tools shown in the following illustration: [Tool Illustration]Sealant NozzleAutomotive Glass SealantSealant Gun
Use a blade to cut away the remaining sealant (A) around the body panel.
When cutting off the remaining sealant around the body panel, be sure to leave a thickness of 2 mm from the adhesive surface.
Make sure the body paint surface is not damaged.
If damaged, apply paint or rust inhibitor for service.
If the sunroof assembly (A) is reused, use a blade to remove the remaining sealant (B) around the body panel.
Use alcohol or a pneumatic pistol to clean the edges of the body panel and sunroof.
Using a sealant gun, apply sealant (B) around the body panel (A).
When applying sealant using a sealant gun, make sure the sealant is not cracked to prevent water leakage.
Align the centering device hole (A) in the body, and carefully install the sunroof onto the body panel. [Front][Rear]
Check the gap and flush before fully installing the sunroof assembly (A).
Apply tape around the sunroof assembly to prevent the assembly from separating.
If too much sealant is applied, it may leak out of the body. Use alcohol or a cleaning agent to wipe off excess sealant.
Tighten the sunroof mounting nuts (A). [Front]
Tightening torque: 9.8 ~ 14.7 N·m
[Rear]
Tightening torque: 9.8 ~ 14.7 N·m
Tighten the sunroof side mounting bolts (A).
Tightening torque: 19.6 - 29 N·m
Install the curtain airbag (CAB) module. (Refer to Passive Restraint System - "Curtain Airbag (CAB) Module".)
Connect the sunroof motor connector (A).
Perform a water leak test.
Make sure the water stream does not reach the newly installed surface, but drops down along the edge of the glass.
If water leaks, apply sealant to any area where water is leaking.
After installing the sunroof, park the vehicle on a level surface for at least 4 hours.
If you need to drive the vehicle, be sure to drive SLOWLY for at least 8 hours after installation.
Advise the driver not to drive aggressively or on rough road surfaces for 2-3 days.
Install the roof headlining assembly.
Install the roof side molding.
Install the windshield.
?
Test yourself
A quick Kia Soul EV Owner's Manual quiz: every answer comes with an explanation and a link to the manual page.


 Use a scraper or a flat-tip screwdriver to pry up the area between the body and the sunroof.
 Turn and pull out the wire (A) between the nut hole and the device hole (B) in the direction indicated by the arrow. Then cut off the remaining sealant again.

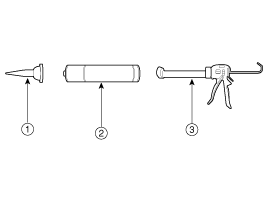
 Sealant Gun