C Pillar Trim Removal/Installation
1. Remove the following parts:
a. Rear seat cushion.
b. Rear scuff plate.
c. Tire house trim.
2. Partially peel back the seaming welt.
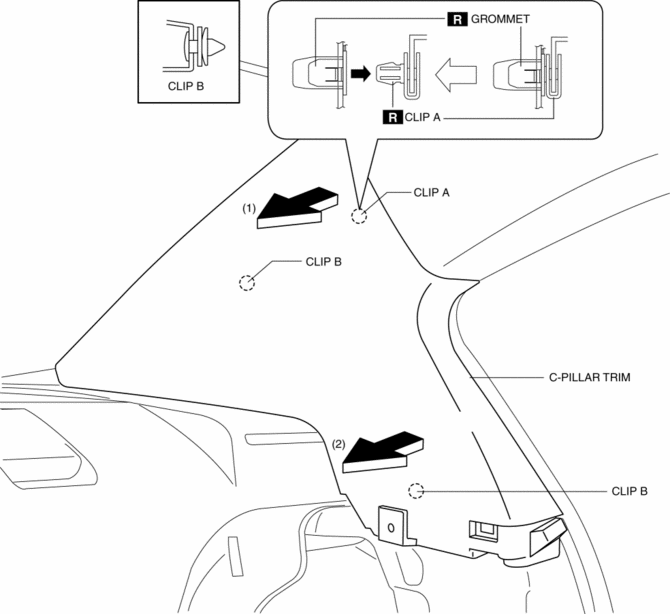
3. Pull the C-pillar trim in the direction of the arrow (1), (2) shown in the figure, then detaching clip A and B.
4. Cut the lead wire connecting clip A and grommet using a nipper and pull out the C-pillar trim in the direction of the arrow shown in the figure, while remove the tab C.
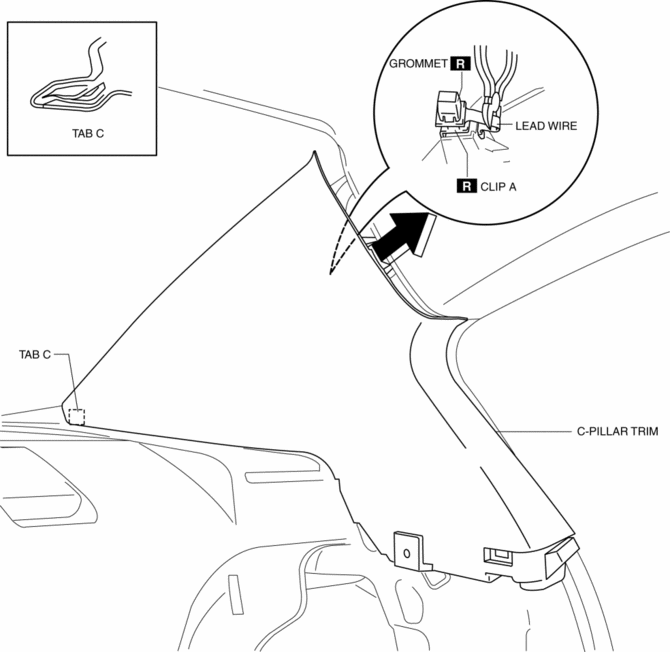
CAUTION:
When removing the C-pillar trim, be careful not to damage the tab C.
5. Move the hook in the direction of arrows (1) and (2) shown in the figure using a flathead screwdriver and detach it from the rear pillar inner panel.
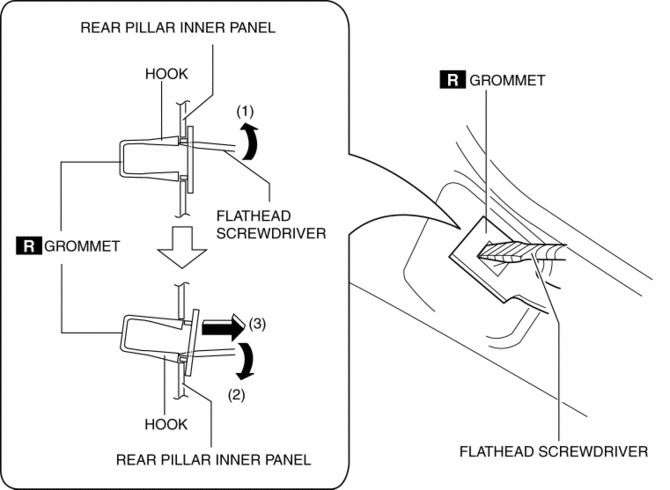
6. Remove the grommet in the direction of the arrow (3) shown in the figure.
7. When installing the C-pillar, install the new clip A and grommet to the C-pillar trim in advance.
8. Install in the reverse order of removal.
5HB1. Remove the following parts:
a. Rear scuff plate.
b. Tire house trim.
c. Trunk side upper trim.
d. Trunk side trim.
2. Partially peel back the seaming welt.
3. Remove the fastener.
4. Pull the C-pillar trim in the direction of the arrow (1), (2) shown in the figure, then remove the clips A, pin B and C.
5. Pull the C-pillar trim in the direction of the arrow (3) shown in the figure, then remove the clips D and tab E.
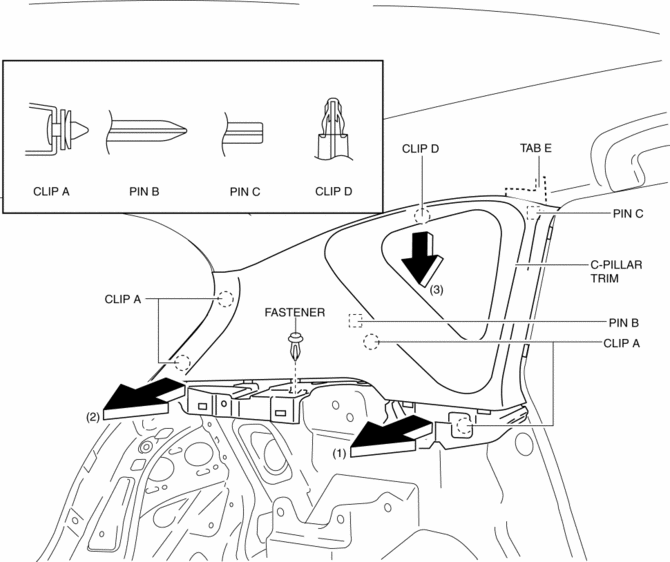
6. Remove the C-pillar trim.
7. Install in the reverse order of removal.
Test yourself
A quick Mazda 3 quiz: every answer comes with an explanation and a link to the manual page.