Console Removal/Installation
1. Disconnect the negative battery cable..
2. Remove the following parts:
a. Upper panel.
b. Shift knob (MTX).
c. Selector lever knob (ATX).
d. Shift panel.
e. Side wall.
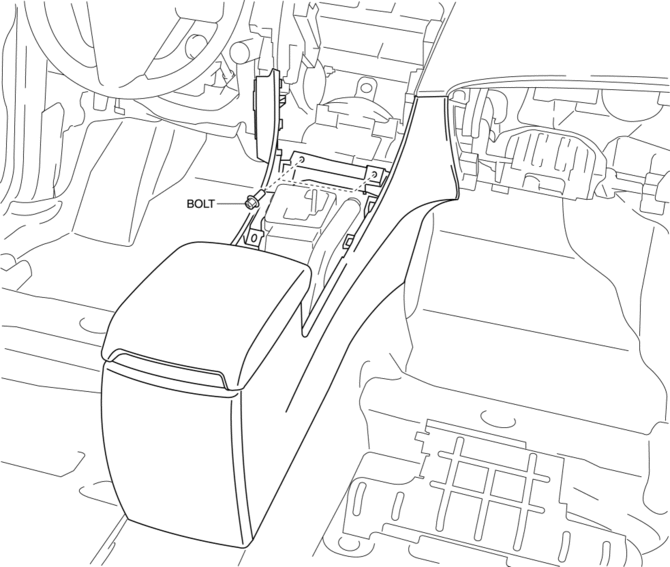
3. Remove the bolts.
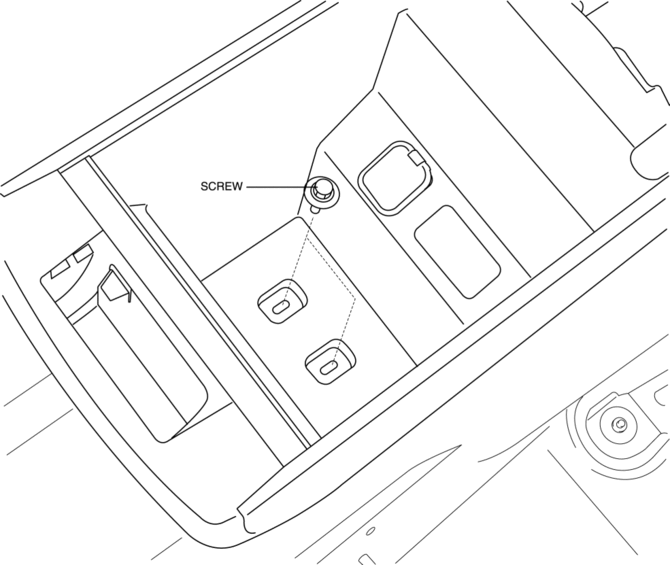
4. Remove the screws.
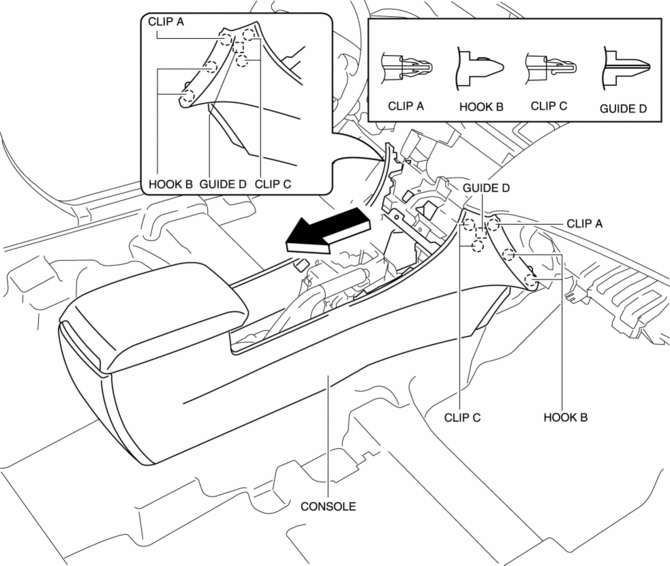
5. Pull the console in the direction of the arrow shown in the figure, then detaching clips A, C hooks B and guides D.
6. Disconnect the following connectors:
a. Rear accessory socket
b. Auxiliary jack (vehicles without USB port)
c. Auxiliary jack/USB port (vehicles with USB port)
d. Car-navigation unit (vehicles with audio unit)
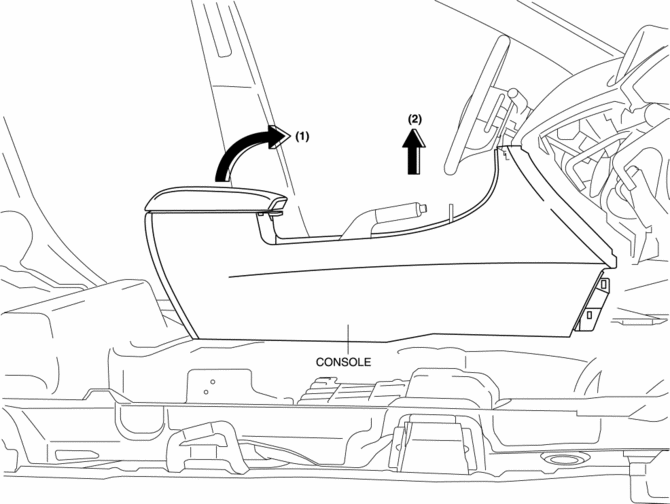
7. Pull up the console in the direction of the arrow (1) shown in the figure, move the rear console in the direction of the arrow (2), and remove it avoiding the parking brake lever.
8. Remove the following parts:
a. Rear accessory socket.
b. Auxiliary jack (vehicles without USB port).
c. Auxiliary jack/USB port (vehicles with USB port).
d. Car-navigation unit (vehicles with audio unit).
9. Install in the reverse order of removal.
Test yourself
A quick Mazda 3 quiz: every answer comes with an explanation and a link to the manual page.