Lower Panel Removal/Installation
1. Disconnect the negative battery cable..
2. Remove the following parts:
a. Driver-side front scuff plate.
b. Driver-side front side trim.
c. Hood release lever.
d. Upper panel.
e. Shift knob (MTX).
f. Selector lever knob (ATX).
g. Shift panel.
h. Side wall.
i. Console.
3. Partially peel back the seaming welt.
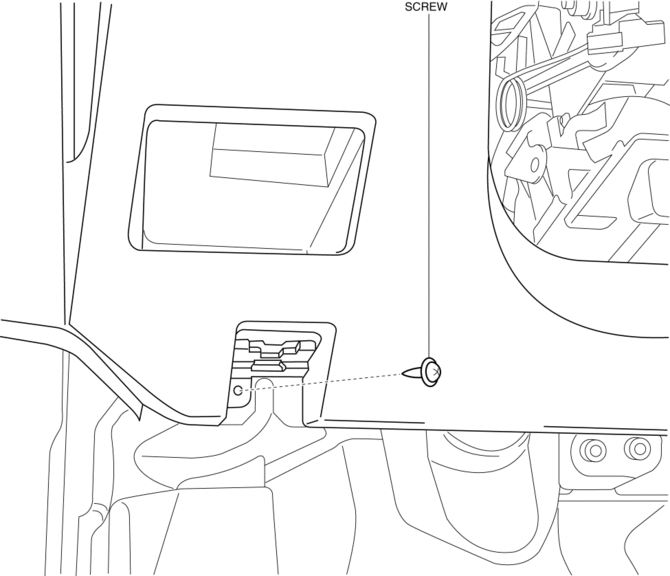
4. Remove the screw.
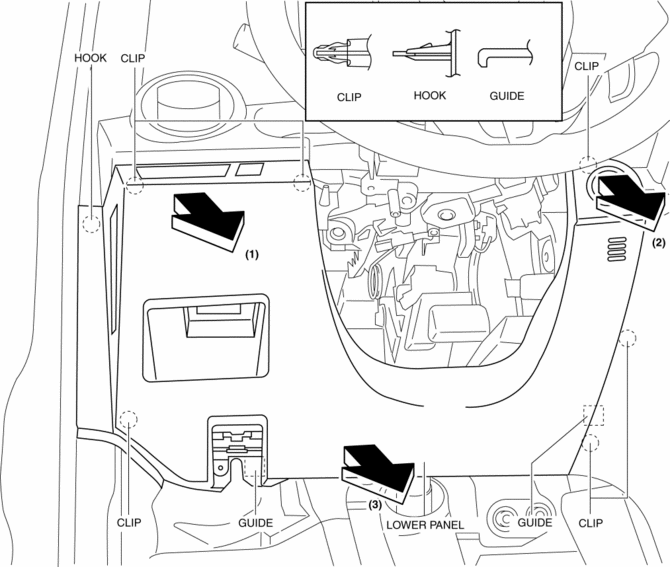
5. Pull the lower panel in the direction of the arrow in the order of (1) (2), (3) and remove the lower panel while detaching the hooks, clips and guides.
6. Disconnect the switch connector.
7. Disconnect the push button start connector.
8. Install in the reverse order of removal.
Passenger-side1. Remove the following parts:
a. Passenger-side front scuff plate.
b. Passenger-side front side trim.
c. Dashboard under cover.
d. Glove compartment.
2. Partially peel back the seaming welt.
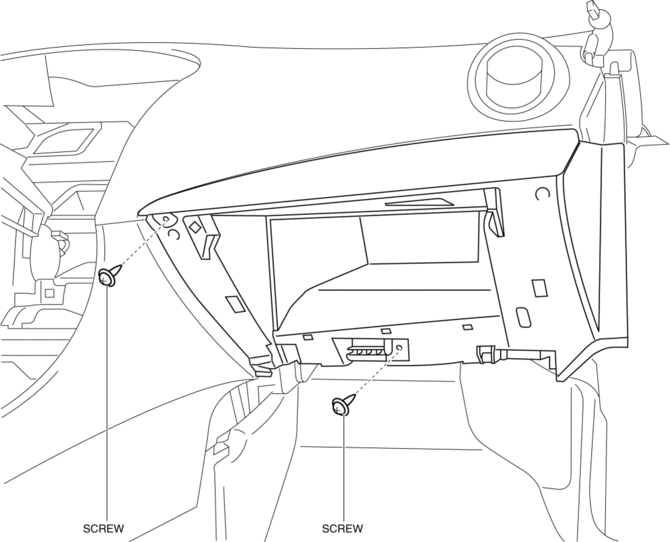
3. Remove the screws.
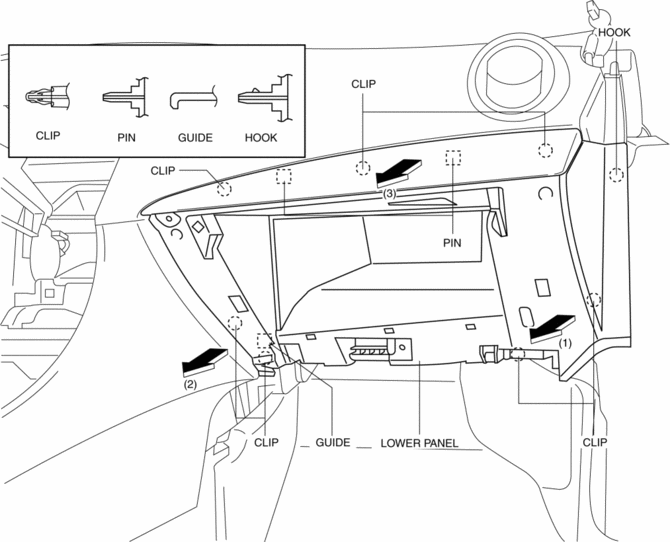
4. Pull the lower panel in the direction of the arrow in the order of (1) (2), (3) and remove the lower panel while detaching the hook, clips, guide and pins.
5. Install in the reverse order of removal.
Test yourself
A quick Mazda 3 quiz: every answer comes with an explanation and a link to the manual page.