Fuel Tank
Exploded View

 |
Fuel tank mounting band (Rear) |  |
Fuel tank mounting band cover |  |
Clip 1 |
 |
Fuel tank side protector 1 |  |
Clip 2 |  |
Fuel tank side protector 2 |
 |
Fuel tank upper protector |  |
Fuel tank front protector |  |
Fuel tank mounting band (Front) |
 |
Fuel tank |  |
Fuel tank protector |  |
Vent tube |
 |
Clamp |  |
Fuel filler hose 1 |  |
Fuel filler tube 2 |
 |
Fuel filler hose 2 |  |
EVAP tube 2 |  |
EVAP tube 1 |
 |
Fuel filler tube 1 |  |
Fuel filler tube protector 1 |  |
Clip 3 |
 |
Fuel filler tube protector 2 | ||||
 |
To EVAP canister. Refer to EVAP CANISTER : Exploded View. | ||||
 |
: N·m (kg-m, ft-lb) | ||||
 |
: N·m (kg-m, in-lb) | ||||
 , ,  : Indicates that the part is connected at points with same symbol in actual vehicle. |
|||||
Removal & Installation
REMOVAL
Perform steps 1 to 7 of “REMOVAL” in “ FUEL LEVEL SENSOR UNIT, FUEL FILTER AND FUEL PUMP ASSEMBLY” on main fuel level sensor unit. Refer to FUEL LEVEL SENSOR UNIT, FUEL FILTER AND FUEL PUMP ASSEMBLY : Removal & Installation.
Remove fuel tank protector .
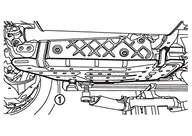
Remove fuel tank side protector 1 .
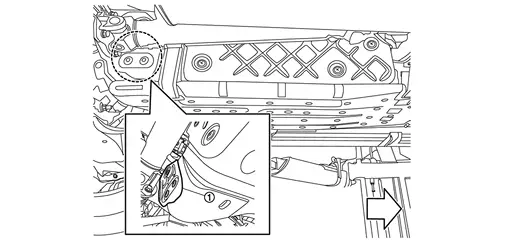
| : vehicle front |
Support center of fuel tank with transmission jack (A).

| : vehicle front |
Remove fuel tank bands .
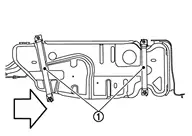
| : vehicle front |
Lower fuel tank 100 mm (3.94 in).
Disconnect fuel filler hose 2 , vent tube and EVAP tube 2 at fuel tank side.
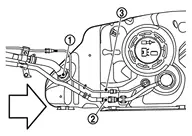
| : vehicle front |
Hold the sides of quick connector, push in tabs and pull out vent tube and EVAP tube 2.
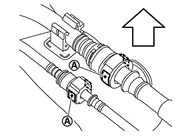
| : vehicle upper |
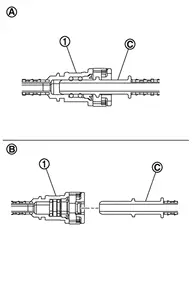
|
: Connection (Crosssection) |
 |
: Disconnection |
 |
: Hard tube |
Never use any tools to disconnected quick connector.
Prevent acid liquid such as battery electrolyte, etc. from getting on resin tube.
Never bend or twist resin tube during installation and disconnection.
Never insert plug, preventing damage to O-ring in quick connector.
To keep the connecting portion clean and to avoid damage and foreign materials, cover them completely with plastic bags
or something similar.

Supporting with hands, descend transmission jack carefully, and remove fuel tank.
If replacing the fuel tank, remove the fuel level sensor unit, fuel filter and fuel pump assembly to transfer to the new fuel tank. Remove and discard the O-ring. Refer to FUEL LEVEL SENSOR UNIT, FUEL FILTER AND FUEL PUMP ASSEMBLY : Removal & Installation.
Inspection
INSPECTION AFTER INSTALLATION
Use the following procedure to check for fuel leakage.
Ignition switch “ON” (with engine stopped), and check connections for leakage by applying fuel pressure to fuel piping.
Start engine and rev it up and check there are no fuel leakage at the fuel system tube and hose connections.