Rear A/c Unit Assembly
Exploded View
REMOVAL
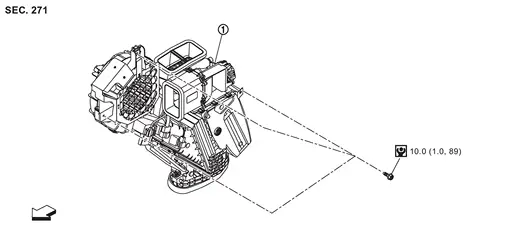
 |
Rear A/C unit assembly | ||||
| : vehicle front | |||||
 |
: N·m (kg-m, in-lb) | ||||
DISASSEMBLY
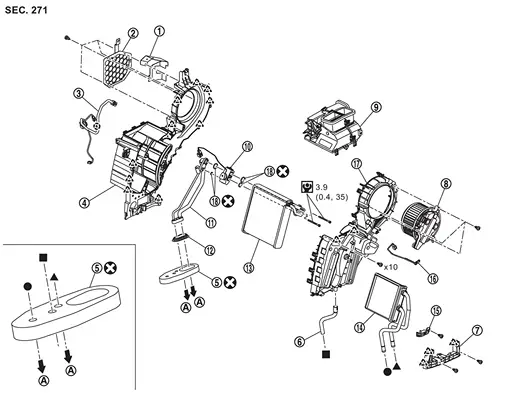
|
Shield plate bracket |  |
Shield plate |  |
Sub harness |
 |
Rear A/C unit case LH |  |
Cooler packing |  |
Drain hose |
 |
Heater pipe support |  |
Rear blower motor |  |
Rear A/C unit case upper assembly |
 |
Rear expansion valve |  |
Rear evaporator pipe |  |
Cooler grommet |
 |
Rear evaporator |  |
Rear heater core |  |
Heater pipe clamp |
 |
Rear in-vehicle sensor |  |
Rear A/C unit case RH |  |
O-ring |
 |
To rear cooler pipe assembly Refer to Exploded View. |
||||
 |
: Clip | ||||
 |
: Pawl | ||||
 |
: Always replace after every disassembly. | ||||
|
: N·m (kg-m, in-lb) | ||||
 , ,  : Indicates that the part is connected at points with same symbol in actual vehicle. |
|||||
Rear A/c Unit Assembly
Removal and Installation
REMOVAL
Use a refrigerant collecting equipment (for HFO-1234yf) to discharge the refrigerant. Refer to Recycle Refrigerant.
Drain engine coolant from cooling system. Refer to ENGINE COOLANT : Draining.
Disconnect rear cooler pipe assembly from rear A/C unit assembly. Refer to Removal and Installation.
Remove luggage side lower finisher RH. Refer to Removal and Installation.
Remove each duct.
Rear inlet duct. Refer to Removal and Installation.
Rear ventilator connecting duct. Refer to Removal and Installation.
Rear foot duct. Refer to Removal and Installation.
Disconnect harness connectors ,  ,
 , and
 .
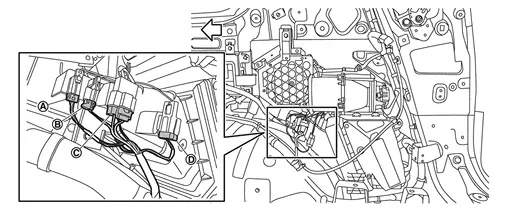
| : vehicle front |
Disconnect rear mode door motor harness connector .
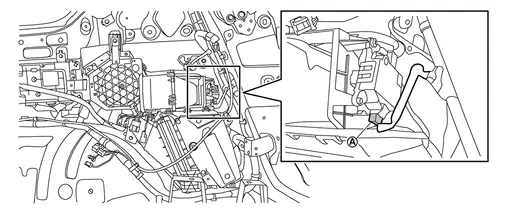
Disengage fixing clip, and then remove rear washer tube A from rear A/C unit assembly.
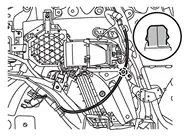
|
: Clip |
Remove rear A/C unit assembly mounting bolts .
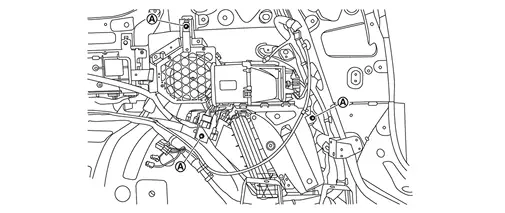
Remove rear A/C unit assembly from vehicle.
INSTALLATION
Note the following items, and then install in the reverse order of removal.
Rear Evaporator
Removal and Installation
REMOVAL
Remove rear A/C unit assembly. Refer to Removal and Installation.
Remove rear heater core. Refer to Removal and Installation.
Remove rear mode door motor. Refer to Removal and Installation.
Remove sub harness from rear A/C unit case RH.
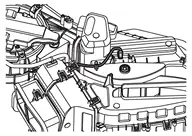
Disconnect rear blower motor harness connector.
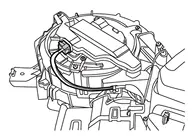
Disengage fixing clip, and then remove sub harness to secure work space.
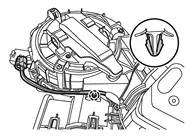
|
: Clip |
Disengage fixing pawls, and then remove rear A/C unit case upper assembly.
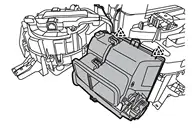
|
: Pawl |
Remove rear A/C solenoid harness connector and rear in-vehicle sensor harness connector from rear A/C unit case LH.
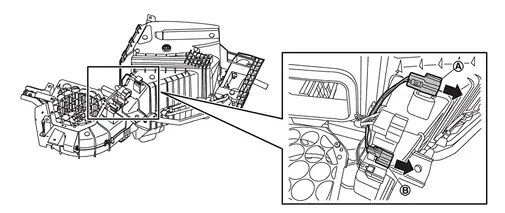
Remove fixing screws , and then remove shield plate and shield plate bracket .
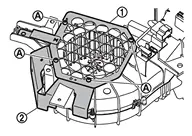
Remove rear A/C unit case RH fixing screws .

Disengage fixing pawls, and then remove rear A/C unit case RH from rear A/C unit case LH.
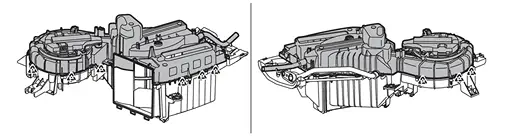
|
: Pawl |
Remove rear A/C solenoid valve harness from rear A/C unit case LH.
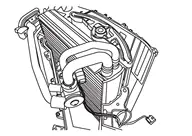
Remove rear evaporator assembly from rear A/C unit case LH.
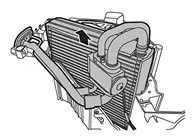
Remove rear expansion valve from rear evaporator. Refer to Removal and Installation.
INSTALLATION
Note the following items, and then install in the reverse order of removal.
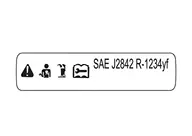
Rear Evaporator Pipe
Removal and Installation
Replacement of a single part of the rear evaporator pipe is impossible. For replacement, replace rear evaporator as a set. Refer to Removal and Installation.
Rear Expansion Valve
Removal and Installation
REMOVAL
Remove rear evaporator. Refer to Removal and Installation.
Remove mounting bolts , and then remove rear expansion valve and rear evaporator pipe from rear evaporator.
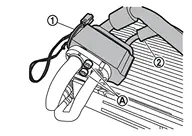
INSTALLATION
Note the following items, and then install in the reverse order of removal.
Rear Heater Core
Removal and Installation
REMOVAL
Remove rear A/C unit assembly. Refer to Removal and Installation.
Remove cooler packing.
Remove cooler grommet.
Remove heater pipe support fixing screws .
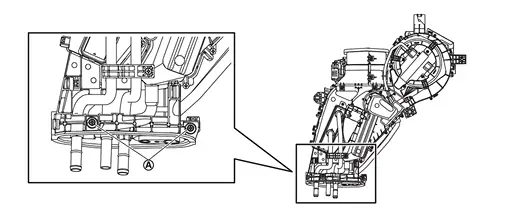
Disengage fixing pawls, and then remove heater pipe support from rear A/C unit case LH.

|
: Pawl |
Remove fixing screw , and then remove heater pipe clamp.
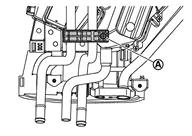
Remove rear heater core.

INSTALLATION
Note the following item, and then install in the reverse order of removal.