Rear Door Finisher
Exploded View
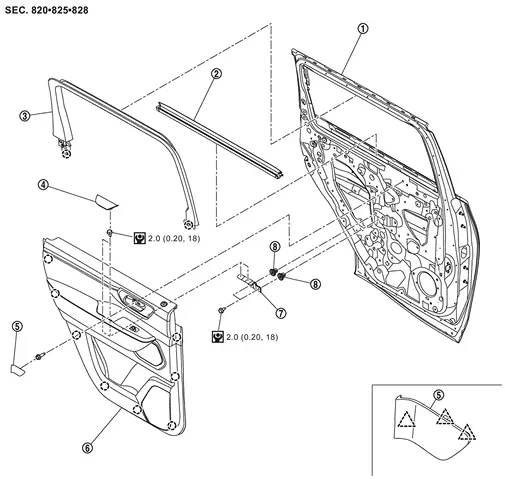
 |
Rear door panel |  |
Inside seal |  |
Rear door sash inner cover |
 |
Pull handle cap |  |
Inside handle cap |  |
Rear door finisher |
 |
Pull handle bracket |  |
Grommet | ||
 |
: Clip | ||||
 |
: Pawl | ||||
 |
: N·m (kg-m, in-lb) | ||||
Rear Door Finisher
Removal and Installation
REMOVAL
Fully open rear door.
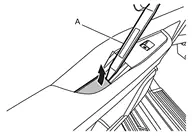
Remove pull handle cap.Apply protective tape (A) on rear door finisher to protect it from damage.

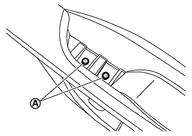
Remove rear door finisher fixing screws  .
Remove inside handle cap.Apply protective tape (A) on inside handle to protect it from damage.
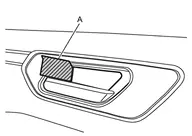
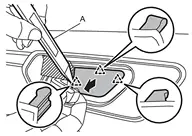
|
: Pawl |
Remove rear door finisher mounting bolt .

Apply protective tapes (A) on rear door sash inner cover to protect it from damage.

Apply protective tape (A) on rear door panel to protect it from damage.
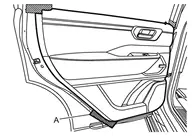
Disengage rear door finisher fixing clips using a remover tool (A) according to numerical order 1→2 indicated by arrows as shown in the figure.
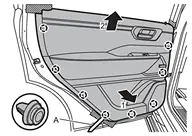
|
: Clip |
Disconnect each rear door harness connector from rear door finisher.
Disconnect inside handle cable from inside handle according to numerical order 1→2 indicated by arrows as shown in the figure.
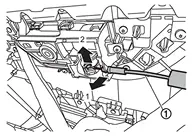
Disconnect lock knob cable from rear door finisher according to numerical order 1→2 indicated by arrows as shown in the figure, and then remove rear door finisher.
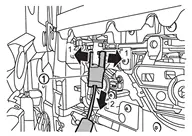
Remove pull handle bracket fixing screws , and then remove pull handle bracket.
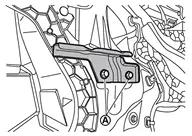
INSTALLATION
Note the following items, and then install in the reverse order of removal.
Rear Door Sash Inner Cover
Removal and Installation
REMOVAL
Remove rear door finisher. Refer to Removal & Installation.
Remove inside seal according to numerical order 1→2 indicated by arrows as shown in the figure.
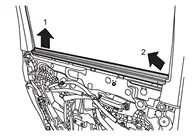
Apply protective tapes (A) on rear door panel to protect it from damage.
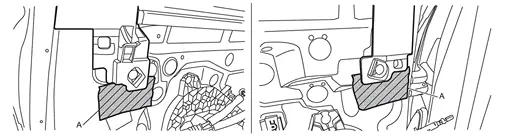
Disengage rear door sash inner cover fixing clips using a remover tool (A).
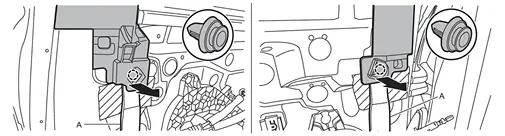
|
: Clip |
Remove rear door sash inner cover according to numerical order 1→3 indicated by arrows as shown in the figure.
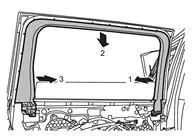
INSTALLATION
Note the following items, and then install in the reverse order of removal.