Rear door finisher
Exploded View
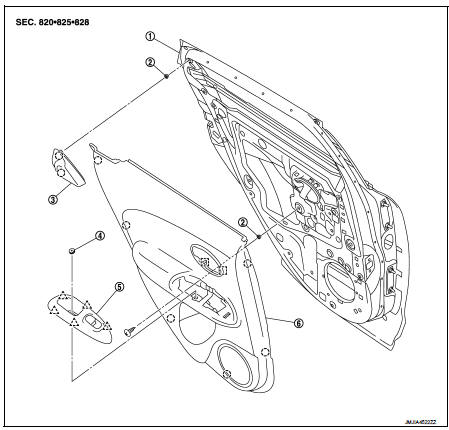
1. Rear door panel
2. Grommet
3. Rear door corner cover inner 4. Cap
5. Power window switch finisher 6. Rear door finisher
 : Clip
 : Pawl
 : Metal clip
Removal and Installation
REMOVAL
CAUTION:• When removing, always use a remover tool that is made of plastic.
• Never damage the door panel.
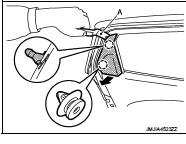
1. Fully open door window.2. Remove rear corner cover inner.
Disengage rear corner cover inner fixing clips with a remover tool.
 : Clip
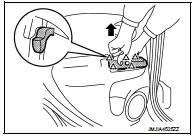
3. Remove power window switch finisher and power window switch as a unit.
1. Pull up power window switch finisher and power window switch as a unit to disengage the fixing pawls.
 : Pawl
2. Disconnect harness connector, and then remove power window switch finisher and power window switch as a unit.
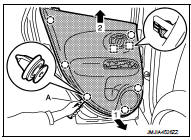
4. Remove rear door finisher fixing screw.
5. Remove rear door finisher.
1. Disengage rear door finisher fixing clips and metal clips with a remover tool (A).
 : Clip
 : Metal clip
2. Pull toward the direction of the arrows as shown in the figure to remove.
CAUTION:Insert a remover tool between body side panel and clip and disengage pawl
NOTE
:
Remove power window switch. Refer to PWC-44, "Removal and Installation".
INSTALLATION
Note the following item, and install in the reverse order of removal.
CAUTION:When installing rear door finisher, check that clips, and metal clips are securely in body panel holes, and press them in.