Calibrating Camera Image (intelligent Around View Monitor)
Calibration must be performed after removing/replacing the cameras, removing parts (e.g. front grille, door mirror, and others) mounted on the cameras, or replacing the Around view monitor control unit.
The use of CONSULT is required to perform calibration or writing of calibration results to the Around view monitor control unit.
Align the white lines on the road near the Nissan Murano vehicle at the boundary of each camera image by this camera calibration. The white lines far from the vehicle may not be aligned at the boundary of each camera image. The farther the line, the greater the difference is.
CALIBRATION FLOWCHART
Following the flowchart shown in the figure, perform the calibration.
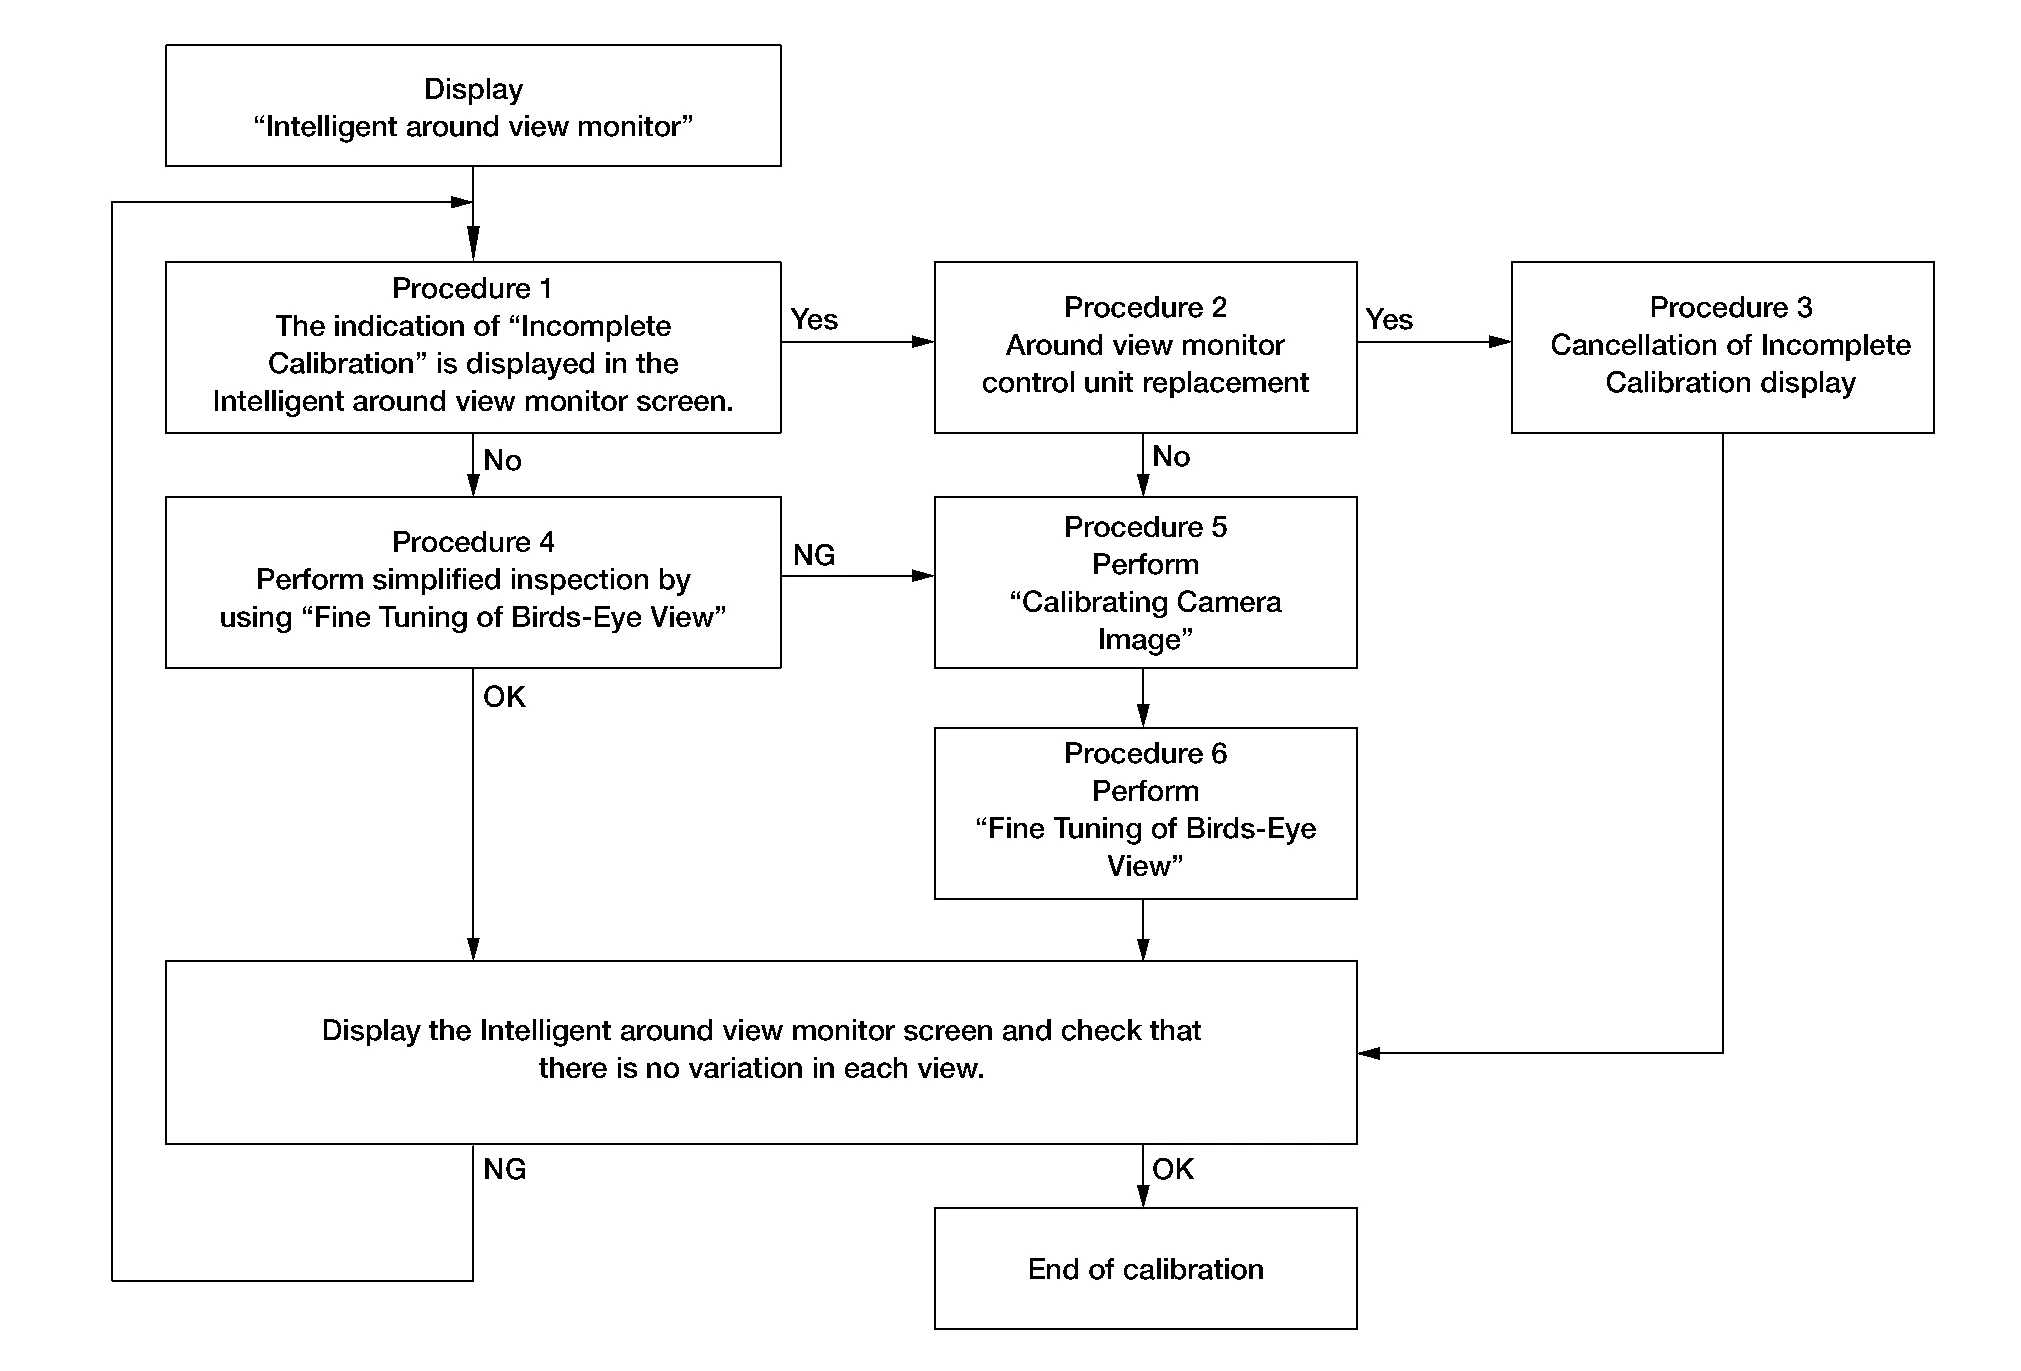
CALIBRATION PROCEDURE
INTELLIGENT AROUND VIEW MONITOR SCREEN CONFIRMATION
Check that there is no indication of “Incomplete calibration”.
Is the “Incomplete calibration” display visible?
YES>>GO TO 2.
NO>>GO TO 4.
CHECK THAT AROUND VIEW MONITOR CONTROL UNIT IS REPLACED
Check that the around view monitor control unit is replaced.
Is the around view monitor control unit replaced?
YES>>GO TO 3.
NO>>GO TO 5.
CANCEL THE INDICATION OF INCOMPLETE CALIBRATION (PERFORM THIS ONLY AFTER REPLACING AROUND VIEW MONITOR CONTROL UNIT.)
 CONSULT
On the CONSULT screen, touch “CALIBRATING CAMERA IMAGE (FRONT CAMERA)”, “CALIBRATING CAMERA IMAGE (PASS-SIDE CAMERA)”, “CALIBRATING CAMERA IMAGE (DR-SIDE CAMERA)”, or “CALIBRATING CAMERA IMAGE (REAR CAMERA)” to accept the selection.
On the adjustment screen of each camera, touch “APPLY” button. After this, touch “OK” button.

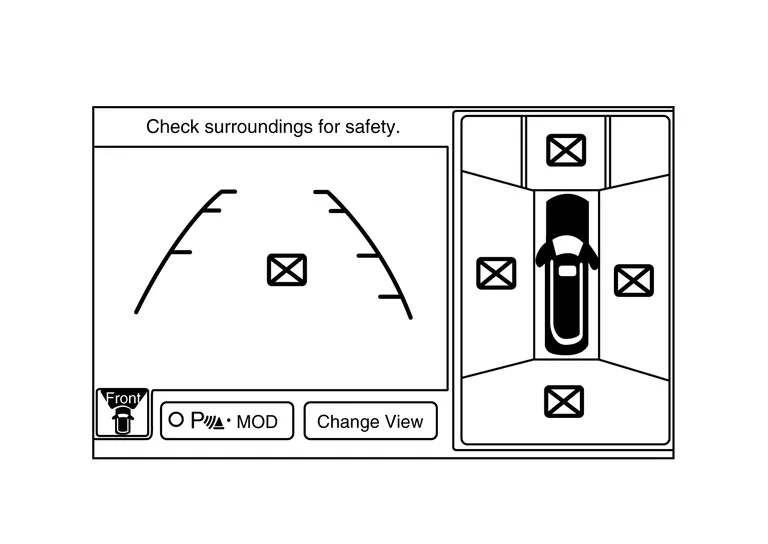
Display the Intelligent around view monitor screen to check that there is no errors, such as deviations among the camera images.
Is there a malfunction?
YES>>Calibration End.
NO>>GO TO 1.
PERFORM SIMPLIFIED CONFIRMATION/ADJUSTMENT BY “FINE TUNING OF BIRDS-EYE VIEW”
Put target line 1 on the ground beside each axle using packing tape, etc.
Put target lines 2 equal to the Nissan Murano vehicle total length + approximately 1.0 m (39.3 in) from the vehicle side (right and left) at approximately 30 cm (11.8 in) away from the Nissan Murano vehicle (make the line as parallel with the vehicle as possible).
Preparation of simplified target line
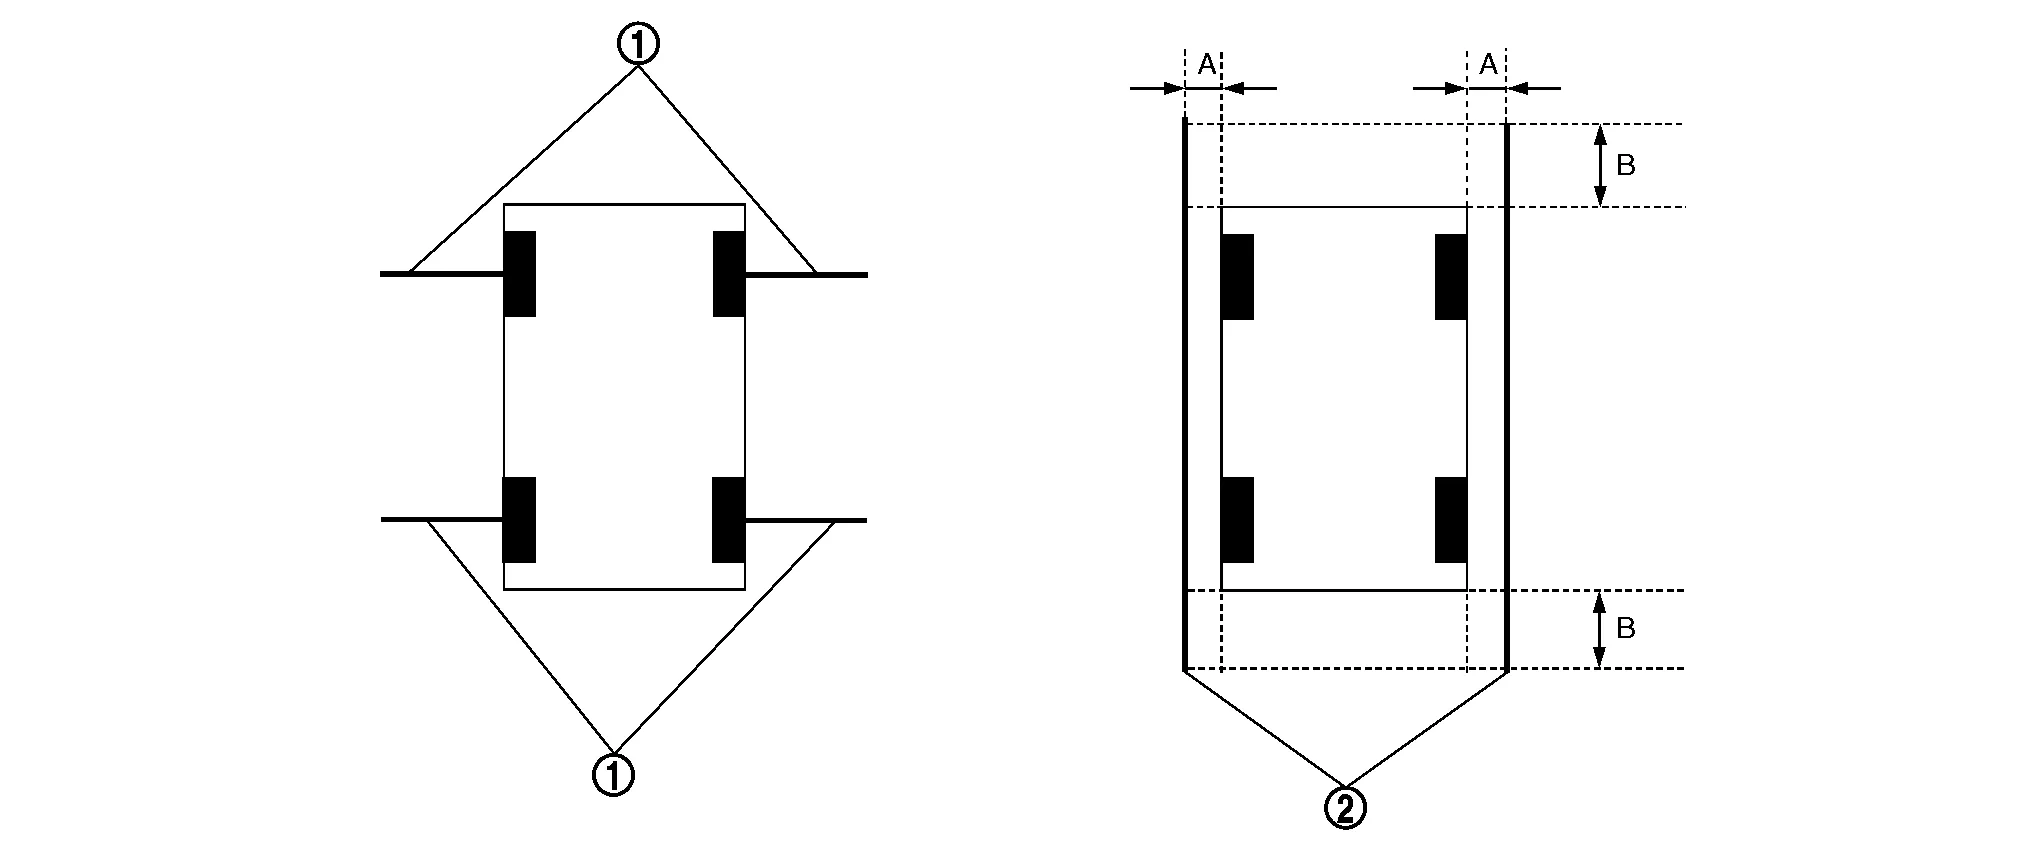
1. Target lines 1 2. Target lines 2 A. Approx. 30 cm (11.8 in) B. Approx. 1.0 m (39.3 in) - CONSULT
Touch “FINE TUNING OF BIRDS-EYE VIEW” on the CONSULT screen.
On the CONSULT screen, touch “SELECT” button to select right or left camera and perform camera calibration as instructed below:
If the marker on the screen deviates from Target line 1, touch “AXIS X” button and “AXIS Y” button to adjust so that the marker is placed on the Target line 1.
If Target line 2 is misaligned among the cameras, adjust each camera image to bring Target line 2 into a straight line.
Simplified target line adjustment method
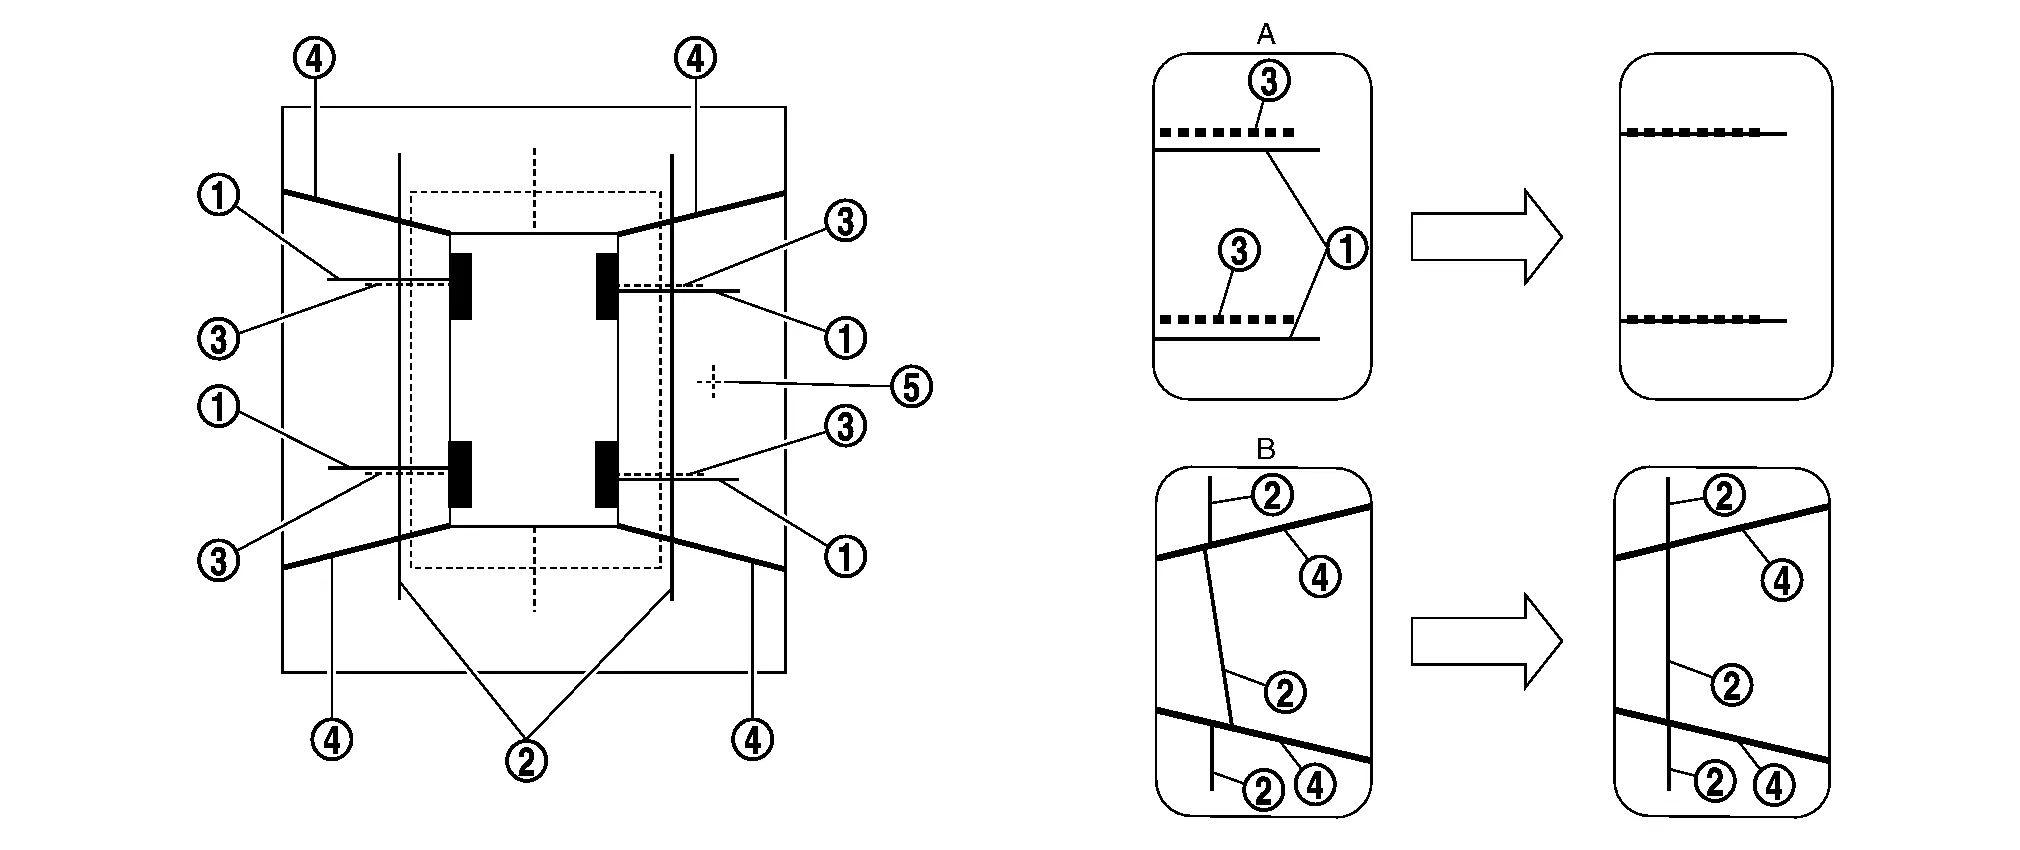
1. Target lines 1 2. Target lines 2 3. Marker for target line 1 4. Boundary between cameras 5. Crosshairs cursor (mark indicated the selected camera) A. Adjustment method for target lines 1 (right) B. Adjustment method for target lines 2 (right)
Adjust right and left cameras. Touch "APPLY" on the CONSULT screen to display adjustment results.
After adjusting right and left cameras, check that the marker is properly placed on the screen and there is no deviation in Target line 1.
Is the difference corrected?
YES>>On the CONSULT screen, touch “OK” button to complete writing to the around view monitor control unit.
NO>>GO TO 5.
PERFORM “CALIBRATING CAMERA IMAGE”
Preparation of target line
Hang a string with a weight as shown in the figure. Put the points FM0, RM0 (mark) on the ground at the center of the Nissan Murano vehicle front end and rear end with white packing tape or a pen.
Route the vinyl string under the Nissan Murano vehicle, and then pull and fix it on the point approximately 1.0 m (39.9 in) to the front and rear of the vehicle through the points FM0 and RM0 using packing tape.
Target line preparation procedure 1

1. Thread 2. Weight 3. Point FM0 (mark) 4. Point RM0 (mark) 5. Packing tape (to fix the vinyl string) 6. Vinyl string Put the points FM and RM (mark) 75 cm (29.5 in) from the points FM0 and RM0 individually.
Route the vinyl string through the points FM and RM using a triangle scale, and then fix it at approximately 1.5 m (59 in) on both sides with packing tape.
Put the points FL, FR, RL, and RR (mark) to both right and left [Nissan Murano vehicle width / 2 + 30 cm (11.8 in)] from the points FM and RM.
Target line preparation procedure 2
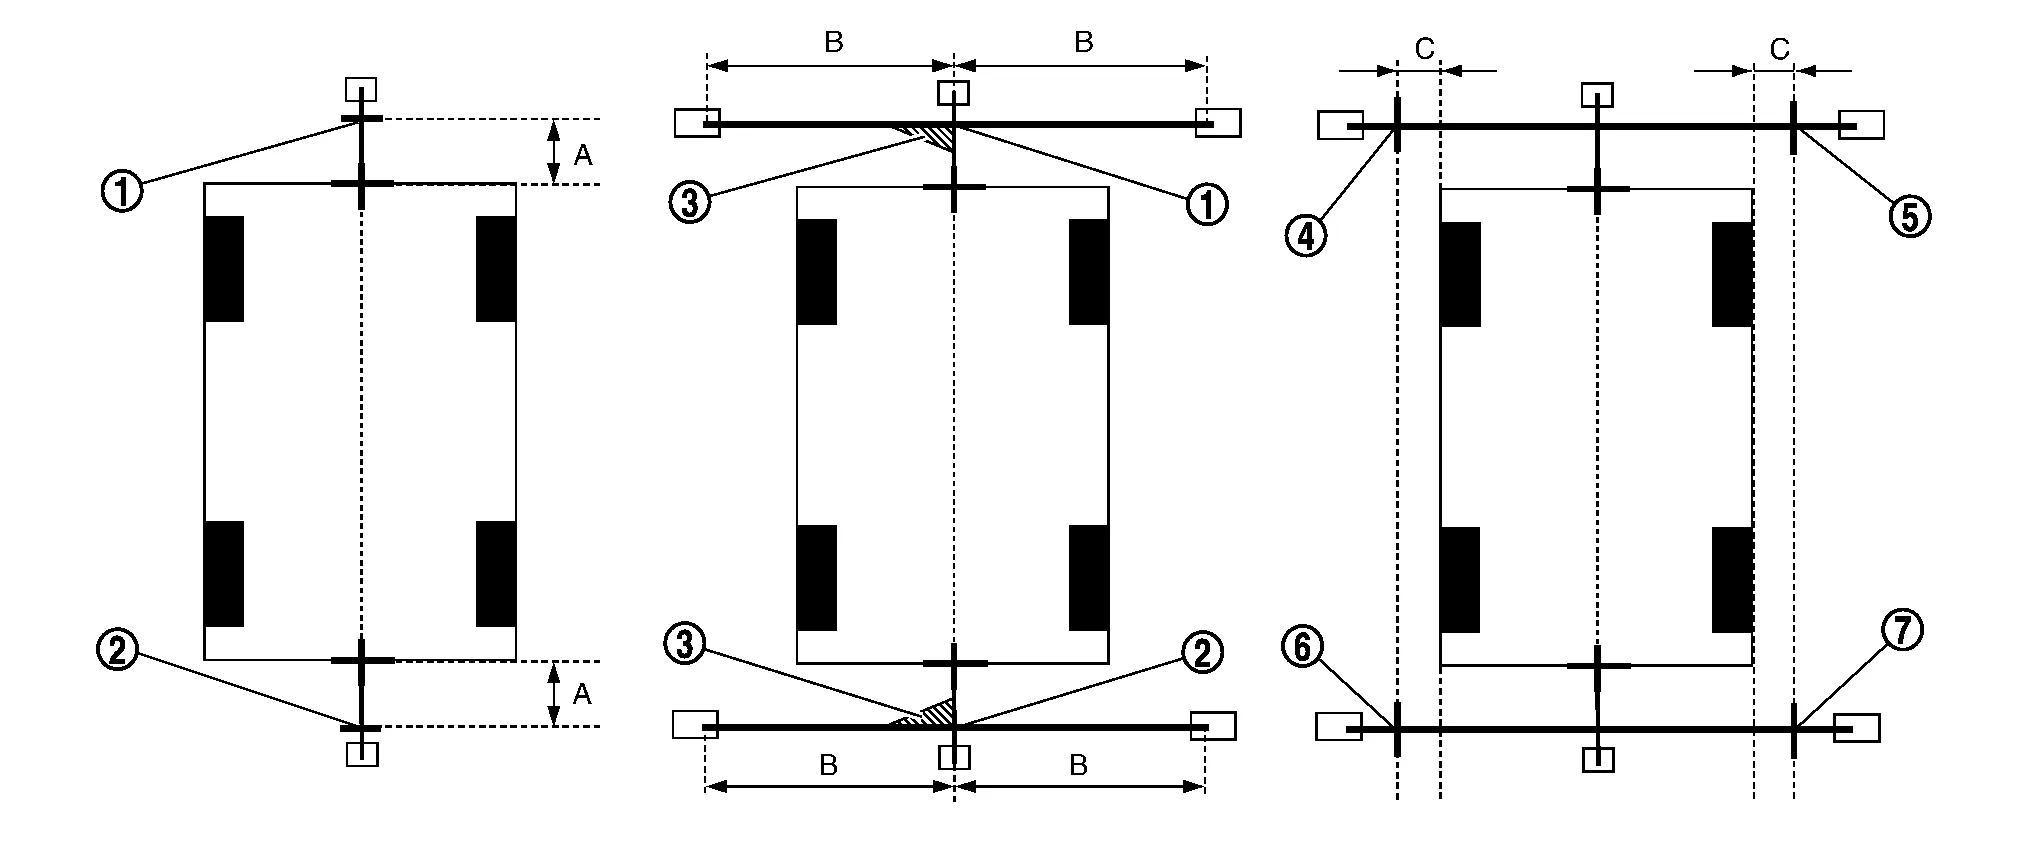
1. Point FM 2. Point RM 3. Triangle scale 4. Point FL (mark) 5. Point FR (mark) 6. Point RL (mark) 7. Point RR (mark) A. 75 cm (29.5 in) B. Approx. 1.5 m (59 in) C. 30 cm (11.8 in)
[Nissan Murano Vehicle width/ 2 + 30 cm (11.8 in) from the points FM and RM]Draw the lines of the points FL – RL and FR – RR with vinyl string, and fix it with packing tape.
Put a mark on the center of each axle, draw vertical lines to the lines of the points FL – RL and FR – RR from the marks on the center of the axle using a triangle scale, and then fix the lines using packing tape.
Target line preparation procedure 3

1. Point FL 2. Point FR 3. Point RL 4. Point RR 5. Center position of axle 6. Triangle scale
Perform “Calibrating Camera Image”
CONSULT
On the CONSULT screen, touch “CALIBRATING CAMERA IMAGE (FRONT CAMERA)”, “CALIBRATING CAMERA IMAGE (PASS-SIDE CAMERA)”, “CALIBRATING CAMERA IMAGE (DR-SIDE CAMERA)”, or “CALIBRATING CAMERA IMAGE (REAR CAMERA)” to accept the selection.
On the adjustment screen of each camera, adjust the parameter by touching the “AXIS X” button, “AXIS Y” button, and “ROTATE” button to place the calibration marker shown on the camera screen on the target line drawn on the ground.
Adjustment range Rotation direction (Center dial) : 31 patterns (16 on the center) Upper/lower direction (upper/lower switch) : −22 – 22 Left/right direction (left/right switch) : −22 – 22 Touch “APPLY” button on the CONSULT screen. “PRCSNG” is displayed and adjustment results are shown on the camera screen.
Touch “OK” button on the CONSULT screen. “PRCSNG” is displayed and adjustment results are written to the around view monitor control unit.
GO TO 6.
PERFORM “FINE TUNING OF BIRDS-EYE VIEW”
This mode is designed to align the boundary between each camera image that could not be aligned in the “Calibrating Camera Image” mode.
CONSULT
Select “FINE TUNING OF BIRDS-EYE VIEW” by touching CONSULT screen.
On the adjustment screen of each camera, adjust the parameter by touching the “AXIS X” button, “AXIS Y” button”, and “ROTATE” button to place the calibration marker shown on the camera screen on the target line drawn on the ground.
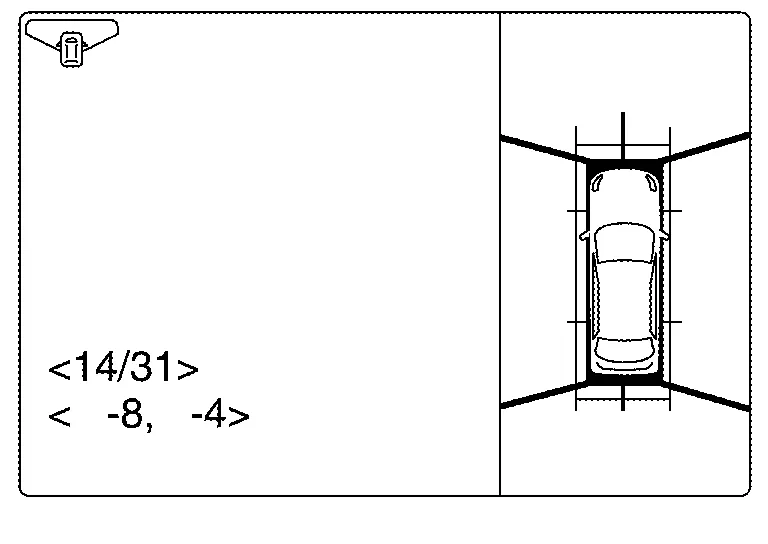
Touch “APPLY” button on the CONSULT screen. “PRCSNG” is displayed and adjustment results are shown on the camera screen.
Touch “OK” button on the CONSULT screen. “PRCSNG” is displayed and adjustment results are written to the around view monitor control unit.
Calibration End.