Magnet Clutch
REMOVAL
Remove the compressor. Refer to Removal and Installation.
Remove the center bolt by holding the clutch disc steady using a suitable tool.
Remove the clutch disc and shim.
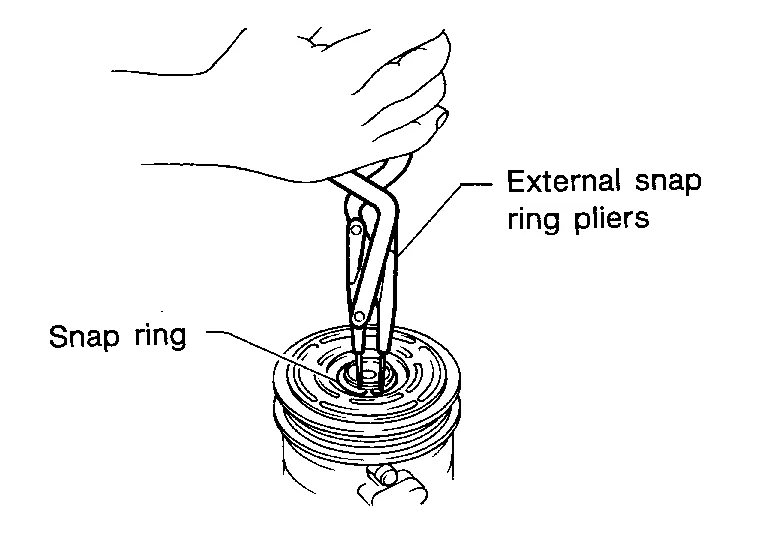
Remove the snap ring using a suitable tool as shown.
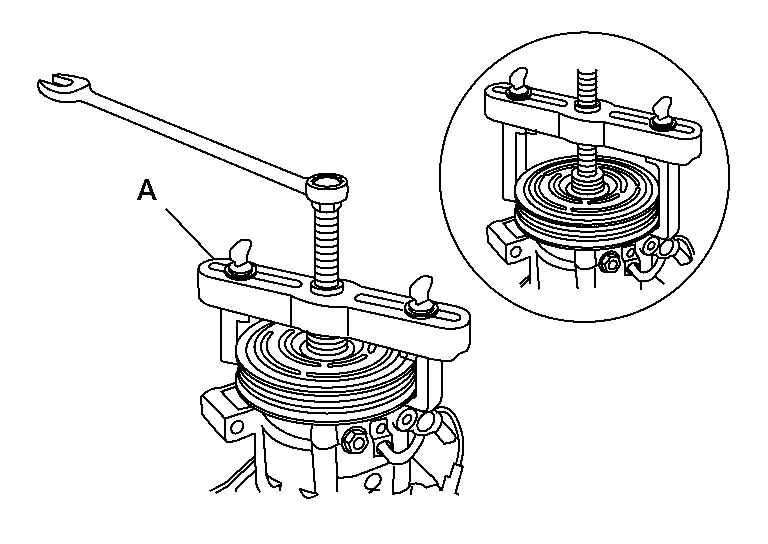
Remove the pulley assembly using a suitable tool (A) as shown.
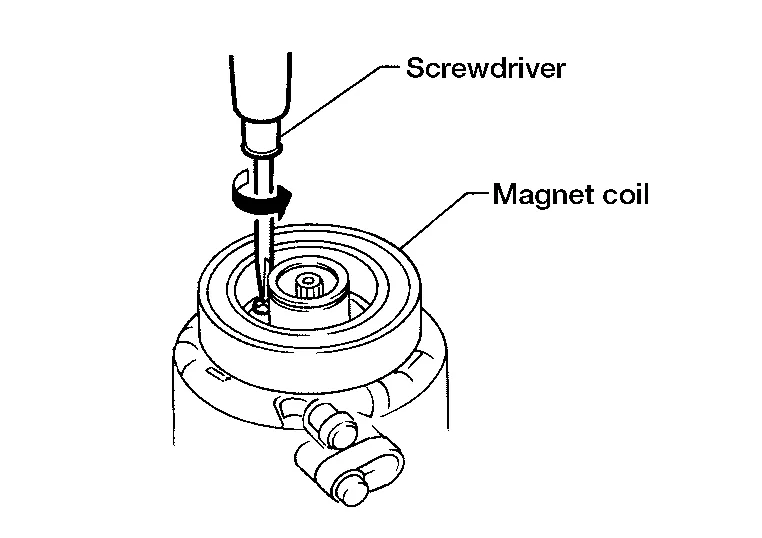
Disconnect the harness connector from the magnet coil.
Remove the three magnet coil screws using a suitable tool as shown then remove the magnet coil.
INSPECTION AFTER REMOVAL
(1): Shim
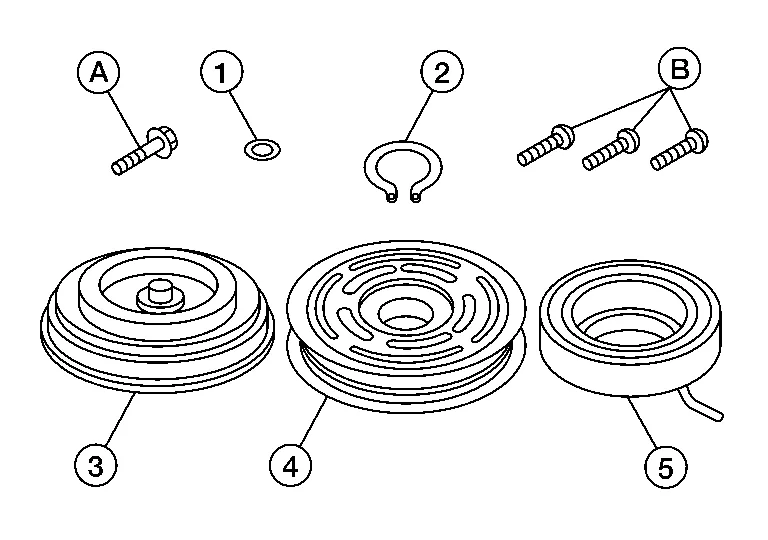
(2): Snap ring
(3): Clutch disc
(4): Pulley
(5): Magnet coil
(A): Center bolt
(B): Magnet coil screws
Clutch Disc
If the contact surface shows signs of damage due to excessive heat, replace as necessary.
Pulley
Check the appearance of the pulley assembly. If the contact surface of the pulley shows signs of excessive grooving, replace as necessary. The contact surfaces of the pulley assembly should be cleaned with a suitable solvent before installation.
Magnet Coil
Check the magnet coil for a loose connection or cracked insulation. Replace as necessary.
INSTALLATION
Install the magnet coil by aligning the magnet coil pin (A) with the hole (B) in the compressor front head as shown then install the magnet coil screws.
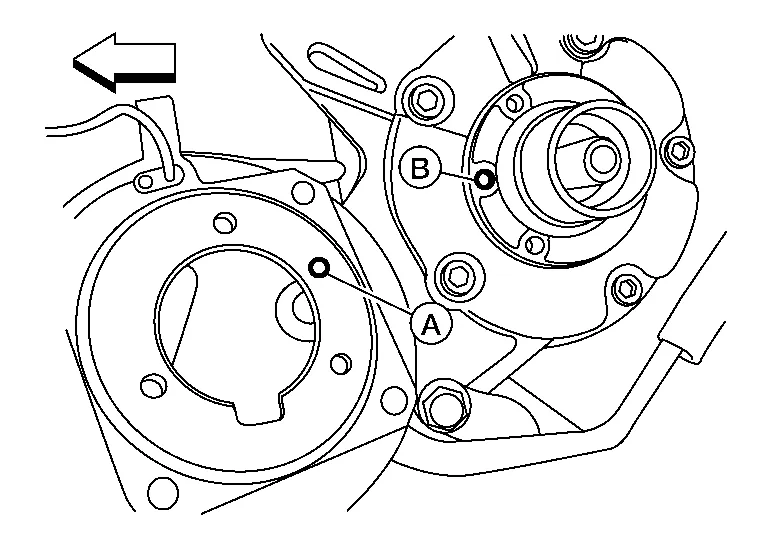
 : Nissan Murano Vehicle rear
Connect the magnet coil harness to the compressor body.
Install the pulley assembly using Tool and a wrench as shown then install the snap ring using a suitable tool.
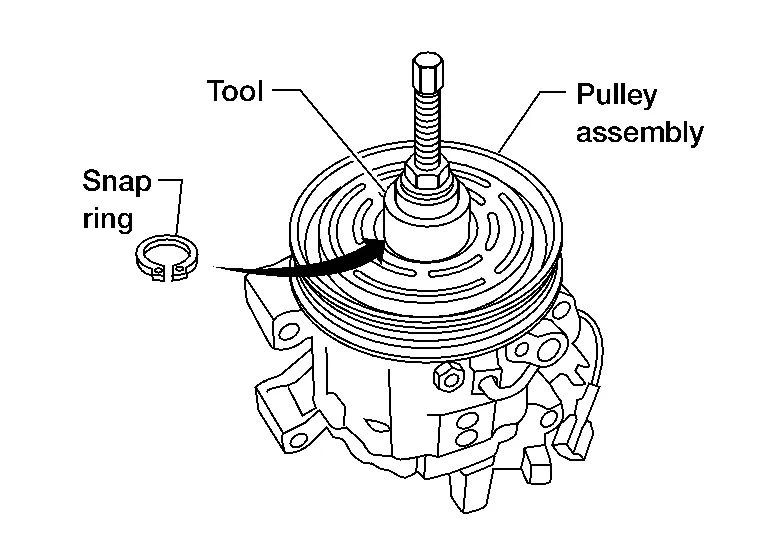
| Tool number | : — (J-38873-A) |
Install the clutch disc (1) on the drive shaft together with all of the original shim(s) (2) using a suitable tool (A).
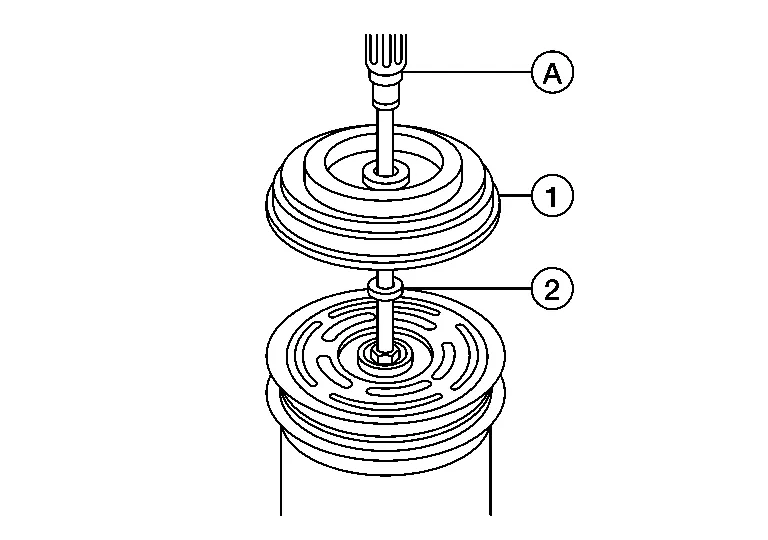
Install the center bolt using a suitable tool.
Install the compressor. Refer to Removal and Installation.
INSPECTION AFTER INSTALLATION
Check the clearance (B) all the way around between the clutch disc (1) and pulley (2) using a suitable tool (A) as shown.
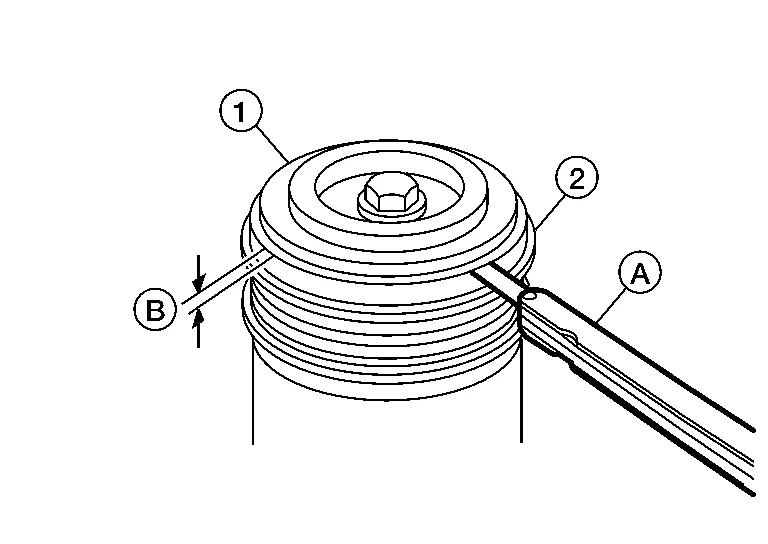
| Clutch disc-to-pulley clearance (B) | : Refer to Compressor. |
If the specified clearance (B) is not obtained, replace the adjusting shims and recheck the clearance (B) as shown.
BREAK-IN OPERATION
When replacing compressor clutch assembly, always conduct the break-in operation. This is done by engaging and disengaging the clutch about 30 times. Break-in operation raises the level of transmitted torque.