Occupant Classification System
OCCUPANT CLASSIFICATION SYSTEM CONTROL UNIT
REMOVAL
Slide front passenger seat to full forward position.
Remove occupant classification system control unit bolts.
Disconnect harness connector from occupant classification system control unit.
Remove occupant classification system control unit.
INSTALLATION
Installation is in the reverse order of removal.
OCCUPANT CLASSIFICATION SYSTEM SENSORS
REMOVAL
Remove the seat cushion outer finisher (RH) from the front passenger seat using the following procedure.For models with power front passenger seat, use the following steps.
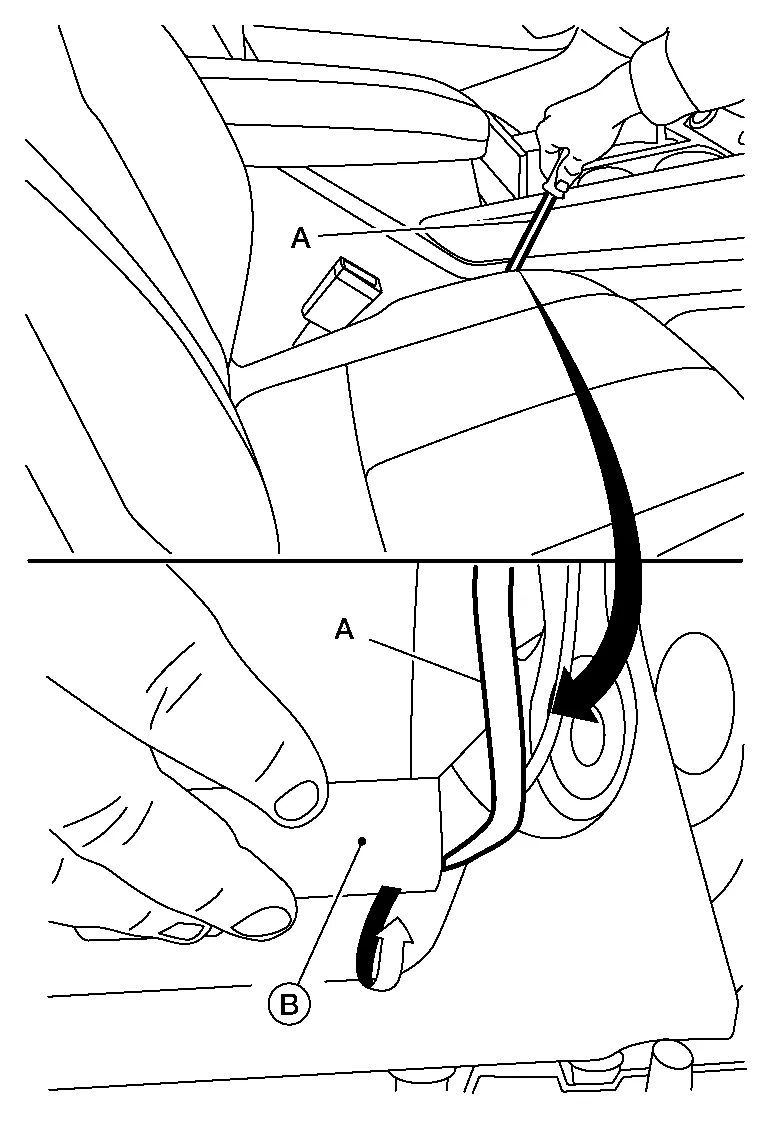
Release the seat cushion outer finisher (RH) pawls.


: Pawl Release the metal clips (A) from the seat frame (2) as shown, and pull the seat cushion outer finisher (RH) (1) away from the seat assembly.

: Metal clip Disconnect the harness connector from the power seat switch.
Release the pawl and remove the recline lever finisher (1) from the recline lever as shown.
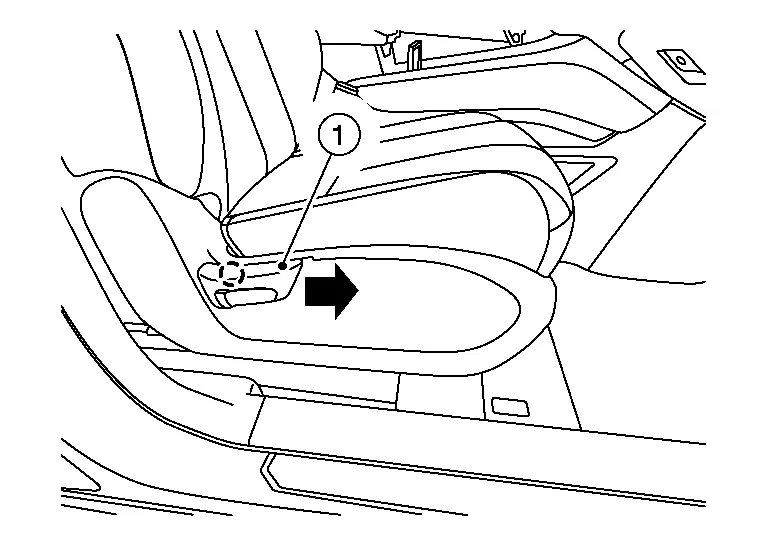
: Pawl Release the seat cushion outer finisher (RH) pawls.

: Pawl Release the metal clips (A) from the seat frame (2) as shown, and pull the seat cushion outer finisher (RH) (1) away from the seat assembly.
: Metal clip
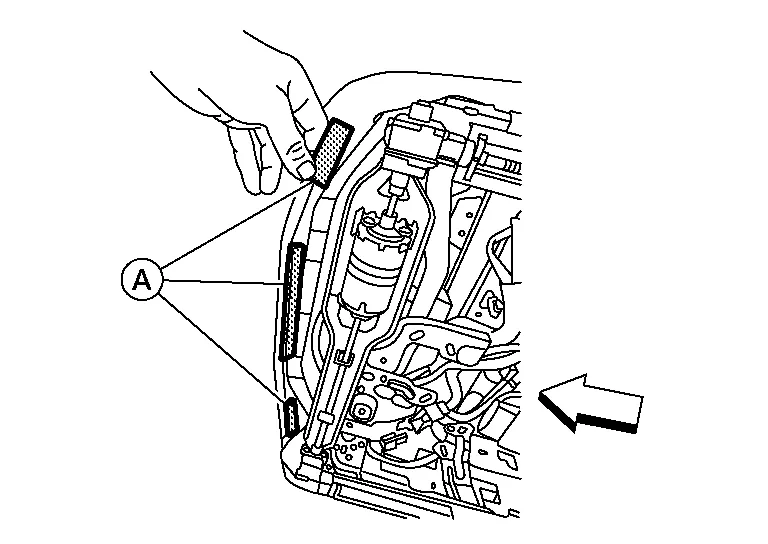
From under the rear of the front passenger seat, release the seatback J-clips and position aside.
Remove the front passenger seat cushion assembly from the seat frame assembly using the following procedure.Release the rear J-hooks.
For models with climate controlled passenger seat, release the rear J-hooks (A) from the seat frame assembly
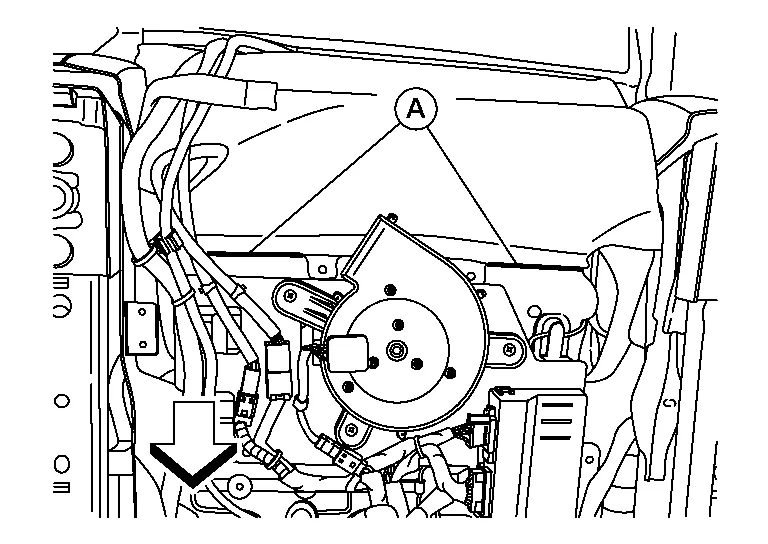

: Front For models without climate controlled passenger seat, release the rear hinge cover J-hooks (A) from the seat frame assembly (1).
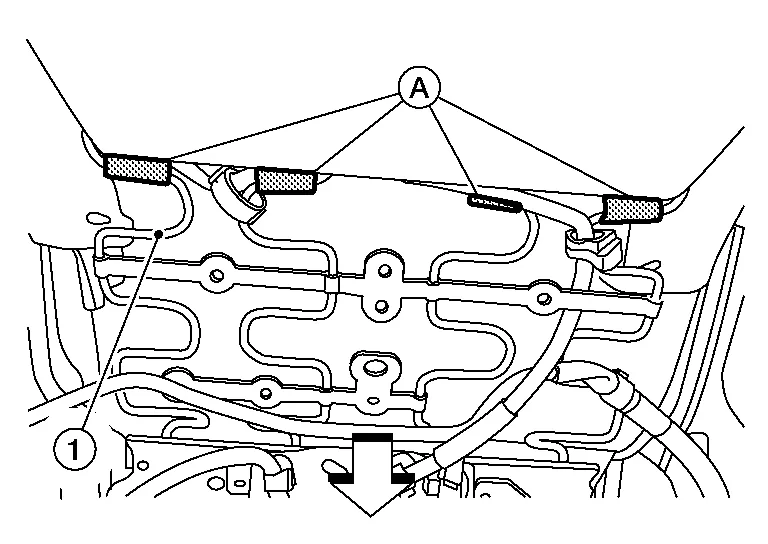
: Front
|
: Front |
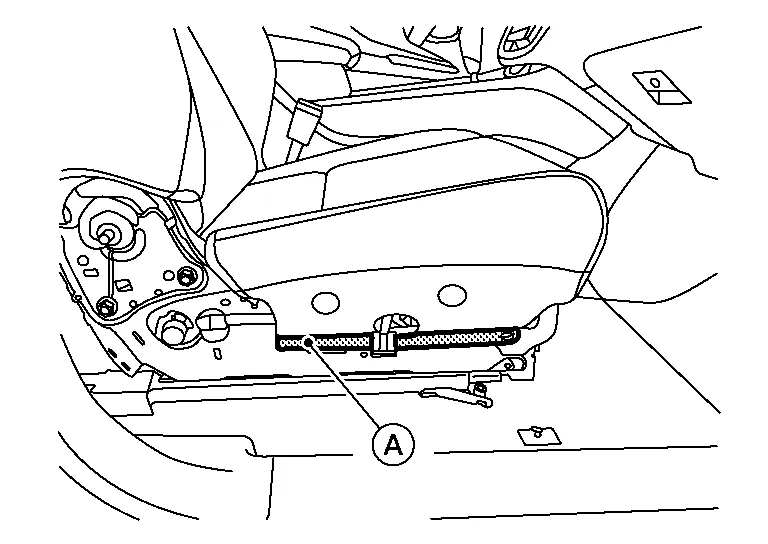
Release the harness clip and disconnect the harness connectors from the front passenger seat.
For models with power front passenger seat, release the harness clip (A) from the seat frame assembly, then disconnect the harness connectors (B).
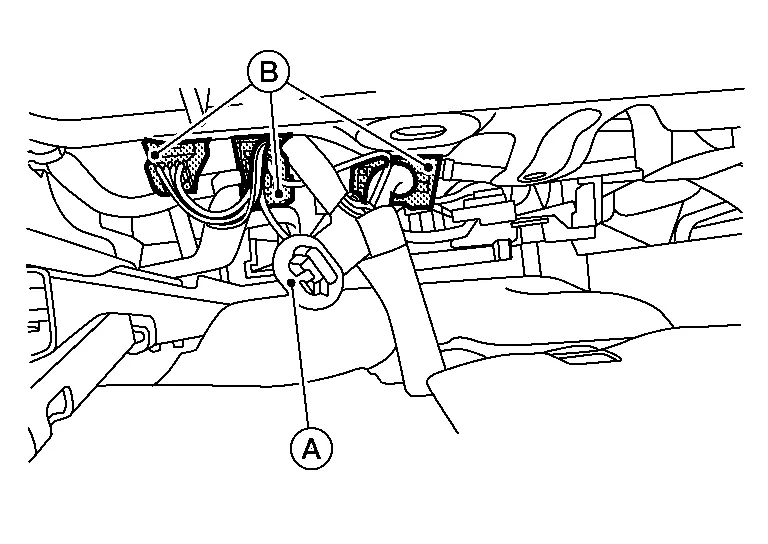
For models with manual front passenger seat, release the harness clip (A) from the seat frame assembly, then disconnect the harness connectors (B).
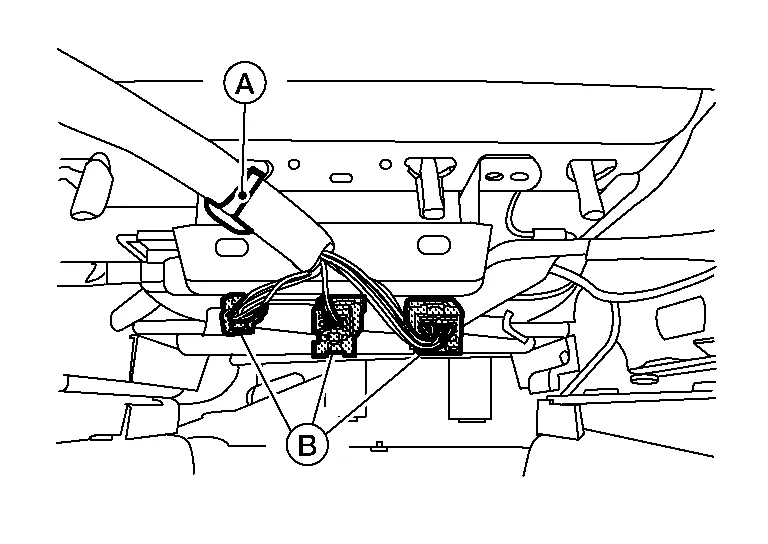
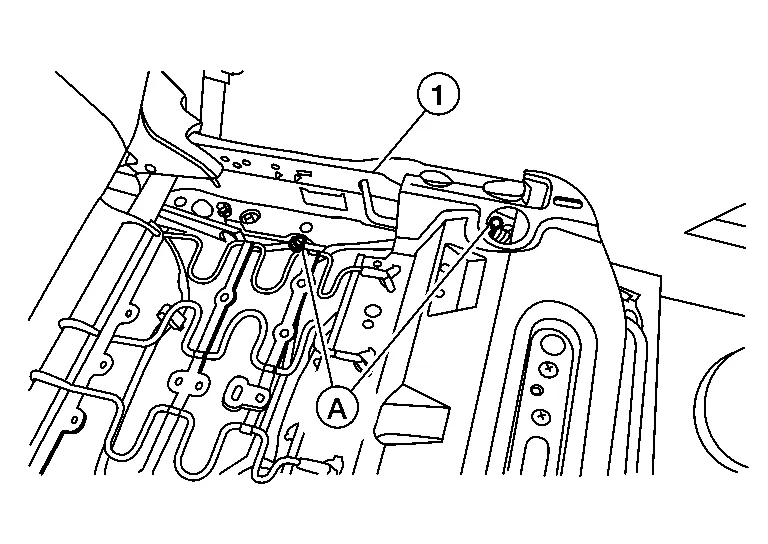
Release the occupant classification system sensors harness clips (A) from the seat frame assembly (1).
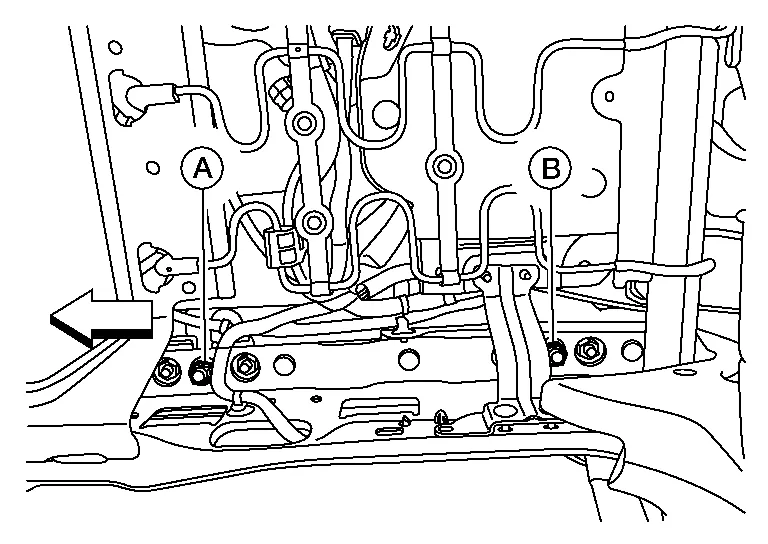
Remove the seat frame assembly nuts from the seat tracks using the following procedure.Remove washer and nut (A) from the front LH (inboard) side of the seat frame assembly, and nut (B) from the rear LH (inboard) side of the seat frame assembly.
|
: Front |
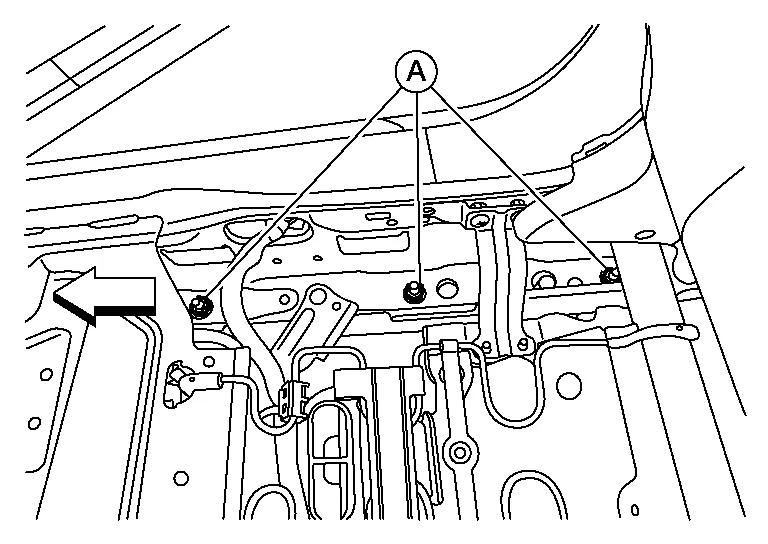
: Front
Tilt the front passenger seat forward and disconnect the harness connector from the rear occupant classification system sensor.
Disconnect the harness connector from the front occupant classification system sensor.
For models with power front passenger seat, perform the following procedure.Tilt the front passenger seat rearward and release the harness clips (A) from the seat frame assembly (1).
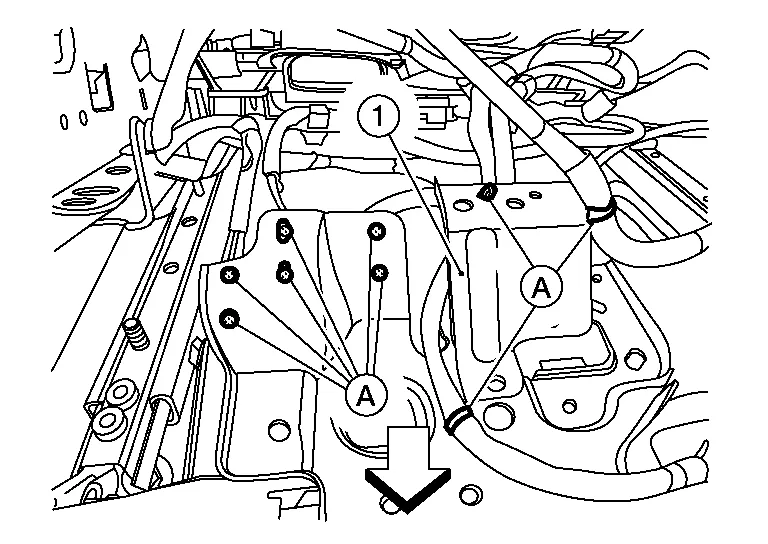
|
: Front |
Remove the front passenger seat frame assembly from the seat tracks and position to the rear.
Remove the occupant classification system sensors using the following procedure.
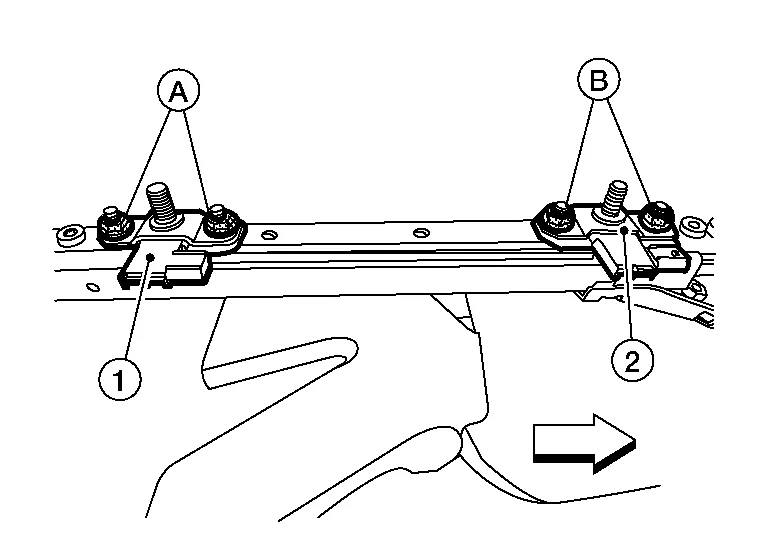
|
: Front |
INSTALLATION
Install the occupant classification system sensors using the following procedure.Install the rear occupant classification system sensor (1) and nuts (A) and tighten to specification.
|
: Front |
| Occupant classification system sensor nuts (A) | : 22 N·m |
| Occupant classification system sensor nuts (B) | : 22 N·m |
Install the seat frame assembly onto the four studs.
For models with power front passenger seat, perform the following procedure.Tilt the front passenger seat rearward and attach the harness clips (A) to the seat frame assembly (1).
|
: Front |
Connect the front occupant classification system sensor harness connector.
Tilt the front passenger seat forward and connect the rear occupant classification system sensor harness connector.
Install the front passenger seat frame assembly using the following procedure.Install washer and nut (A) to the front LH (inboard) side of the seat frame assembly and hand tighten.
|
: Front |
|
: Front |
| Seat frame assembly nuts (A) | : 45 N·m |
|
: Front |
| Seat frame assembly nut (A) | : 45 N·m |
| Seat frame assembly nut (B) | : 45 N·m |
Attach the occupant classification system sensors harness clips (A) to the seat frame assembly (1).
Attach the harness clip and connect the harness connectors to the front passenger seat.
For models with power front passenger seat, attach the harness clip (A) to the seat frame assembly, then connect the harness connectors (B).
For models with manual front passenger seat, attach the harness clip (A) to the seat frame assembly, then connect the harness connectors (B).
Install the seat cushion assembly using the following procedure.Attach the rear J-hooks.
For models with climate controlled passenger seat, release the rear J-hooks (A) from the seat frame assembly
: Front For models without climate controlled passenger seat, attach the rear hinge cover J-hooks (A) to the seat frame assembly (1).
: Front
|
: Front |
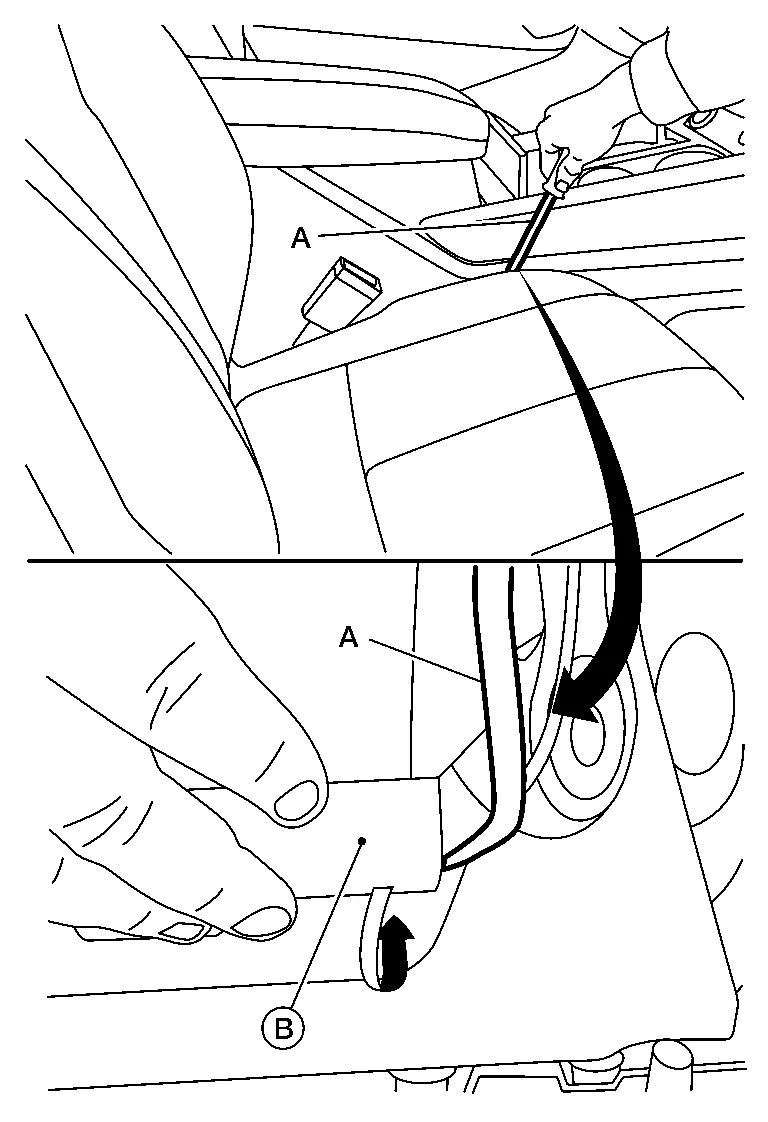
Attach the seatback J-clips under the rear of the front passenger seat.
Install the seat cushion outer finisher (RH) to the front passenger seat using the following procedure.For models with power front passenger seat, use the following steps.
Connect the power seat switch harness connector.
Install the seat cushion outer finisher (RH) (1) to the front passenger seat.
: Pawl : Metal clip Install the seat cushion outer finisher (RH) (1) to the front passenger seat.
: Pawl : Metal clip Install the recline lever finisher (1) to the recline lever as shown.
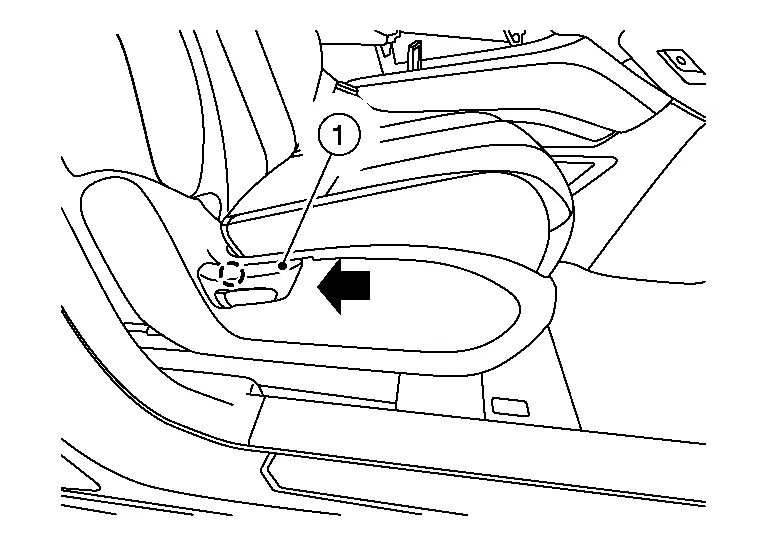
: Pawl
For models with manual passenger seat, operate seat slide and make sure both tracks lock in place at each adjustment point.