Body (Interior and Exterior)
Center Pillar Trim Repair Procedures
In this manual: Body (Interior and Exterior)
10steps
~60min
3/5difficulty
Done 0 of 10
Replacement
[Center Pillar Lower Trim]
|

|

- Remove the front door sill trim. (Refer to Interior Trim - "Door Scuff Trim")
- Remove the rear door sill trim. (Refer to Interior Trim - "Door Scuff Trim")
- Slightly remove the front door side weatherstrip.
- Slightly remove the rear door body side weatherstrip.
- Using a screwdriver or removal tool, remove the center pillar lower trim (A).
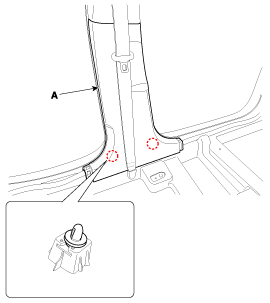
- Install in the reverse order of removal.

- Replace any damaged clips.
|
|
- Remove the lower center pillar trim. (Refer to Interior Trim - "Center Pillar Trim")
- Remove the front anchor seat belt. (Refer to Retractor - "EFD (Emergency Fastening Device) System").
- Using a screwdriver or removal tool, remove the center pillar lower trim (A).
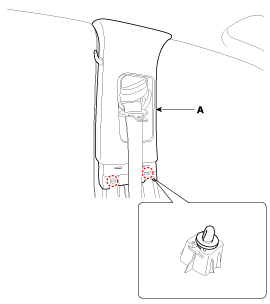
- Install in the reverse order of removal.
- Replace all damaged clips.
Test yourself
A quick Hyundai Sonata LF quiz: every answer comes with an explanation and a link to the manual page.
Was this page helpful?