When prying with a flat-tip screwdriver or a trim tool, wrap the tool with protective tape and apply protective tape to the surrounding parts to prevent damage.
Use a plastic panel removal tool to remove the interior trim parts so as not to damage the surface.
Be careful not to bend or scratch the trim and panels.
Remove the rear seat cushion assembly. (Refer to Rear Seat - "Rear Seat Assembly")
Remove the rear seatback assembly. (Refer to Rear Seat - "Rear Seat Assembly")
Slightly remove the rear door weatherstrip.
Remove the rear door sill trim. (Refer to Interior Trim - "Door Scuff Trim")
Remove the rear pillar trim. (Refer to Interior Trim - "Rear Wheel House Trim")
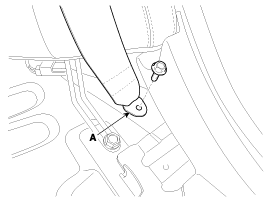
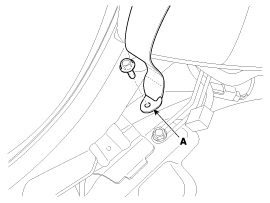
Loosen the mounting bolt, then remove the lower anchor of the rear seat belt (A).
Tightening torque: 39.2 ~ 54 N·m
[LH][RH]
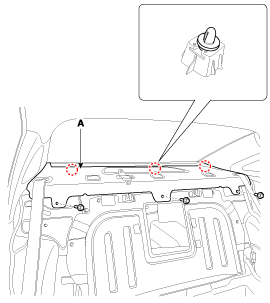
Loosen the mounting screws and remove the rear parcel tray garnish (A).
Install in the reverse order of removal.
Make sure the connector is properly connected.
Replace any damaged clips.
?
Test yourself
A quick Hyundai Sonata LF quiz: every answer comes with an explanation and a link to the manual page.