Restraints
General Safety Information and Precautions
In this manual: Restraints
~4min read
Precautions
General Precautions
Before performing service on the airbag system, carefully read the following precautions. Follow the instructions described in this manual, otherwise the airbags may deploy accidentally and cause damage or injury.- Except when inspecting electrical components, always turn the ignition switch OFF and disconnect the negative battery cable, then wait at least three minutes before starting work.
|

- Use replacement parts manufactured to the same standards and quality as original parts. Do not install used SRS parts from another vehicle. When repairing the SRS, use only new parts.
- Carefully inspect any SRS component before installing it. Do not install any part that shows signs of dropping or improper handling, such as dents, cracks or deformation.
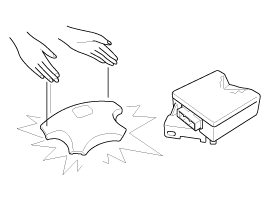
- Before removing any SRS parts (including disconnecting connectors), always disconnect the SRSCM connector.
- Store the removed airbag with the pad facing up.
- Do not allow oil, grease, cleaning agents or water to contact the airbag unit to prevent damage to the airbag assembly.
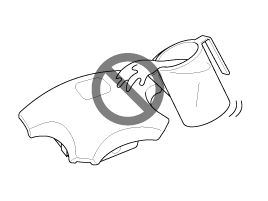
- Store the removed airbag on a secure, flat surface away from any heat sources (temperature above 85 °C/185 °F).
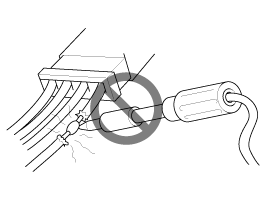
- Never perform electrical tests on airbags, such as measuring resistance.
- Do not stand in front of the airbag unit during removal, inspection or replacement.
- Refer to the disposal procedures for a deployed or damaged airbag.
- Be careful not to strike the SRS unit or its side impact sensors or front impact sensors. Whenever the ignition switch is ON, wait at least three minutes after turning the ignition OFF before starting work.
- During installation or replacement, take care not to strike the area around the SRS unit, side impact sensors and front impact sensors (with an impact wrench, hammer, etc.). Airbags could deploy unintentionally and cause damage or injury.
- Replace the front airbag module, SRSCM and FIS when the front airbag has deployed. Replace the SRS wiring when the SRS wiring is damaged. Replace the side airbag module, curtain airbag module, SRSCM and SIS when the side airbag has deployed. Replace the airbag when the SRS wiring is damaged.
- After a collision in which the airbags or side airbags did not deploy, inspect the SRS unit and side impact sensors for damage or deformation. If damaged, replace the SRS unit, front impact sensor and/or side impact sensors.
- Do not disassemble the SRS unit, front impact sensor or side impact sensors.
- Turn the ignition OFF, disconnect the negative battery cable and wait at least three minutes before starting installation or replacement of the SRS unit.
- Make sure the SRS unit, front impact sensor and side impact sensors are securely fastened with the mounting bolts.
- Do not spill water or oil on the SRS unit, front or side impact sensor, and keep them away from dust.
- Store the SRS unit, front impact sensor and side impact sensors in a cool (15 ~ 25 °C / 59 ~ 77 °F) and dry (30 ~ 80 % relative humidity, no moisture) area.
- Never attempt to modify, splice or repair SRS wiring. If the SRS wiring is open or damaged, replace the harness.
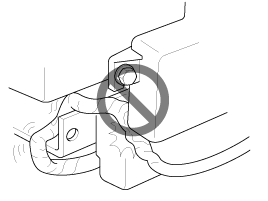
- Make sure the harness wires are routed so that they are not pinched and do not interfere with other components.
- Make sure all SRS ground points are clean and the grounds are securely fastened for optimal metal-to-metal contact. Poor grounding may cause intermittent problems that are difficult to diagnose.
- When using electrical test equipment, insert the tester probe into the connector from the wire side. Do not insert the tester probe into the terminal side of the connector and do not tamper with the connector.
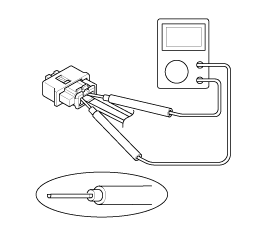
- Use a U-shaped probe. Do not force the probe into the connector.
- Use the specified service connectors for troubleshooting. Using improper tools may cause an incorrect check result due to poor metal contact.
Disconnection
To unlock the connector, pull the spring-loaded sleeve (A) and slider (B) while holding the opposite half of the connector. Disconnect the connector halves. Always pull on the sleeve, not on the connector half.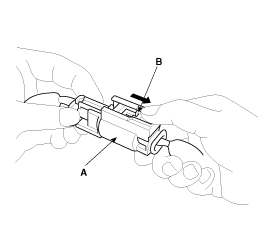
Connection
While holding both connector halves, push until the projection (C) on the sleeve side of the connector locks with a click.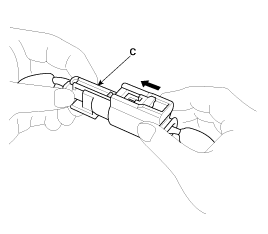
Test yourself
A quick Hyundai Sonata LF quiz: every answer comes with an explanation and a link to the manual page.
Was this page helpful?