Engine
Generator removal and installation
In this manual: Engine
5steps
~30min
2/5difficulty
Done 0 of 5
Removal

 (a): 09930–44530 (rotor holder)
 (b): 09930–30460 (rotor remover
bolt) (c): 09930–34970 (rotor remover)
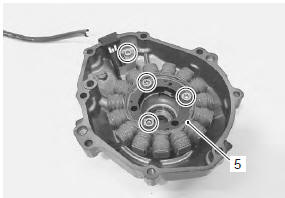
Installation : Sealant 99000–31140 (suzuki
bond no.1207B or equivalent)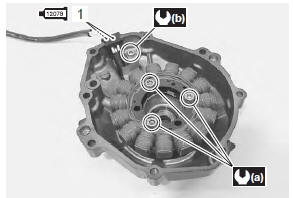
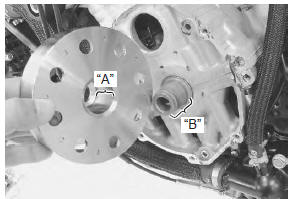
 (a): 09930–44530 (rotor holder)
Tightening torque generator rotor bolt (c): 145 N·m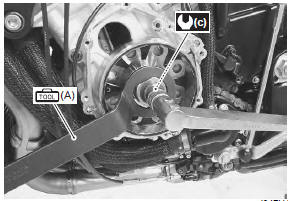
 : Sealant 99000–31140 (suzuki
bond no.1207B or equivalent)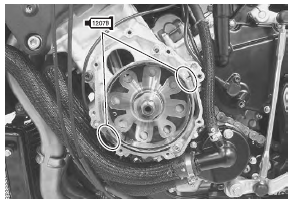
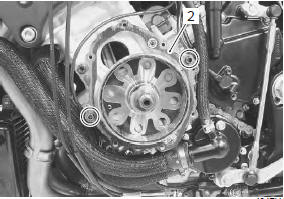
 Be careful
not to pinch the finger between the generator cover and crankcase.
- Drain engine oil. Refer to “engine oil and filter replacement” in section 0b .
- Remove the left side cowling. Refer to “exterior parts removal and installation” in section 9d .
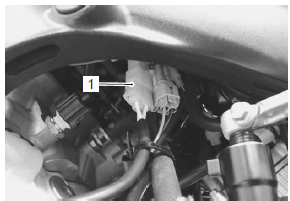
- Disconnect the generator coupler (1).
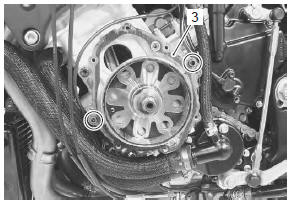
- Remove the generator cover (2).
- Remove the gasket (3) and dowel pins.
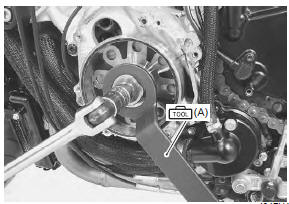
- Hold the generator rotor with the special tool and remove the generator rotor bolt.
(a): 09930–44530 (rotor holder) - Screw in the special tool to the crankshaft.
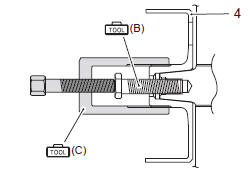
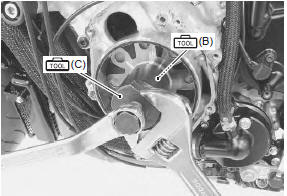
- Remove the generator rotor (4) using the special tool.
(b): 09930–30460 (rotor remover bolt)
(c): 09930–34970 (rotor remover) - Remove the generator stator (5).
Installation
Install the generator in the reverse order of removal. Pay attention to the following points:
- tighten the generator stator set bolts and generator lead wire set bolt to the specified torque.
- Apply bond lightly to the generator lead wire grommet (1).
: Sealant 99000–31140 (suzuki bond no.1207B or equivalent)
- Degrease the tapered portion “a” of generator rotor and also the crankshaft “b” with nonflammable cleaning solvent.
dry these parts naturally. Do not wipe them with a cloth or use compressed air to dry.
- Install the generator rotor onto crankshaft.
- Hold the generator rotor with the special tool and tighten its bolt to the specified torque.
(a): 09930–44530 (rotor holder) Tightening torque generator rotor bolt (c): 145 N·m
- Apply a bond lightly to the mating surfaces at the parting line between the upper and lower crankcases as shown.
: Sealant 99000–31140 (suzuki bond no.1207B or equivalent)
- Install the dowel pins and new gasket (2).
Caution use new gasket to prevent oil leakage.
- Install the generator cover (3) and tighten the generator cover bolts.
Be careful not to pinch the finger between the generator cover and crankcase.
Note fit the clamp to the generator cover bolt “c”.
- Route the generator lead wire. Refer to “wiring harness routing diagram” in section 9a .
Test yourself
A quick Suzuki GSX-R 1000 quiz: every answer comes with an explanation and a link to the manual page.
Was this page helpful?