Engine
Oil jet removal and installation
In this manual: Engine
9steps
~54min
2/5difficulty
Done 0 of 9
Piston cooling oil jet Removal
Installation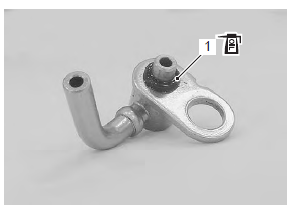
 : Thread lock cement
99000–32110 (thread lock cement super “1322” or equivalent) Tightening torque piston cooling oil jet bolt (a): 10 N·m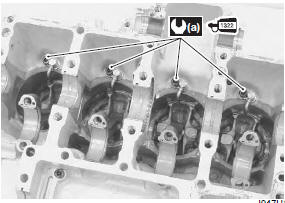
Oil jet (for cam chain tension adjuster) Removal
Installation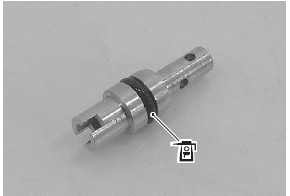
Installation
- Remove the engine assembly. Refer to “engine assembly removal” in section 1d .
- Remove the crankshaft assembly. Refer to “engine bottom side disassembly” in section 1d (page 1d- 49).
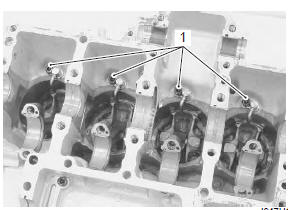
- Remove the piston cooling oil jets (1) from the upper crankcase.
Installation
Installation is in the reverse order of removal. Pay attention to the following points:
- fit new o-ring (1) to each piston cooling oil jet and apply engine oil to it.
Caution use new o-rings to prevent oil pressure leakage.
- Apply a small quantity of thread lock to the bolts and tighten them to the specified torque.
: Thread lock cement 99000–32110 (thread lock cement super “1322” or equivalent) Tightening torque piston cooling oil jet bolt (a): 10 N·m
Oil jet (for cam chain tension adjuster) Removal
- Remove the throttle body. Refer to “throttle body removal and installation” in section 1d (page 1d- 10).
- Remove the regulator/rectifier. Refer to “regulator / rectifier removal and installation” in section 1j .
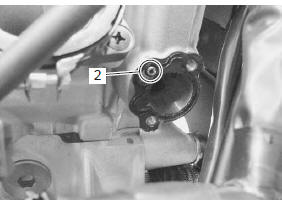
- Remove the cam chain tension adjuster (1). Refer to “engine top side disassembly” in section 1d .

- Remove the oil jet (2) (for cam chain tension adjuster).
Installation
Installation is in the reverse order of removal. Pay attention to the following points:
- apply engine oil to the o-ring.
Caution use a new o-ring to prevent oil leakage.
- Install the cam chain tension adjuster. Refer to “engine top side assembly” in section 1d (page 1d- 28).
- Install the regulator/rectifier. Refer to “regulator / rectifier removal and installation” in section 1j .
- Install the throttle body. Refer to “throttle body removal and installation” in section 1d (page 1d- 10).
- Remove the engine assembly. Refer to “engine assembly removal” in section 1d .
- Separate the crankcases, upper and lower. Refer to “engine bottom side disassembly” in section 1d .
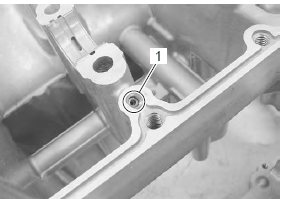
- Remove the oil jet (1) (for transmission) from the lower crankcase.
Installation
Installation is in the reverse order of removal. Refer to “engine bottom side assembly” in section 1d .
Test yourself
A quick Suzuki GSX-R 1000 quiz: every answer comes with an explanation and a link to the manual page.
Was this page helpful?