Suspension
Rear wheel assembly removal and installation
In this manual: Suspension
8steps
~48min
2/5difficulty
Done 0 of 8
Removal

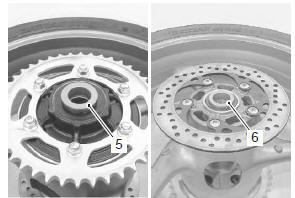
Installation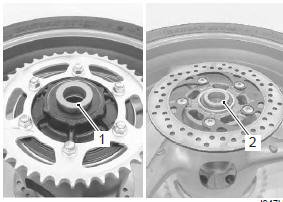


- Loosen the axle nut (1).
- Raise the rear wheel off the ground and support the motorcycle with a jack or wooden block.
Caution make sure that the motorcycle is supported securely.
- Remove the axle nut (1).
- Loosen the left and right lock-nuts (2) and turn in the adjuster bolts (3).
- Draw out the rear axle.
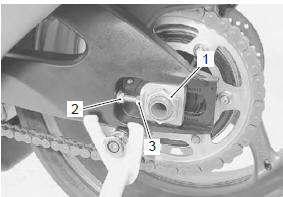
- Remove the rear wheel by disengaging the drive chain.
Caution do not operate the rear brake pedal with the rear wheel removed.
- Remove the collars (5) and (6).
Installation
- Install the collars (1) and (2).
- Remount the rear wheel and rear axle, tighten the rear axle nut (3) temporarily.
- Adjust the chain slack after installing the rear wheel.
Refer to “drive chain inspection and adjustment” in section 0b .
- Tighten the rear axle nut (3) to the specified torque.
After remounting
the rear wheel, pump the brake pedal several times to check for proper brake operation.
- Tighten both chain adjuster lock-nut (4) securely.
Test yourself
A quick Suzuki GSX-R 1000 quiz: every answer comes with an explanation and a link to the manual page.
Was this page helpful?