Back Power Window Switch
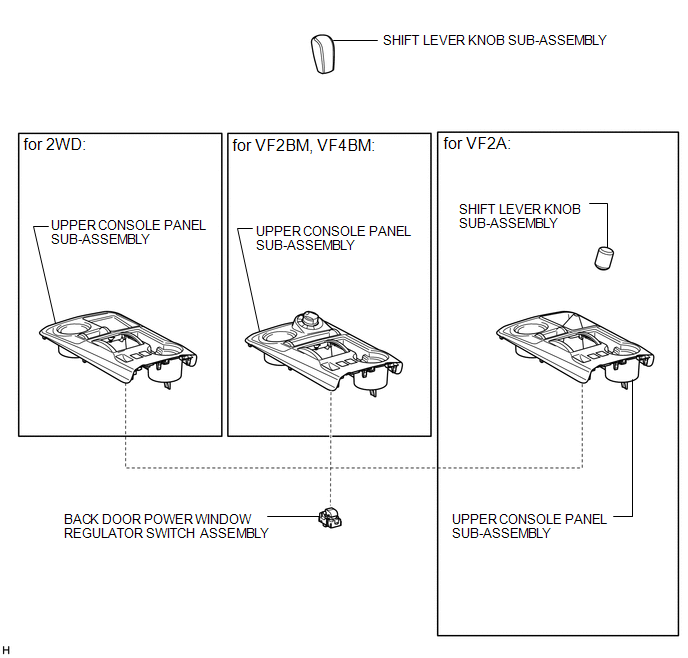
Removal REMOVAL PROCEDURE
1. REMOVE SHIFT LEVER KNOB SUB-ASSEMBLY

2. REMOVE SHIFT LEVER KNOB SUB-ASSEMBLY (for VF2A)
3. REMOVE UPPER CONSOLE PANEL SUB-ASSEMBLY
4. REMOVE BACK DOOR POWER WINDOW REGULATOR SWITCH ASSEMBLY
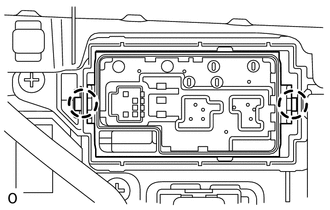
(a) Detach the 2 claws and remove the regulator switch.
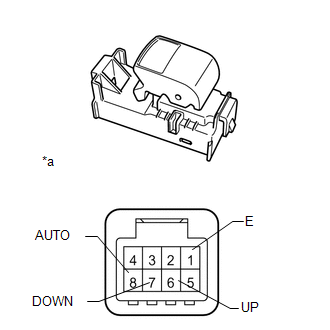
Inspection INSPECTION PROCEDURE1. INSPECT BACK DOOR POWER WINDOW REGULATOR SWITCH ASSEMBLY
(a) Measure the resistance according to the value(s) in the table below. Standard Resistance:
|
 |
1. INSTALL BACK DOOR POWER WINDOW REGULATOR SWITCH ASSEMBLY
(a) Attach the 2 claws to install the regulator switch.
2. INSTALL UPPER CONSOLE PANEL SUB-ASSEMBLY

3. INSTALL SHIFT LEVER KNOB SUB-ASSEMBLY (for VF2A)
4. INSTALL SHIFT LEVER KNOB SUB-ASSEMBLY
Test yourself
A quick Toyota 4Runner quiz: every answer comes with an explanation and a link to the manual page.