Disassembly
1. REMOVE RADIATOR GRILLE

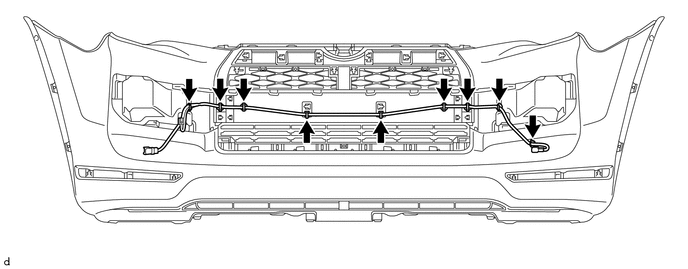
2. REMOVE NO. 2 ENGINE ROOM WIRE
(a) Disconnect each connector.
(b) Detach the 9 clamps to remove the No. 2 engine room wire.
3. REMOVE NO. 1 ULTRASONIC SENSOR
4. REMOVE ULTRASONIC SENSOR CLIP
5. REMOVE NO. 2 ULTRASONIC SENSOR RETAINER
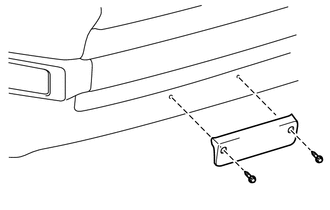
6. REMOVE FRONT BUMPER EXTENSION MOUNTING BRACKET (w/ License Plate Bracket)
(a) Remove the 2 screws and front bumper extension mounting bracket. |
 |
7. REMOVE FRONT BUMPER SIDE MOULDING LH
(a) Remove the 2 outside moulding retainers. |
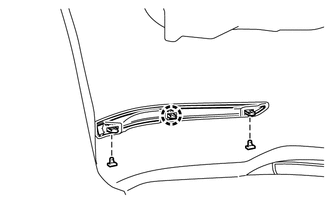 |
(b) Detach the claw to remove the front bumper side moulding LH.
8. REMOVE FRONT BUMPER SIDE MOULDING RH
HINT:
Use the same procedure as for the LH side.
9. REMOVE FRONT BUMPER LOWER SIDE SUPPORT LH
(a) Remove the 2 clips. |
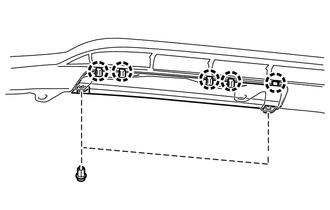 |
(b) Detach the 5 claws to remove the front bumper lower side support LH.
10. REMOVE FRONT BUMPER LOWER SIDE SUPPORT RH
HINT:
Use the same procedure as for the LH side.
11. REMOVE NO. 2 RADIATOR GRILLE MOULDING
(a) Remove the 2 outside moulding retainers and 4 screws. |
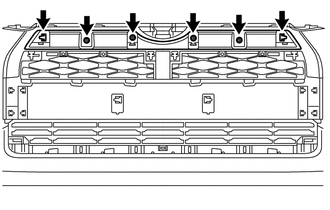 |
(b) Detach the 4 claws to remove the No. 2 radiator grille moulding. |
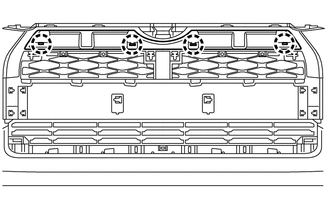 |
12. REMOVE FRONT BUMPER SIDE MOULDING SUB-ASSEMBLY LH
(a) Remove the 3 outside moulding retainers. |
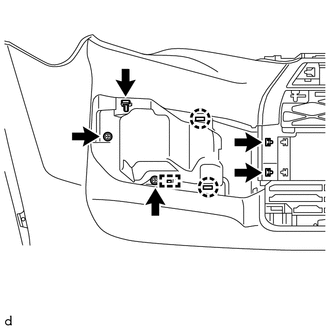 |
(b) Remove the 2 screws.
(c) Detach the 2 claws and guide to remove the front bumper side moulding sub-assembly LH.
13. REMOVE FRONT BUMPER SIDE MOULDING SUB-ASSEMBLY RH
HINT:
Use the same procedure as for the LH side.
14. REMOVE FRONT BUMPER MOULDING SUB-ASSEMBLY
(a) Remove the 4 screws. |
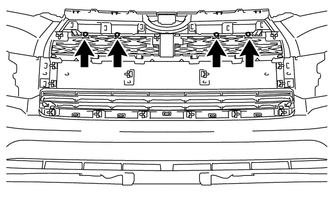 |
(b) Remove the 15 outside moulding retainers. |
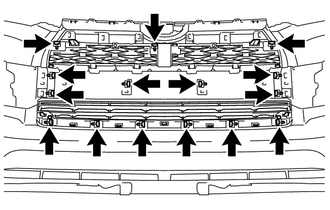 |
(c) Detach the 12 guides and 4 claws to remove the front bumper moulding sub-assembly. |
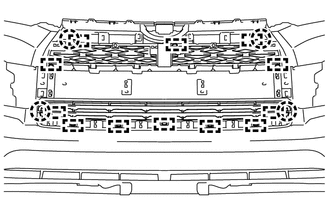 |
15. REMOVE FOG LIGHT ASSEMBLY LH
16. REMOVE FOG LIGHT ASSEMBLY RH
HINT:
Use the same procedure as for the LH side.
Test yourself
A quick Toyota 4Runner quiz: every answer comes with an explanation and a link to the manual page.