Room Light(for Front)
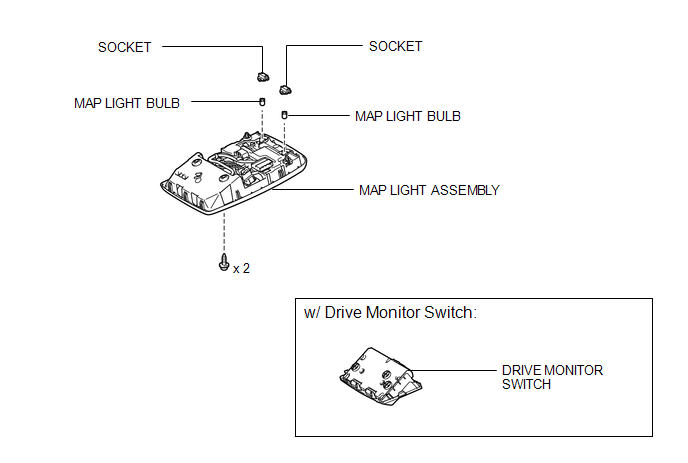
Inspection INSPECTION PROCEDURE
1. INSPECT MAP LIGHT ASSEMBLY
(a) Measure the resistance according to the value(s) in the table below. Standard Resistance:
|
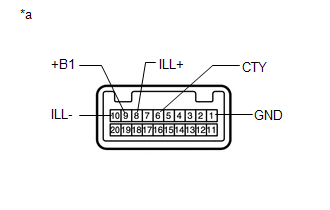 |
(b) Apply battery voltage to the connector and check the LED illumination.
OK:
Condition | Specified Condition |
|---|---|
Battery positive (+) → Terminal 8 (ILL+) Battery negative (-) → Terminal 10 (ILL-) |
LED illuminates |
*a |
Component without harness connected (Map Light Assembly) |
If the result is not as specified, replace the map light assembly.
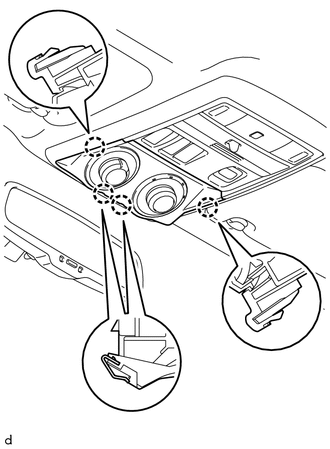
Removal REMOVAL PROCEDURE1. REMOVE DRIVE MONITOR SWITCH (w/ Drive Monitor Switch)
(a) Detach the 4 claws to remove the drive monitor switch. |
 |
(b) Disconnect the connector.
2. REMOVE MAP LIGHT ASSEMBLY
(a) Open the cover (w/o Drive Monitor Switch).
(b) Remove the 2 screws. |
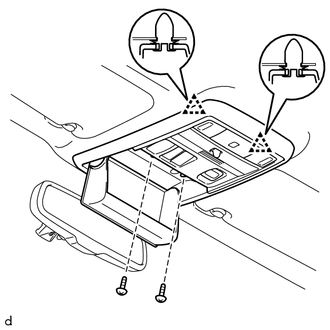 |
(c) Detach the 2 clips to remove the map light assembly.
(d) Disconnect the connector.
3. REMOVE MAP LIGHT BULB
(a) Turn the 2 sockets in the direction indicated by the arrows to remove them. |
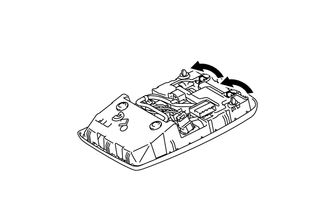 |
(b) Remove the 2 map light bulbs from the sockets.
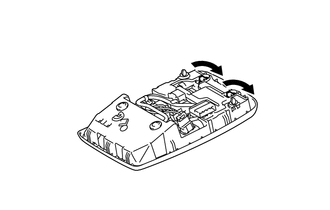
Installation INSTALLATION PROCEDURE1. INSTALL MAP LIGHT BULB
(a) Install the 2 map light bulbs to the sockets.
(b) Turn the 2 sockets in the direction indicated by the arrows to install them. |
 |
2. INSTALL MAP LIGHT ASSEMBLY
(a) Connect the connector.
(b) Attach the 2 clips to install the map light assembly.
(c) Install the 2 screws.
(d) Close the cover (w/o Drive Monitor Switch).
3. INSTALL DRIVE MONITOR SWITCH (w/ Drive Monitor Switch)
(a) Connect the connector.
(b) Attach the 4 claws to install the drive monitor switch.
Test yourself
A quick Toyota 4Runner quiz: every answer comes with an explanation and a link to the manual page.