Front Pillar Upper Garnish
Components
COMPONENTS
ILLUSTRATION
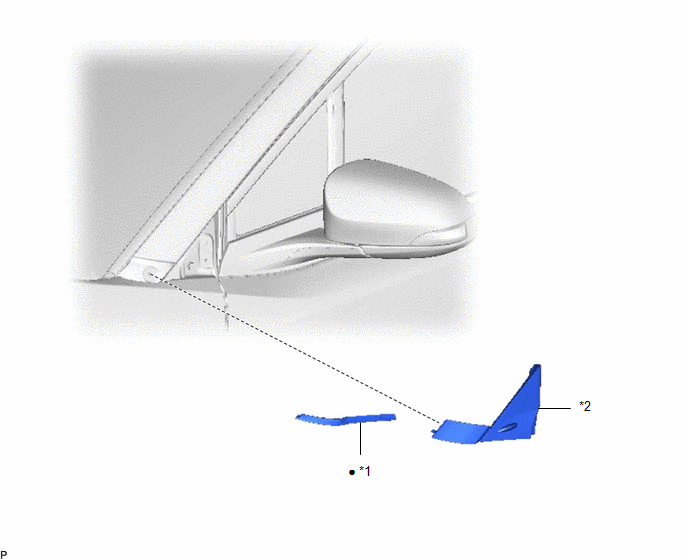
*1 |
FRONT PILLAR GARNISH PROTECTOR |
*2 |
FRONT PILLAR UPPER GARNISH SUB-ASSEMBLY |
● |
Non-reusable part |
- |
- |
Disassembly
DISASSEMBLY
PRECAUTION / NOTICE / HINT
HINT:
- Repeat the same procedure for the right side and the left side.
- The following procedure applies to the left side.
PROCEDURE
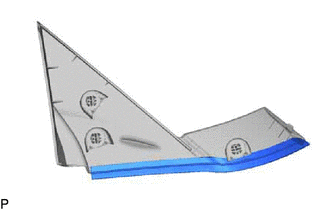
1. REMOVE FRONT PILLAR GARNISH PROTECTOR
(a) Remove the front pillar garnish protector. |
 |
Removal
REMOVAL
PRECAUTION / NOTICE / HINT
HINT:
- Repeat the same procedure for the right side and the left side.
- The following procedure applies to the left side.
PROCEDURE
1. REMOVE FRONT PILLAR UPPER GARNISH SUB-ASSEMBLY
(a) Apply protective tape around the front pillar upper garnish sub-assembly.
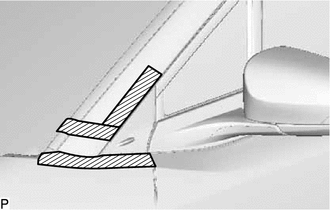
 |
Protective tape |
(b) Using a moulding remover B, release the clips and remove the front pillar upper garnish sub-assembly as shown in the illustration.
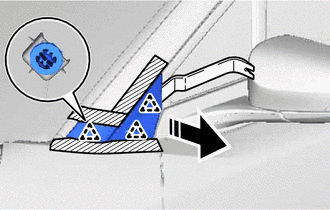
 |
Remove in this direction |
Reassembly
REASSEMBLY
PRECAUTION / NOTICE / HINT
HINT:
- Repeat the same procedure for the right side and the left side.
- The following procedure applies to the left side.
PROCEDURE
1. INSTALL FRONT PILLAR GARNISH PROTECTOR
HINT:
When installing the front pillar garnish protector, heat the front pillar upper garnish sub-assembly using a heat lamp.
Heating TemperatureItem | Temperature |
|---|---|
Front Pillar Upper Garnish Sub-assembly |
20 à 30 °C |
CAUTION:
- Do not touch heated parts or the heat lamp. Touching them may cause burns.
- Prolonged contact with heated parts may cause burns.
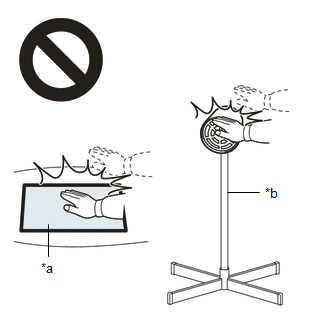
*a |
Hot Surface |
*b |
Heat Lamp |
NOTICE:
Do not overheat the front pillar upper garnish sub-assembly.
(a) Clean the surface of the front pillar upper garnish sub-assembly.
(1) Using a heat lamp, heat the surface of the front pillar upper garnish sub-assembly.
(2) Remove the double-sided adhesive tape from the front pillar upper garnish sub-assembly.
(3) Remove any adhesive residue using a cleaning agent.
(b) Using a heat lamp, heat the front pillar upper garnish sub-assembly.
(c) Peel the release liner off the new front pillar garnish protector.
HINT:
After removing the release liner, prevent the adhesive surface from contacting foreign matter.
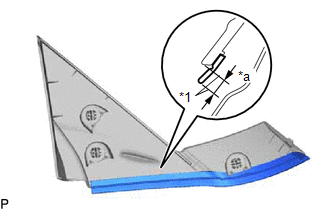
(d) Install the front pillar garnish protector as shown in the illustration. HINT: Align the front pillar garnish protector with the alignment line of the front pillar upper garnish sub-assembly. |
|
Installation
INSTALLATION
PRECAUTION / NOTICE / HINT
HINT:
- Repeat the same procedure for the right side and the left side.
- The following procedure applies to the left side.
PROCEDURE
1. INSTALL FRONT PILLAR UPPER GARNISH SUB-ASSEMBLY
(a) Engage the clips to install the front pillar upper garnish sub-assembly as shown in the illustration.
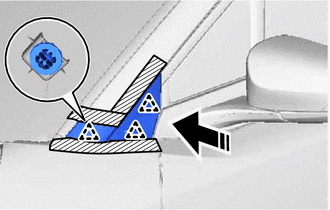
 |
Install in this direction |
(b) Remove the protective tape.