Roof Drip Molding
Components
COMPONENTS
ILLUSTRATION
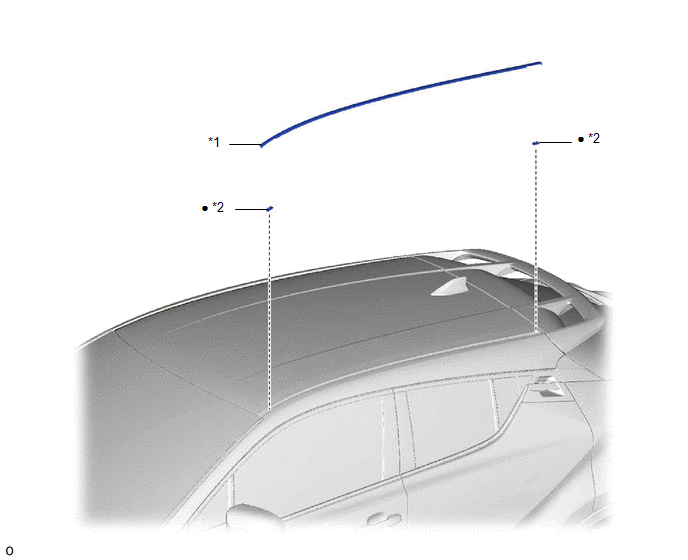
*1 |
CENTER ROOF DRIP MOLDING |
*2 |
ROOF DRIP MOLDING CLIP NO. 1 |
● |
Non-reusable part |
- |
- |
Removal
REMOVAL
PRECAUTION / NOTICE / HINT
HINT:
- Repeat the same procedure for the right side and the left side.
- The following procedure applies to the left side.
PROCEDURE
1. REMOVE CENTER ROOF DRIP MOLDING
(a) Apply protective tape around the center roof drip molding.
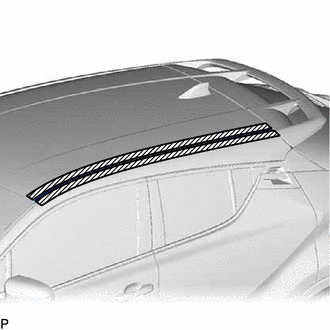
 |
Protective tape |
(b) Using a molding remover D, release the 2 clips to remove the center roof drip molding. NOTICE:
|
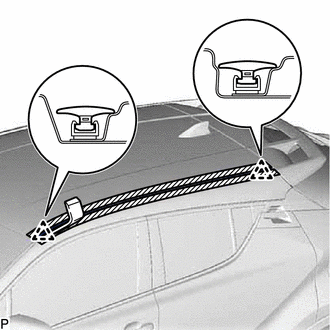 |
Installation
INSTALLATION
PRECAUTION / NOTICE / HINT
HINT:
- Repeat the same procedure for the right side and the left side.
- The following procedure applies to the left side.
PROCEDURE
1. INSTALL ROOF DRIP MOLDING CLIP NO. 1
NOTICE:
When installing new roof drip molding clips, remove any double-sided tape residue from the body where the roof drip molding clips will be installed, then clean the area using a residue-free solvent.
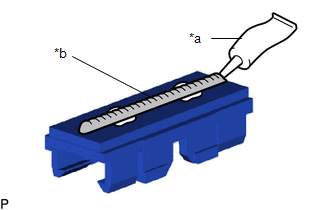
(a) 2 to 3 mm (0.0787 to 0.118 in.) Apply a bead of adhesive (3M DP-105 or equivalent) to each new roof drip molding clip. HINT: Adhesion strength (tensile strength): 13.7 MPa (140.0 kgf/cm2, 1,987 psi) minimum (at a temperature of 23 °C). |
|
(b) Install the roof drip molding clips to the roof panel as shown in the illustration. Determine the positions, press firmly, and install the roof drip molding clips.
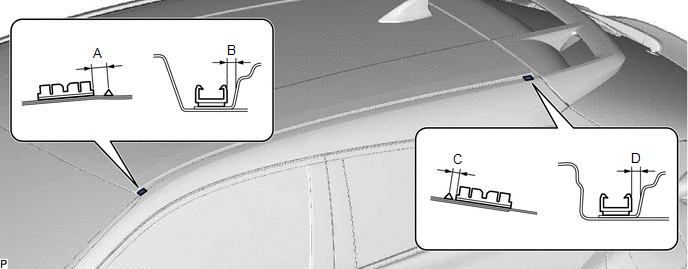
Standard measurement:
Area | Measurement | Area | Measurement |
|---|---|---|---|
A |
6.1 mm (0.240 in.) |
B |
2.4 mm (0.0945 in.) |
C |
2.9 mm (0.114 in.) |
D |
2.5 mm (0.0984 in.) |
(c) Install the roof drip molding after at least 40 minutes have passed since the roof drip molding clips were attached.
HINT:
- Initial curing time: 40 minutes
- Full cure time: 24 hours
2. INSTALL ROOF CENTER GUTTER
(a) Engage the 2 clips to install the roof center gutter, as shown in the illustration.
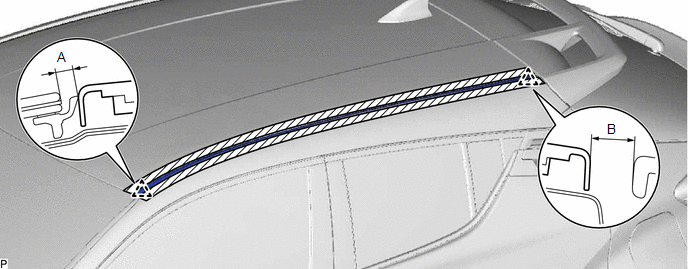
Standard measurement:
Area | Measurement | Area | Measurement |
|---|---|---|---|
A |
4.0 mm (0.157 in.) |
B |
9.7 mm (0.382 in.) |