Installation
INSTALLATION
PRECAUTION / NOTICE / HINT
HINT:
- Use the same procedure for the right and left sides.
- The procedure described below applies to the left side.
PROCEDURE
1. INSTALL FRONT DOOR SILL LIGHT SWITCH ASSEMBLY
(a) Using a TORX socket wrench T30, install the front door sill light switch assembly with the screw.
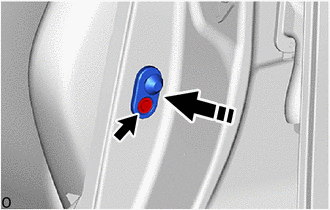
 |
Install in this direction |
Torque:
6 N·m {61 kgf·cm, 53 in·lbf}
(b) Connect the connector.
2. INSTALL CENTER PILLAR LOWER GARNISH
Click here
3. CONNECT FRONT DOOR OPENING TRIM WEATHERSTRIP
(a) Connect the rear door opening trim weatherstrip to the area shown in the illustration. |
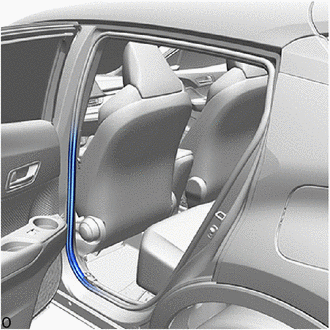 |
4. CONNECT FRONT DOOR OPENING TRIM WEATHERSTRIP
(a) Connect the front door opening trim weatherstrip to the area shown in the illustration. |
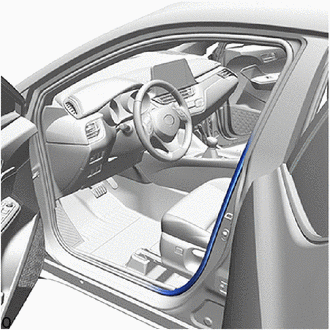 |
5. CONNECT FRONT SEAT BELT OUTER BELT ASSEMBLY
Click here
6. INSTALL SEAT BELT OUTER LAP ANCHOR COVER
Click here
7. INSTALL REAR DOOR SCUFF PLATE (with rear seat side airbag)
Click here
8. INSTALL REAR DOOR SCUFF PLATE (without rear seat side airbag)
Click here
9. INSTALL FRONT DOOR SCUFF PLATE
Click here
10. INSTALL REAR SEAT CUSHION LOCK HOOK
Click here
11. INSTALL REAR BENCH SEAT ASSEMBLY
Click here