Installation
INSTALLATION
PROCEDURE
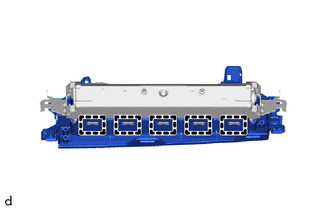
1. INSTALL NO. 1 LOWER INSTRUMENT PANEL AIRBAG DOOR (TMMT made)
(a) Engage the claws. |
 |
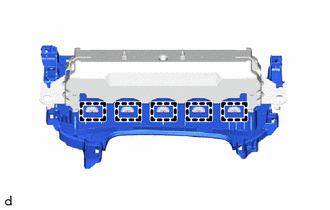
(b) Engage the claws to install the No. 1 lower instrument panel airbag door onto the No. 1 lower instrument panel airbag assembly. |
 |
2. INSTALL NO. 1 LOWER INSTRUMENT PANEL AIRBAG ASSEMBLY WITH DOOR
(a) Make sure the ignition switch is in the OFF position.
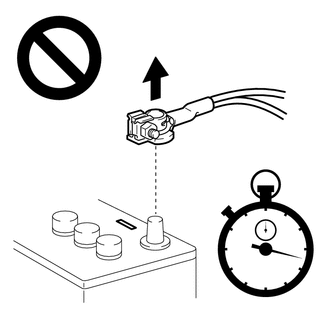
(b) Make sure the cable is disconnected from the negative (-) battery terminal.
CAUTION:
Wait at least 90 seconds after disconnecting the cable from the negative (-) battery terminal to disable the SRS system.
(c) Connect the airbag connector to the No. 1 lower instrument panel airbag assembly with door. NOTICE: When connecting any airbag connector, take care not to damage the airbag wire harness. |
|
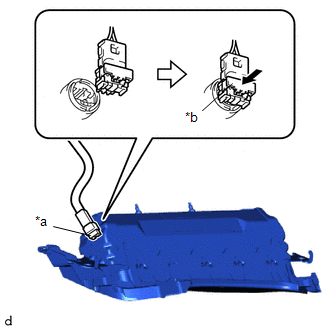
(d) Push in the airbag connector lock to install the airbag connector.
NOTICE:
Make sure the airbag connector lock is locked securely.
(e) Engage the claws to temporarily install the No. 1 lower instrument panel airbag assembly with door. |
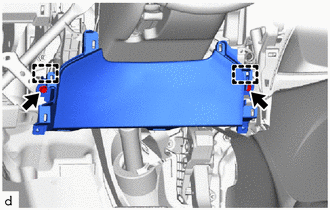 |
(f) Install the 2 bolts.
Torque:
10 N·m {102 kgf·cm, 7 ft·lbf}
NOTICE:
Make sure the No. 1 lower instrument panel airbag assembly with door is installed correctly, with no excessive gap and not protruding outward.
3. INSTALL INSTRUMENT PANEL LOWER CENTER FINISH PANEL
Click here
4. INSTALL INSTRUMENT CLUSTER FINISH PANEL GARNISH ASSEMBLY
Click here
5. INSTALL FUSE BOX OPENING COVER
Click here
6. CONNECT CABLE TO NEGATIVE BATTERY TERMINAL
Click here
NOTICE:
When the cable has been disconnected, some systems must be reset after the cable is reconnected.
Click here
7. PERFORM DIAGNOSTIC SYSTEM CHECK
Click here
8. CHECK SRS WARNING LIGHT
Click here