Installation
INSTALLATION
COMPONENTS (INSTALLATION)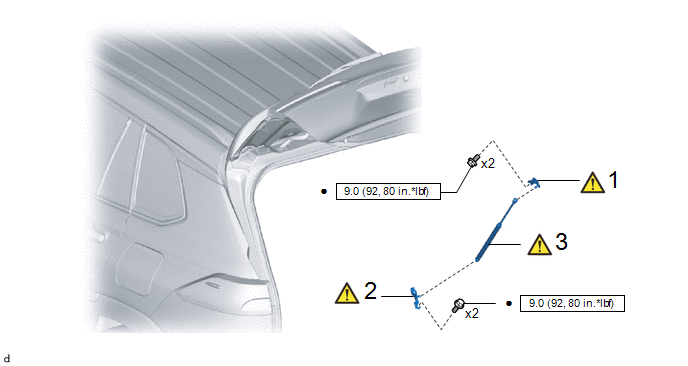
Procedure | Part Name Code |  |  |  |
|
|---|---|---|---|---|---|
1 |
BACK DOOR DAMPER STAY LOWER BRACKET |
68948 |
 |
- |
- |
2 |
BACK DOOR DAMPER STAY UPPER BRACKET |
68946 |
|
- |
- |
3 |
BACK DOOR STAY ASSEMBLY |
68960B |
|
- |
- |
 |
N*m (kgf*cm, ft.*lbf): Specified torque |
● |
Non-reusable part |
HINT:
- Use the same procedure for the RH side and LH side.
- The following procedure is for the LH side.
PROCEDURE
1. INSTALL BACK DOOR DAMPER STAY LOWER BRACKET
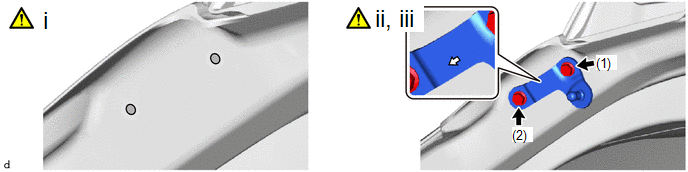
 |
Cleaning Area |
 |
Arrow Mark |
(1) Clean the bolt holes in the back door.
(2) Temporarily install the back door damper stay lower bracket with the 2 new bolts.
HINT:
With the door closed, install the back door damper stay lower bracket so that the arrow marker is facing the top side of the vehicle.
(3) Tighten the 2 bolts in the order shown in the illustration.
Torque:
9 N·m {92 kgf·cm, 80 in·lbf}
2. INSTALL BACK DOOR DAMPER STAY UPPER BRACKET
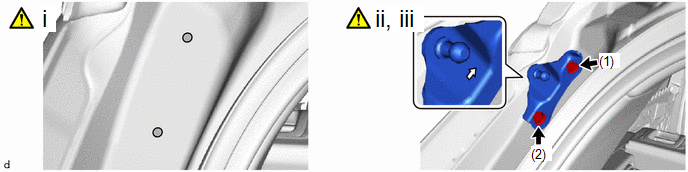
|
Cleaning Area |
|
Arrow Mark |
(1) Clean the bolt holes in the vehicle body.
(2) Temporarily install the back door damper stay upper bracket with the 2 new bolts.
HINT:
With the door closed, install the back door damper stay upper bracket so that the arrow marker is facing the top side of the vehicle.
(3) Tighten the 2 bolts in the order shown in the illustration.
Torque:
9 N·m {92 kgf·cm, 80 in·lbf}
3. INSTALL BACK DOOR STAY ASSEMBLY
|
CAUTION:
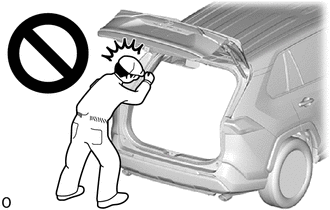
NOTICE:
|