Power steering
Steering gear
In this manual: Power steering
34steps
~209min
5/5difficulty
1special tools
Done 0 of 34
Components
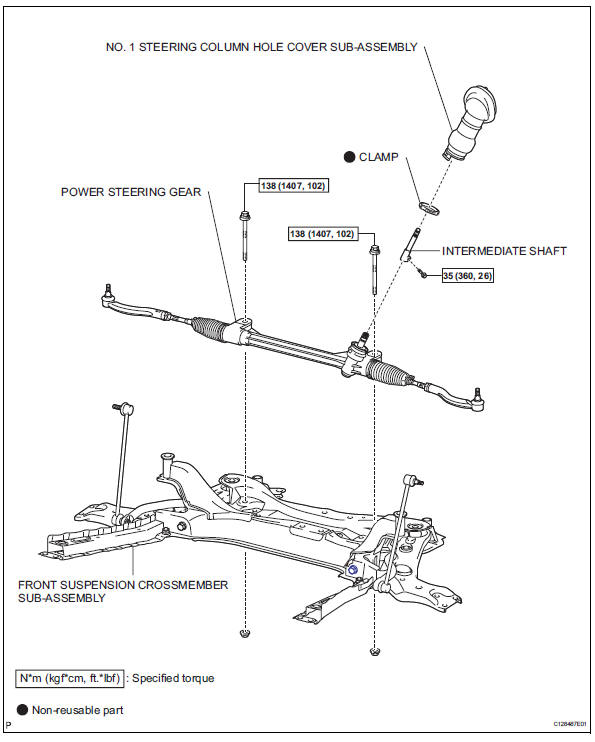
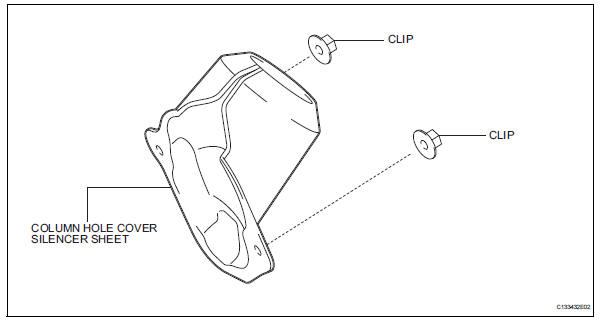
Removal
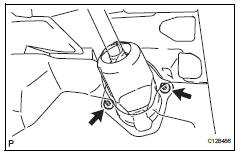
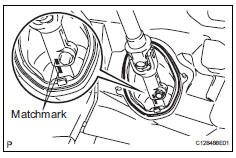

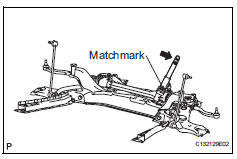
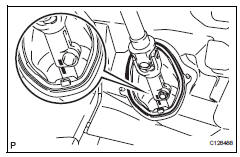
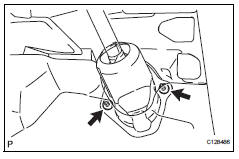
Removal
- Position front wheels facing straight ahead
- Disconnect cable from negative battery terminal
- Remove front wheel
- Disconnect tie rod end sub-assembly lh
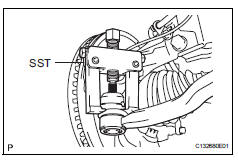
- Remove the cotter pin and castle nut.
- Using sst, disconnect the tie rod end from the steering knuckle.
Do not damage the tie rod end dust cover.
- Disconnect tie rod end sub-assembly rh
Use the same procedure for the rh side as for the lh side
- Remove column hole cover silencer sheet
- Remove the floor carpet, 2 clips and column hole cover silencer.
- Disconnect steering sliding yoke subassembly
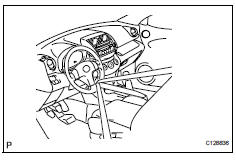
- Use a seat belt to fix the steering wheel in place to avoid breakage of the spiral cable.
- Place matchmarks on the sliding yoke of the steering intermediate shaft.
- Remove the bolt and disconnect the sliding yoke.
- Disconnect no. 1 Steering column hole cover sub-assembly
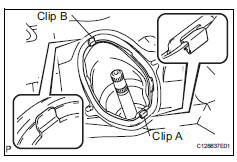
- Remove clip a, detach clip b from the body and disconnect the no. 1 Steering column hole cover.
Do not damage clips a and b.
- Remove engine assembly with transaxle
- Remove the engine with transaxle (see page em- 98).
- Remove no. 1 Steering column hole cover sub-assembly
- Remove the clamp and disconnect the column hole cover from the steering gear.
- Remove intermediate shaft
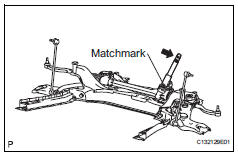
- Place matchmarks on the intermediate shaft of the steering gear.
- Remove the bolt and disconnect the steering intermediate shaft from the steering gear.
- Remove steering gear assembly
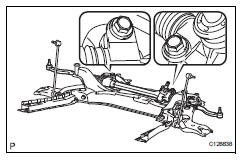
- Remove the 2 bolts, 2 nuts and steering gear from the suspension crossmember.
Keep the nut from rotating while turning the bolt.
Installation- Install steering gear assembly
- Install the steering gear onto the front suspension crossmember with the 2 bolts and 2 nuts.
Keep the nut from rotating while turning the bolt.
- Install intermediate shaft
- Align the matchmarks and install the intermediate shaft onto the steering gear.
- Install no. 1 Steering column hole cover sub-assembly
- Install the column hole cover onto the steering gear with a new clamp.
- Install engine assembly with transaxle
- Install the engine with transaxle (see page em-105).
- Install no. 1 Steering column hole cover sub-assembly
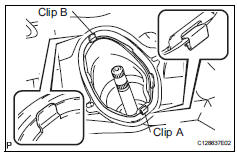
- Attach clip b onto the body portion and install the no. 1 Hole cover onto the body portion with clip a.
Make sure that the lip portion of the no. 1 Hole cover is not damaged.
- Connect steering sliding yoke subassembly
- Align the matchmarks and install the sliding yoke onto the intermediate shaft.
- Install column hole cover silencer sheet
- Install the column hole cover silencer sheet with the 2 clips.
- Install the floor carpet.
- Connect tie rod end sub-assembly lh
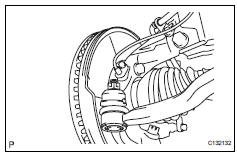
- Connect the tie rod end onto the steering knuckle with the castle nut.
If the holes for the clip are not aligned, tighten the nut up to 60Рfurther.
- Install a new cotter pin.
- Connect tie rod end sub-assembly rh
- Install front wheel torque: 103 n*m (1,050 kgf*cm, 76 ft.*Lbf)
- Connect cable to negative battery terminal
- Position front wheels facing straight ahead
- Inspect and adjust front wheel alignment
- Inspect and adjust the wheel alignment (see page sp-3).
Test yourself
A quick Toyota RAV4 quiz: every answer comes with an explanation and a link to the manual page.
Was this page helpful?