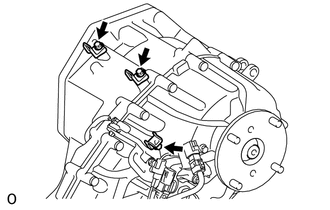
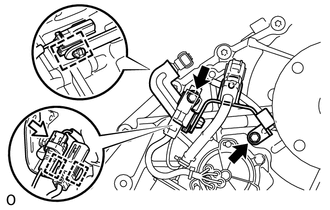
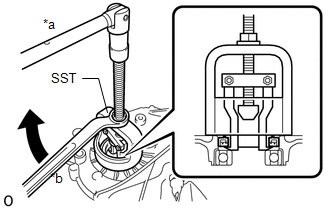
(a) Using a chisel and hammer, loosen the staked part of the transfer output shaft nut.
NOTICE:
Completely loosen the staked part of the transfer output shaft nut when removing it.
Do not damage the threads of the rear transfer output shaft.
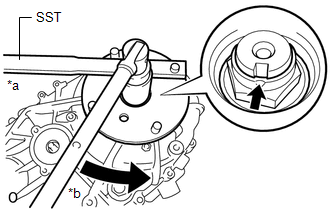
(b) Using SST, hold the output shaft companion flange sub-assembly (rear).
SST: 09330-00021
Text in Illustration
*a
Hold
*b
Turn
(c) Using a 30 mm socket wrench, remove the transfer output shaft nut.
(d) Remove the O-ring.
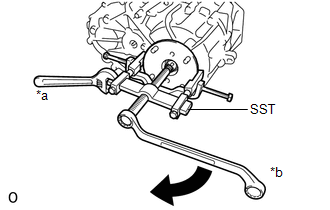
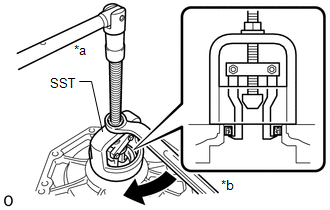
(e) Using SST, remove the output shaft companion flange sub-assembly (rear).
SST: 09950-40011
09951-04020
09952-04010
09953-04030
09954-04010
09955-04031
09957-04010
09958-04011
Text in Illustration
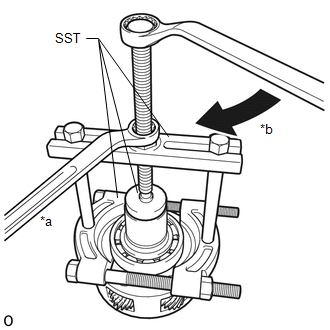
*a
Hold
*b
Turn
5. REMOVE TRANSFER OUTPUT SHAFT TYPE T OIL SEAL
6. REMOVE TRANSFER INDICATOR SWITCH
7. REMOVE REAR TRANSFER CASE
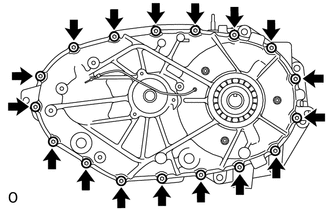
(a) Using a 40 IP ''TORX PLUS'' socket wrench or T40 ''TORX'' socket wrench, remove the 17 bolts.
(b) Remove the rear transfer case.
HINT:
If necessary, tap the rear transfer case with a plastic-faced hammer to remove it.
8. REMOVE SOLENOID COIL SUB-ASSEMBLY
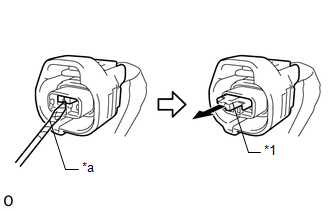
(a) Disconnect the solenoid coil sub-assembly terminal.
(1) Remove the retainer from the coupler as shown in the illustration.
Text in Illustration
*1
Retainer
*a
Protective Tape
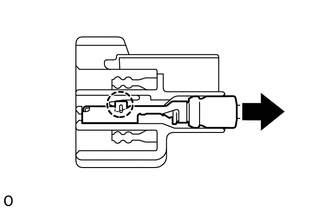
(2) Detach the claw and disconnect the solenoid coil sub-assembly terminal.
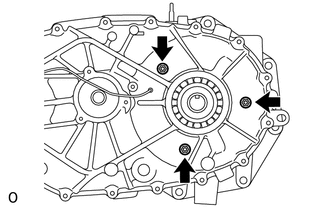
(b) Remove the 3 nuts and solenoid coil sub-assembly.
NOTICE:
Be careful not to drop the solenoid coil sub-assembly.
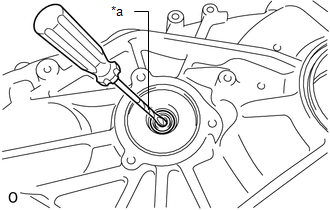
9. REMOVE TRANSFER COVER TYPE T OIL SEAL
(a) Using a screwdriver, remove the transfer cover type T oil seal.
Text in Illustration
*a
Protective Tape
NOTICE:
Do not damage the rear transfer case.
HINT:
Tape the screwdriver tip before use.
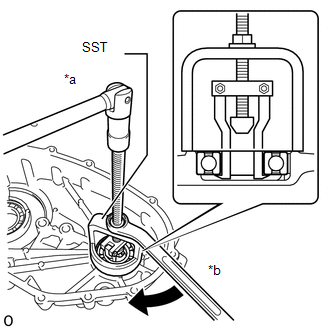
10. REMOVE TRANSFER DRIVEN SPROCKET BEARING (REAR)
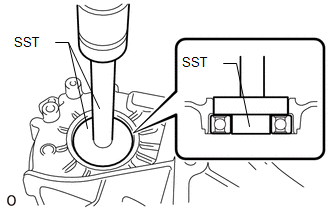
(a) Using SST, remove the transfer driven sprocket bearing (rear).
SST: 09612-65014
09612-01040
Text in Illustration
*a
Hold
*b
Turn
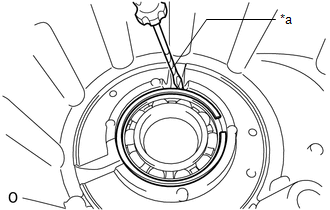
11. REMOVE REAR TRANSFER OUTPUT SHAFT RADIAL BALL BEARING
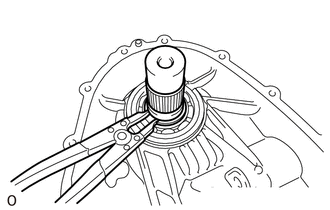
(a) Using a screwdriver, remove the transfer output shaft rear shaft snap ring.
Text in Illustration
*a
Protective Tape
HINT:
Tape the screwdriver tip before use.
(b) Remove the rear transfer output shaft radial ball bearing.
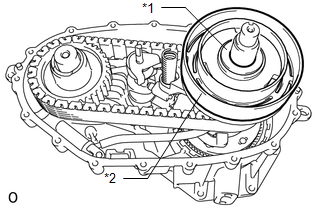
12. REMOVE SOLENOID COVER
(a) Remove the No. 1 transfer output shaft spacer and solenoid cover.
Text in Illustration
*1
No. 1 Transfer Output Shaft Spacer
*2
Solenoid Cover
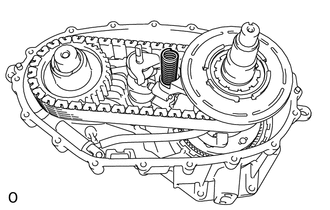
13. REMOVE TRANSFER SELECT RETURN SPRING
(a) Remove the transfer select return spring.
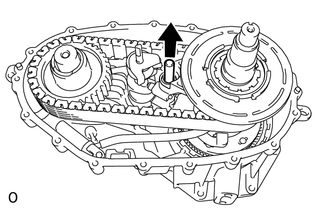
14. REMOVE TRANSFER HIGH AND LOW SHIFT FORK SHAFT
(a) Remove the transfer high and low shift fork shaft.
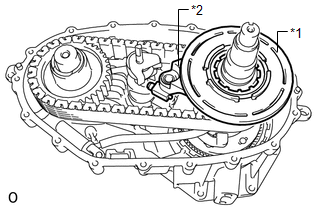
15. REMOVE SOLENOID LOCK PLATE WITH NO. 2 TRANSFER GEAR SHIFT FORK
(a) Remove the solenoid lock plate together with the No. 2 transfer gear shift fork.
Text in Illustration
*1
Solenoid Lock Plate
*2
No. 2 Transfer Gear Shift Fork
(b) Remove the No. 2 transfer gear shift fork from the solenoid lock plate.
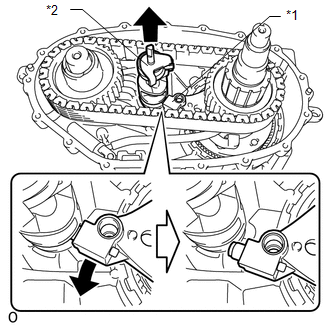
16. REMOVE CONTROL SELECT SHAFT SUB-ASSEMBLY
(a) Remove the No. 1 transfer gear shift fork from the side of the control select shaft sub-assembly as shown in the illustration. Then remove the control select shaft sub-assembly.
Text in Illustration
*1
No. 1 Transfer Gear Shift Fork
*2
Control Select Shaft Sub-assembly
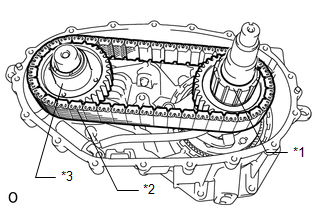
17. REMOVE TRANSFER DRIVE SPROCKET SUB-ASSEMBLY
(a) Remove the transfer drive sprocket sub-assembly together with the front transfer drive chain and transfer driven sprocket.
Text in Illustration
*1
Transfer Drive Sprocket Sub-assembly
*2
Front Transfer Drive Chain
*3
Transfer Driven Sprocket
NOTICE:
Do not drop the transfer drive sprocket sub-assembly, front transfer drive chain and transfer driven sprocket.
(b) Remove the transfer drive sprocket sub-assembly and transfer driven sprocket from the front transfer drive chain.
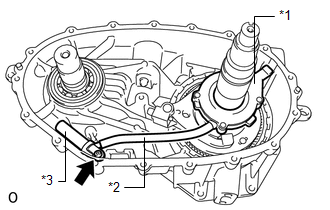
18. REMOVE TRANSFER OIL PUMP BODY SUB-ASSEMBLY
(a) Using a T25 ''TORX'' socket wrench, remove the bolt and the transfer oil pump body sub-assembly together with the transfer oil tube and transfer oil strainer sub-assembly.
Text in Illustration
*1
Transfer Oil Pump Body Sub-assembly
*2
Transfer Oil Tube
*3
Transfer Oil Strainer Sub-assembly
HINT:
The sleeve does not have to be removed.
The transfer oil strainer sub-assembly comes with the sleeve installed.
(b) Remove the transfer oil tube from the transfer oil pump body sub-assembly.
(c) Remove the transfer oil strainer sub-assembly from the transfer oil tube.
19. REMOVE TRANSFER CASE MAGNET
(a) Remove the transfer case magnet.
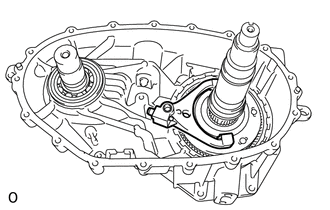
20. REMOVE NO. 1 TRANSFER GEAR SHIFT FORK
(a) Remove the No. 1 transfer gear shift fork.
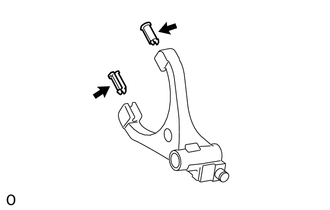
(b) Inspect the gear shift fork pad (See page ).
(c) Remove the 2 gear shift fork pads from the No. 1 transfer gear shift fork.
HINT:
It is not necessary to remove the 2 gear shift fork pads unless they are being replaced.
21. REMOVE REAR TRANSFER OUTPUT SHAFT
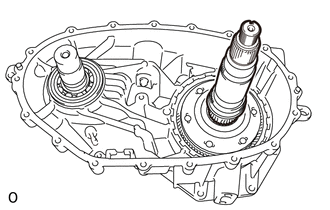
(a) Remove the rear transfer output shaft.
22. REMOVE TRANSFER HIGH AND LOW CLUTCH SLEEVE
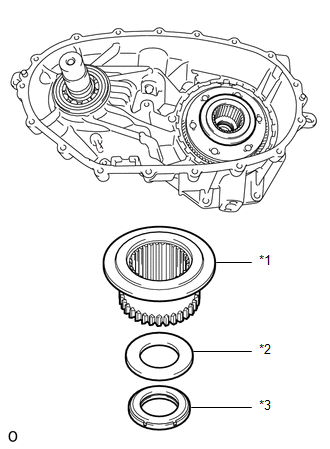
(a) Remove the transfer high and low clutch sleeve, No. 2 transfer output shaft spacer and transfer lower planetary gear bearing.
Text in Illustration
*1
Transfer High and Low Clutch Sleeve
*2
No. 2 Transfer Output Shaft Spacer
*3
Transfer Lower Planetary Gear Bearing
23. REMOVE TRANSFER LOWER PLANETARY GEAR ASSEMBLY
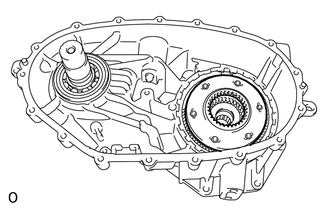
(a) Remove the transfer lower planetary gear assembly.
(b) Using SST, remove the transfer input gear radial ball bearing.
SST: 09950-00020
SST: 09950-00030
SST: 09950-60010
09951-00480
Text in Illustration
*a
Hold
*b
Turn
24. REMOVE TRANSFER LOWER PLANETARY RING GEAR
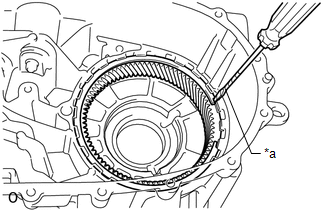
(a) Using a screwdriver, remove the transfer lower planetary ring gear hole snap ring.
Text in Illustration
*a
Protective Tape
HINT:
Tape the screwdriver tip before use.
(b) Remove the transfer lower planetary ring gear.
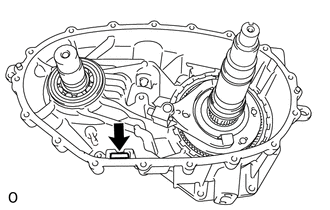
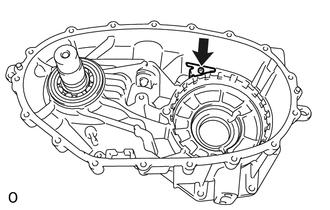
25. REMOVE TRANSFER OIL SEPARATOR
(a) Using a T25 ''TORX'' socket wrench, remove the bolt and transfer oil separator.