INSPECTION
PROCEDURE
1. INSPECT OUTPUT SHAFT COMPANION FLANGE SUB-ASSEMBLY (FRONT)
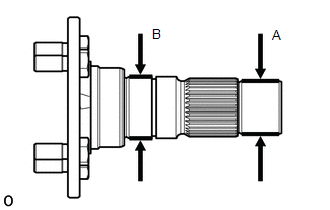
(a) Using a micrometer, measure the outer diameter of the output shaft companion flange sub-assembly (front) journal surface.
Minimum Diameter:
Journal | Specified Condition |
A |
34.962 mm (1.376 in.) |
B |
39.955 mm (1.573 in.) |
If the outer diameter is less than the minimum, replace the output shaft companion flange sub-assembly (front). |
 |
2. INSPECT TRANSFER LOW PLANETARY GEAR ASSEMBLY
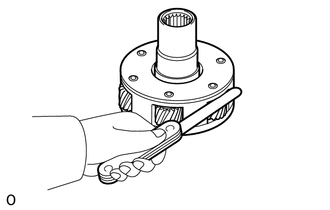
(a) Using a feeler gauge, measure the thrust clearance of the pinion gear.
Maximum clearance:
0.93 mm (0.037 in.)
If the clearance is more than the maximum, replace the transfer low planetary gear assembly. |
 |
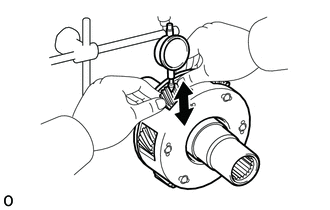
(b) Using a dial indicator, measure the radial clearance of the pinion gear.
Maximum clearance:
0.021 mm (0.0008 in.)
If the clearance is more than the maximum, replace the transfer low planetary gear assembly. |
 |
3. INSPECT REAR TRANSFER OUTPUT SHAFT
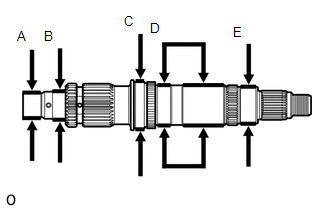
(a) Using a micrometer, measure the diameter of the rear transfer output shaft journal.
Minimum Diameter:
Journal | Specified Condition |
A |
29.987 mm (1.181 in.) |
B |
34.848 mm (1.372 in.) |
C |
58.000 mm (2.284 in.) |
D |
49.110 mm (1.934 in.) |
E |
44.874 mm (1.767 in.) |
If the diameter is less than the minimum, replace the rear transfer output shaft. |
 |
4. INSPECT SOLENOID LOCK PLATE AND NO. 2 TRANSFER GEAR SHIFT FORK CLEARANCE
(a) Using a vernier caliper, measure the thickness of the No. 2 transfer gear shift fork claw.
Standard thickness (A):
6.90 to 7.06 mm (0.272 to 0.277 in.) |
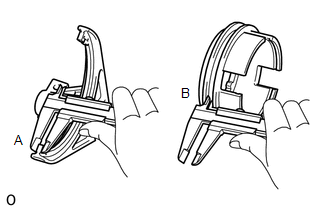 |
(b) Using a vernier caliper, measure the width of the groove of the solenoid lock plate.
Standard width (B):
7.16 to 7.32 mm (0.282 to 0.288 in.)
(c) Calculate the clearance between the solenoid lock plate and No. 2 transfer gear shift fork claw.
Maximum clearance (B) - (A):
0.42 mm (0.017 in.)
If the clearance is more than the maximum, replace the solenoid lock plate or No. 2 transfer gear shift fork.
5. INSPECT NO. 1 TRANSFER GEAR SHIFT FORK AND NO. 2 TRANSFER GEAR SHIFT FORK
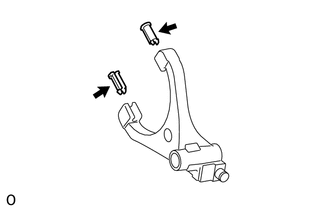
(a) Check the gear shift fork pad for wear or damage.
If necessary, replace the gear shift fork pad. |
 |
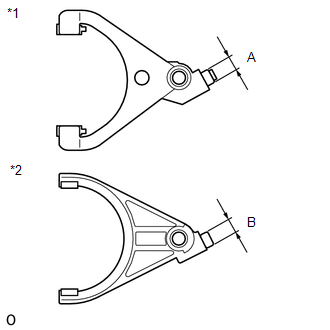
(b) Using a micrometer, measure the outer diameter of the No. 1 transfer gear shift fork and No. 2 transfer gear shift fork.
Minimum Diameter:
Diameter | Specified Condition |
A |
12.586 mm (0.496 in.) |
B |
12.586 mm (0.496 in.) |
Text in Illustration
*1 |
No. 1 Transfer Gear Shift Fork |
*2 |
No. 2 Transfer Gear Shift Fork |
If the diameter is less than the minimum, replace the No. 1 transfer gear shift fork or No. 2 transfer gear shift fork. |
 |
6. INSPECT TRANSFER HIGH AND LOW CLUTCH SLEEVE
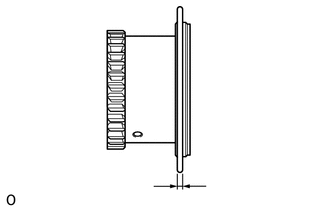
(a) Using a vernier caliper, measure the thickness of the transfer high and low clutch sleeve.
Minimum thickness:
3.00 mm (0.1182 in.)
If the thickness is less than the minimum, replace the transfer high and low clutch sleeve. |
 |
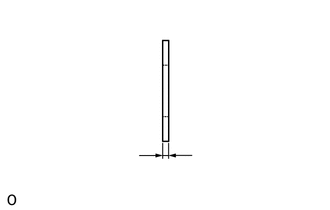
7. INSPECT TRANSFER OUTPUT SHAFT SPACER
(a) Using a vernier caliper, measure the thickness of the No. 1 transfer output shaft spacer and No. 2 transfer output shaft spacer.
Minimum Thickness:
Transfer Output Shaft Spacer | Minimum Thickness |
No. 1 Transfer Output Shaft Spacer |
2.80 mm (0.111 in.) |
No. 2 Transfer Output Shaft Spacer |
4.045 mm (0.160 in.) |
If the thickness is less than the minimum, replace the transfer output shaft spacer. |
 |
8. INSPECT SOLENOID COIL SUB-ASSEMBLY
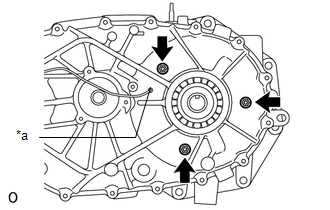
(a) Install the solenoid coil sub-assembly with the 3 nuts.
Torque:
9,5 N·m {97 kgf·cm, 84 in·lbf} Text in Illustration
*a |
Rear Transfer Case Hole |
Make sure that the solenoid coil sub-assembly terminal extends out from the rear transfer case hole. |
 |
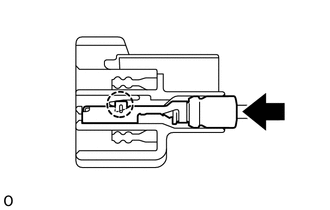
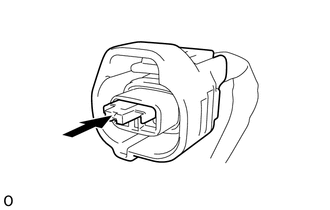
(b) Connect the solenoid coil sub-assembly terminal.
(1) Attach the claw to connect the solenoid coil sub-assembly terminal. |
 |
(2) Install the retainer to the coupler. |
 |
(c) Measure the resistance according to the value(s) in the table below. 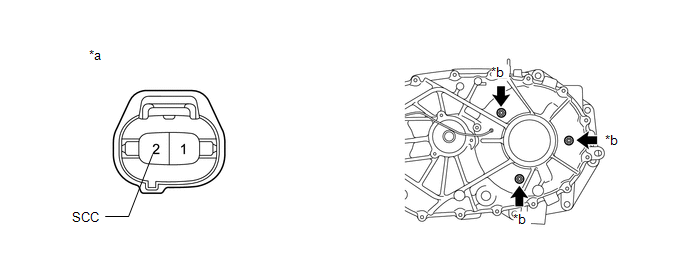
Standard Resistance:
Tester Connection | Condition | Specified Condition |
2 (SCC) - Case GND |
Always |
1.62 to 1.78 Ω |
Text in Illustration
*a |
Component without harness connected
(Solenoid Coil Sub-assembly) |
*b |
Case GND |
HINT:
For case ground, perform the measurement at one of the locations indicated by the arrows. |