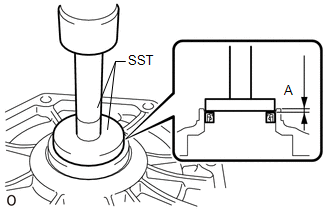
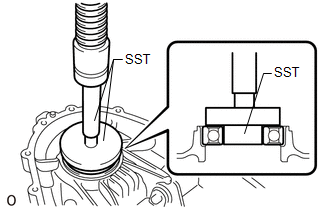
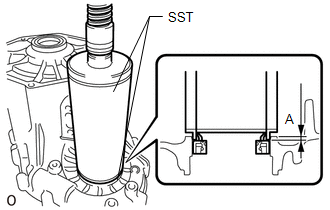
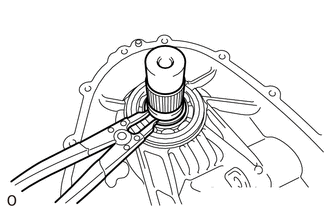
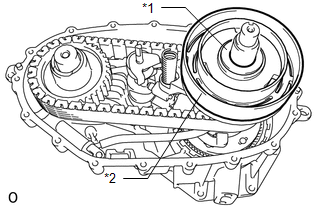
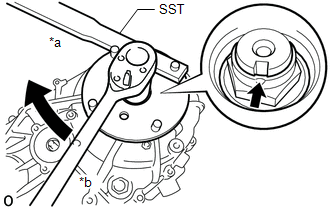
(a) Install the output shaft companion flange sub-assembly (front).
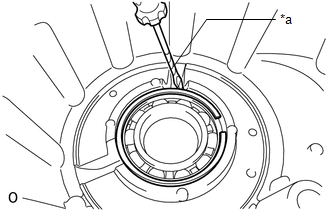
(b) Using a snap ring expander, install the shaft snap ring.
5. INSTALL TRANSFER OIL SEPARATOR
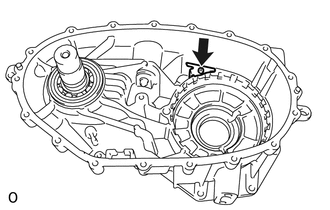
(a) Using a T25 ''TORX'' socket wrench, install the bolt and transfer oil separator.
Torque:
7,6 N·m {77 kgf·cm, 67 in·lbf}
6. INSPECT TRANSFER LOWER PLANETARY RING GEAR
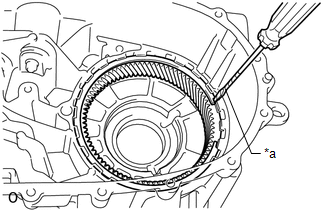
(a) Install the transfer lower planetary ring gear.
(b) Using a screwdriver, install the transfer lower planetary ring gear hole snap ring.
Text in Illustration
*a
Protective Tape
HINT:
Tape the screwdriver tip before use.
7. INSTALL TRANSFER LOWER PLANETARY GEAR ASSEMBLY
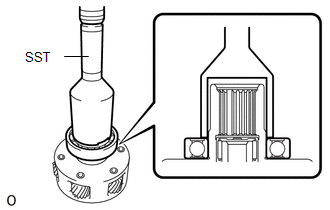
(a) Using SST and a press, press in a new transfer input gear radial ball bearing.
SST: 09214-76011
NOTICE:
The transfer input gear radial ball bearing should be installed completely.
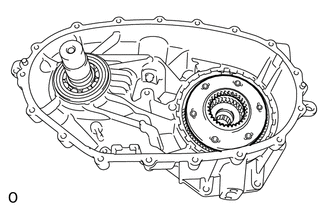
(b) Install the transfer lower planetary gear assembly.
8. INSTALL TRANSFER HIGH AND LOW CLUTCH SLEEVE
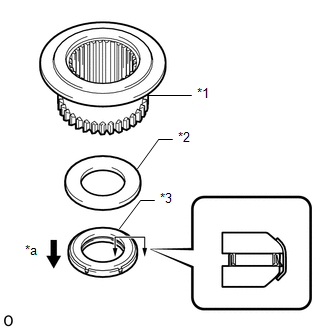
(a) Install the transfer lower planetary gear bearing, the No. 2 transfer output shaft spacer and the transfer high and low clutch sleeve.
Text in Illustration
*1
Transfer High and Low Clutch Sleeve
*2
No. 2 Transfer Output Shaft Spacer
*3
Transfer Lower Planetary Gear Bearing
*a
Transfer Lower Planetary Gear Assembly Side
NOTICE:
Make sure that the transfer lower planetary gear bearing is installed facing the correct direction.
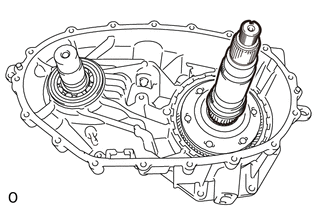
9. INSTALL REAR TRANSFER OUTPUT SHAFT
(a) Install the rear transfer output shaft.
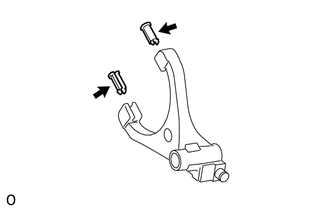
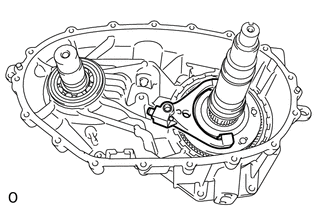
10. INSTALL NO. 1 TRANSFER GEAR SHIFT FORK
(a) Install the 2 gear shift fork pads to the No. 1 transfer gear shift fork.
(b) Install the No. 1 transfer gear shift fork.
11. INSTALL TRANSFER CASE MAGNET
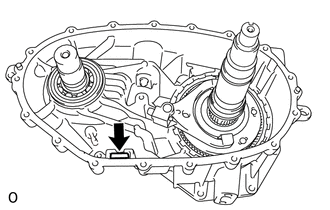
(a) Install the transfer case magnet.
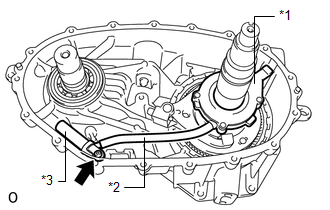
12. INSTALL TRANSFER OIL PUMP BODY SUB-ASSEMBLY
(a) Install the transfer oil strainer sub-assembly to the transfer oil tube.
(b) Install the transfer oil tube to the transfer oil pump body sub-assembly.
(c) Install the transfer oil pump body sub-assembly together with the transfer oil tube and transfer oil strainer sub-assembly.
Text in Illustration
*1
Transfer Oil Pump Body Sub-assembly
*2
Transfer Oil Tube
*3
Transfer Oil Strainer Sub-assembly
(d) Using a T25 ''TORX'' socket wrench, install the bolt.
Torque:
7,6 N·m {77 kgf·cm, 67 in·lbf}
13. INSTALL TRANSFER DRIVE SPROCKET SUB-ASSEMBLY
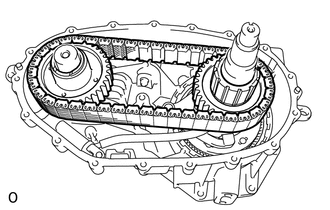
(a) Install the transfer drive sprocket sub-assembly and transfer driven sprocket to the front transfer drive chain.
(b) Install the transfer drive sprocket sub-assembly together with the front transfer drive chain and transfer driven sprocket.
NOTICE:
Do not drop the transfer drive sprocket sub-assembly, front transfer drive chain and transfer driven sprocket.
14. INSTALL CONTROL SELECT SHAFT SUB-ASSEMBLY
(a) Install the control select shaft sub-assembly.
NOTICE:
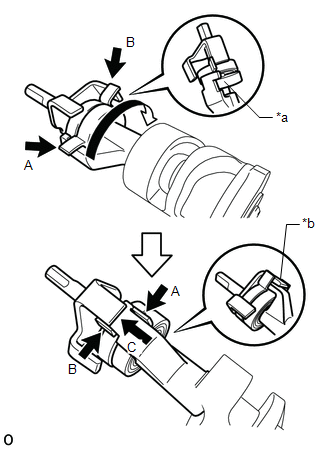
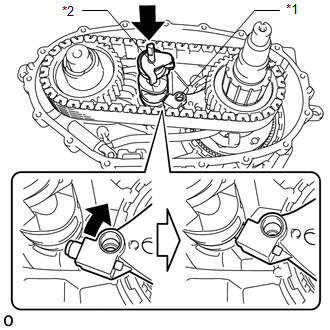
When removing the rear transfer case, the spring of the control select shaft sub-assembly may become detached. Check the condition of the spring before installing the control select shaft sub-assembly, and if the spring is not in the correct position, correct the spring as shown in the illustration.
CAUTION:
Wear protective gloves to avoid injuries to your hands.
Take care when performing this procedure as the spring is under high tension.
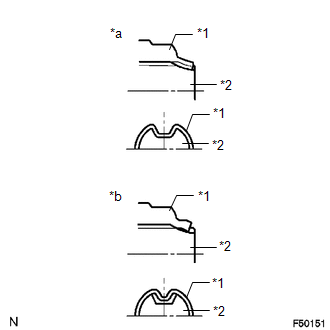
(1) Make sure the spring is positioned as indicated by arrows A and B, and then rotate the control select shaft in the direction indicated by the arrow shown in the illustration.
(2) Rotate the control select shaft until the part of the spring indicated by arrow A moves past the part indicated by arrow B.
(3) Slide the control select shaft in the direction indicated by arrow C in the illustration to return the spring to the correct position.
Text in Illustration
*a
Part of the Spring Shown by Arrow A in the Open Position
*b
Control Select Shaft Sub-assembly in Correct Position
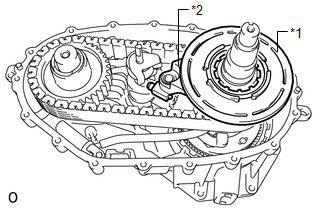
(b) Install the No. 1 transfer gear shift fork to the side of the control select shaft sub-assembly as shown in the illustration.
Text in Illustration
*1
No. 1 Transfer Gear Shift Fork
*2
Control Select Shaft Sub-assembly
15. INSTALL SOLENOID LOCK PLATE WITH NO. 2 TRANSFER GEAR SHIFT FORK
(a) Install the No. 2 transfer gear shift fork to the solenoid lock plate.
(b) Install the solenoid lock plate together with the No. 2 transfer gear shift fork.
Text in Illustration
*1
Solenoid Lock Plate Assembly
*2
No. 2 Transfer Gear Shift Fork Sub-assembly
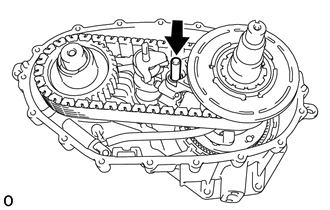
16. INSTALL TRANSFER HIGH AND LOW SHIFT FORK SHAFT
(a) Install the transfer high and low shift fork shaft.
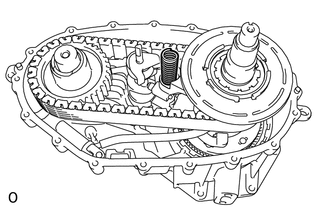
17. INSTALL TRANSFER SELECT RETURN SPRING
(a) Install the transfer select return spring.
18. INSTALL SOLENOID COVER
(a) Install the solenoid cover and No. 1 transfer output shaft spacer.
Text in Illustration
*1
No. 1 Transfer Output Shaft Spacer
*2
Solenoid Cover
19. INSTALL REAR TRANSFER OUTPUT SHAFT RADIAL BALL BEARING
(a) Install the rear transfer output shaft radial ball bearing.
(b) Using a screwdriver, install the transfer output shaft rear shaft snap ring.
Text in Illustration
*a
Protective Tape
HINT:
Tape the screwdriver tip before use.
20. INSTALL TRANSFER DRIVEN SPROCKET BEARING (REAR)
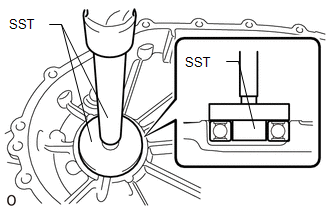
(a) Using SST and a hammer, tap in a new transfer driven sprocket bearing (rear).
SST: 09950-60010
09951-00340
09952-06010
SST: 09950-60020
09951-00730
SST: 09950-70010
09951-07150
NOTICE:
The transfer driven sprocket bearing (rear) should be installed completely.
21. INSTALL TRANSFER COVER TYPE T OIL SEAL
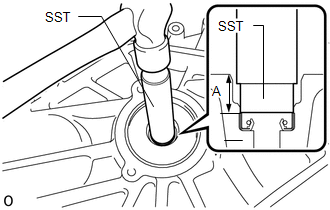
(a) Using SST and a hammer, tap in a new transfer cover type T oil seal.
SST: 09950-70010
09951-07100
SST: 09950-60010
09951-00190
Drive in depth (A):
14.4 to 15.4 mm (0.567 to 0.606 in.)
22. INSTALL SOLENOID COIL SUB-ASSEMBLY
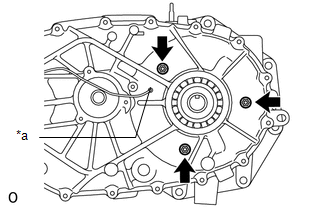
(a) Install the solenoid coil sub-assembly with the 3 nuts.
Torque:
9,5 N·m {97 kgf·cm, 84 in·lbf}
Text in Illustration
*a
Rear Transfer Case Hole
HINT:
Make sure that the solenoid coil sub-assembly terminal extends out from the rear transfer case hole.
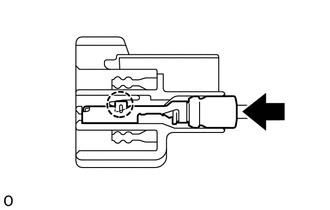
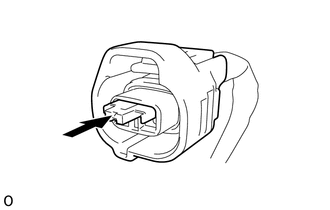
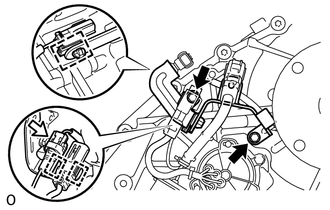
(b) Connect the solenoid coil sub-assembly terminal.
(1) Attach the claw to connect the solenoid coil sub-assembly terminal.
(2) Install the retainer to the coupler.
23. INSTALL REAR TRANSFER CASE
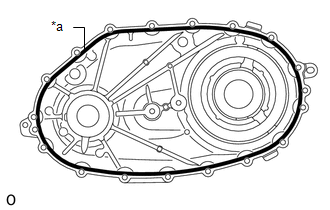
(a) Apply seal packing to the rear transfer case as shown in the illustration.
Seal packing:
Toyota Genuine Seal Packing 1281, Three Bond 1281 or equivalent
Text in Illustration
*a
Seal Packing
NOTICE:
If the removed rear transfer case will be reused: After removing the rear transfer case, be sure to perform the following before reinstalling it: 1) using a knife, cut off any old seal packing on the contact surface of the rear transfer case, 2) clean off any remaining old seal packing from the contact surface of the rear transfer case, and 3) reapply seal packing to the rear transfer case.
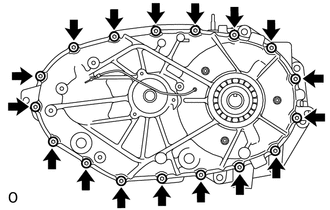
(b) Using a 40 IP ''TORX PLUS'' socket wrench or T40 ''TORX'' socket wrench, install the 17 bolts.
Torque:
35 N·m {357 kgf·cm, 26 ft·lbf}
NOTICE:
Tighten the bolts of the rear transfer case within 10 minutes of applying the seal packing. The seal packing will dry very quickly.