Installation
1. INSTALL BRAKE MASTER CYLINDER SUB-ASSEMBLY
NOTICE:
When install a new brake master cylinder sub-assembly, remove the protectors from the piston and outlet ports.
(a) Install a new O-ring to the brake master cylinder sub-assembly.
(b) Apply a light layer of lithium soap base glycol grease to the entire circumference of the brake master cylinder sub-assembly and inner surface of the brake booster assembly as shown in the illustration. |
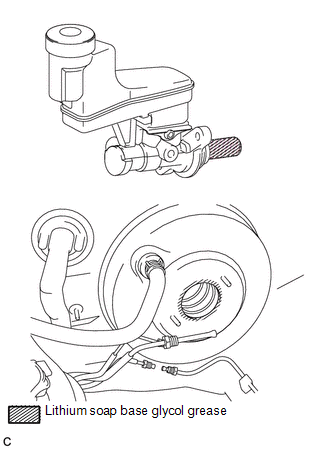 |
(c) Install the brake master cylinder sub-assembly and front brake tube way with the 2 nuts. Torque: 13 N·m {130 kgf·cm, 9 ft·lbf} NOTICE:
|
 |
(d) Using a union nut wrench, connect the 2 brake lines and install the No. 1 front brake tube to the brake master cylinder sub-assembly. Text in Illustration
Torque: Specified Tightening Torque : 20 N·m {199 kgf·cm, 14 ft·lbf} NOTICE:
HINT:
|
 |
(e) Using a union nut wrench, connect the 2 brake lines to the front brake tube way. Text in Illustration
Torque: Specified Tightening Torque : 15 N·m {155 kgf·cm, 11 ft·lbf} NOTICE:
HINT:
|
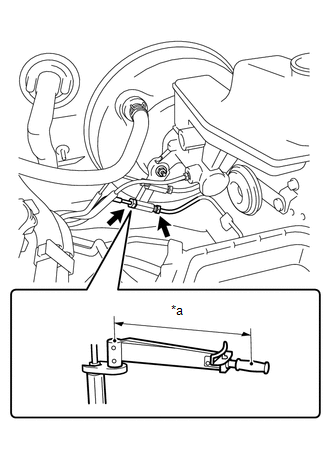 |
(f) Connect the connector and engage the clamp. |
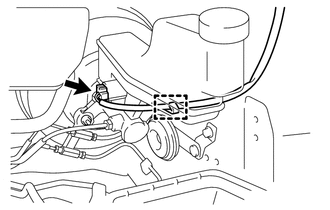 |
2. FILL RESERVOIR WITH BRAKE FLUID

3. BLEED BRAKE MASTER CYLINDER
4. BLEED BRAKE LINE
5. INSPECT FOR BRAKE FLUID LEAK
6. INSPECT FLUID LEVEL IN RESERVOIR
7. INSTALL AIR CLEANER FILTER ELEMENT SUB-ASSEMBLY
8. INSTALL AIR CLEANER CAP SUB-ASSEMBLY (for 1AR-FE)
9. INSTALL AIR CLEANER CAP SUB-ASSEMBLY (for 2GR-FE)
Test yourself
A quick Toyota Venza quiz: every answer comes with an explanation and a link to the manual page.