Axle And Differential
Removal
In this manual: Axle And Differential
~1min read
REMOVAL CAUTION / NOTICE / HINT

HINT:
- Use the same procedure for the RH side and LH side.
- The procedure listed below is for the LH side.
1. REMOVE REAR WHEEL
2. SEPARATE REAR SPEED SENSOR
3. REMOVE REAR AXLE SHAFT NUT
4. SEPARATE REAR DISC BRAKE CALIPER ASSEMBLY
5. REMOVE REAR DISC
6. REMOVE REAR AXLE HUB AND BEARING ASSEMBLY
7. SEPARATE NO. 3 PARKING BRAKE CABLE ASSEMBLY
8. REMOVE REAR STRUT ROD ASSEMBLY
9. REMOVE REAR AXLE CARRIER SUB-ASSEMBLY
(a) Loosen the 2 bolts. NOTICE: Since stopper nuts are used, loosen the bolts. |
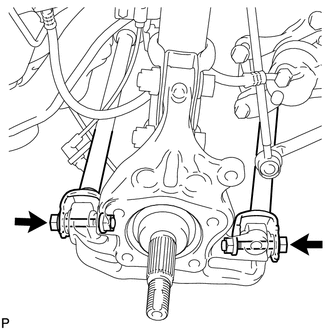 |
(b) Remove the 2 bolts and 2 nuts, and separate the rear shock absorber with coil spring (lower side) from the rear axle carrier sub-assembly. NOTICE:
|
 |
(c) Remove the 2 bolts, 2 nuts and rear axle carrier sub-assembly. NOTICE:
|
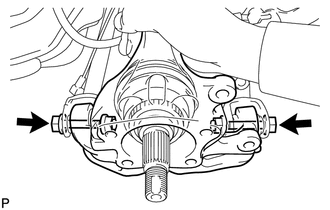 |
Test yourself
A quick Toyota Venza quiz: every answer comes with an explanation and a link to the manual page.
Was this page helpful?