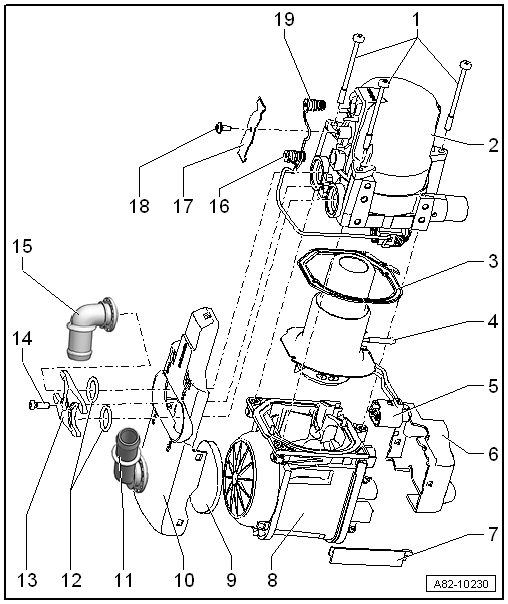
Auxiliary heater control unit -J364- with combustion air blower -V6-
Note The auxiliary heater control unit -J364- and the combustion air blower -V6- with housing form one component and cannot be dismantled. The reason is the seal between the auxiliary heater control unit -J364- and the housing.
9 -
Noise insulation
10 -
Cover
Removing and installing → Chapter.
11 -
Coolant connection
Mark installation position before detaching
12 -
O-rings
Renew.
13 -
Retaining plate
14 -
Bolt
4 N·m
15 -
Coolant connection
Mark installation position before detaching
16 -
Temperature sensor -G18-
Removing and installing → Chapter.
17 -
Retaining spring
18 -
Bolt
4 N·m
19 -
Overheating sensor -G189-
Removing and installing → Chapter.
?
Test yourself
A quick Volkswagen Golf quiz: every answer comes with an explanation and a link to the manual page.
 Note The auxiliary heater control unit -J364- and the combustion air blower -V6- with housing form one component and cannot be dismantled. The reason is the seal between the auxiliary heater control unit -J364- and the housing.