General body repairs, interior

Removing and installing lock carrier trim

~1min read

Special tools and workshop equipment required

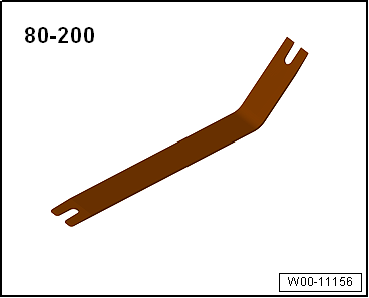
Removal lever -80 - 200

Removing

Vehicles with towing bracket, saloon

  • Remove luggage compartment floor towards rear.
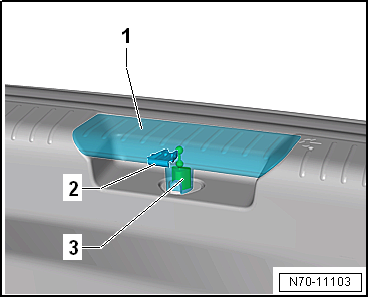
  • Release clip -2- on cable end-piece -1-.
  • Remove cable end-piece -1- upwards from Bowden cable -3-.
Removing and installing lock carrier trim

Vehicles with towing bracket, estate

  • Turn fasteners on left and right of luggage compartment floor by 90° to release them, and remove luggage compartment floor towards rear from vehicle.
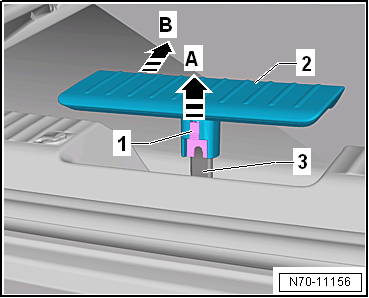
  • Release clip -1- on lever for Bowden cable -2-, and push it upwards -arrow A-.
  • Remove lever for Bowden cable -2- towards front from Bowden cable -3--arrow B-.

Continued for all vehicles

Removing and installing lock carrier trim
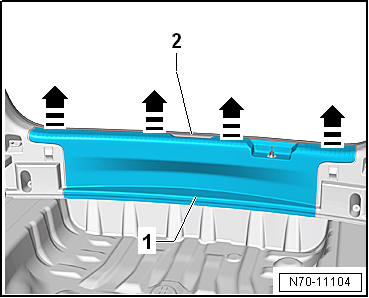
  • Pull off rear lid seal -2- in area of lock carrier trim -1-.
  • Release lock carrier trim -1- in area of retaining clips from body mountings -arrows- using removal lever -80 - 200-.

Vehicles with towing bracket

  • Disconnect connector for trailer towing attachment locked warning lamp -K226-.

Continued for all vehicles

  • Remove lock carrier trim -1- upwards.

Installing

Note
  • Before installing, check all fasteners for damage and renew if necessary.
  • Remove any retaining clips left in body mountings using removal tool -T40280- and fit them in lock carrier trim for installation.
  • Following installation, ensure that the lock carrier trim is positioned in rear lid seal beading.

Installation is carried out in reverse order.

Removing and installing lock carrier trim

Test yourself

A quick Volkswagen Golf quiz: every answer comes with an explanation and a link to the manual page.