Emission control
Assembly overview - Emission control
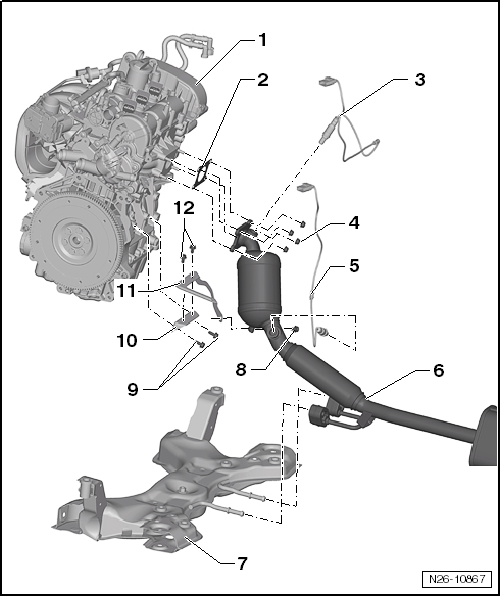
Assembly overview - Emission control, vehicles with close-coupled emission control
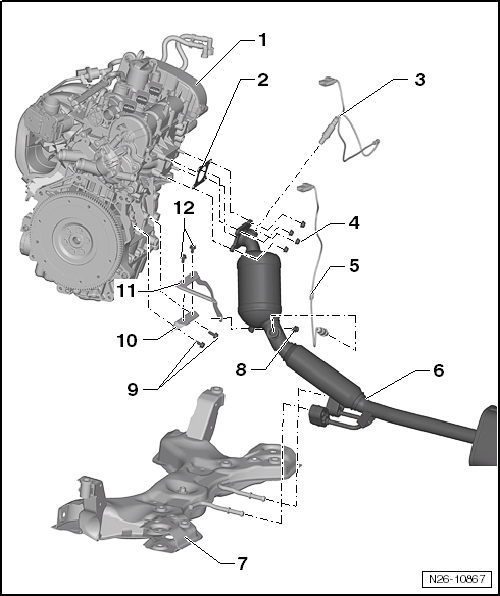
- Engine
- Gasket
- replace after removal
- Lambda sensor -G39-
- Grease only the thread with "G 052 112 A3"; "G 052 112 A3" must not get onto the slots of the probe body
- Removing and Installing "Lambda Sensor 1 before Catalytic Converter -GX10-"
- If leaking, cut open the sealing ring and replace it
- 50 N·m
- Nut
- Observe installation sequence
- 23 N·m
- Lambda sensor downstream of catalytic converter -G130-
- Grease only the thread with "G 052 112 A3"; "G 052 112 A3" must not get onto the slots of the probe body
- Removing and Installing "Lambda Sensor 1 after Catalytic Converter -GX7-"
- If leaking, cut open the sealing ring and replace it
- 50 N·m
- Exhaust front pipe
- Remove and install
- Subframe with bracket
- Removing and installing → Suspension, Axles, Steering
- Bolt
- Catalytic converter to bracket
- 23 N·m
- Bolt
- Bracket to cylinder block
- 23 N·m
- Bracket
- to cylinder block
- Observe installation sequence
- Bracket
- Observe installation sequence
- Bolt
- 23 N·m

Note
Before installing the lock nuts, treat the stud bolts with high-temperature bolt paste -N 052.112.00- according to TL 521 12.
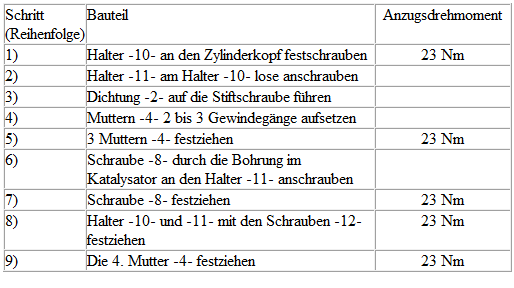
Installation sequence from catalytic converter to cylinder head
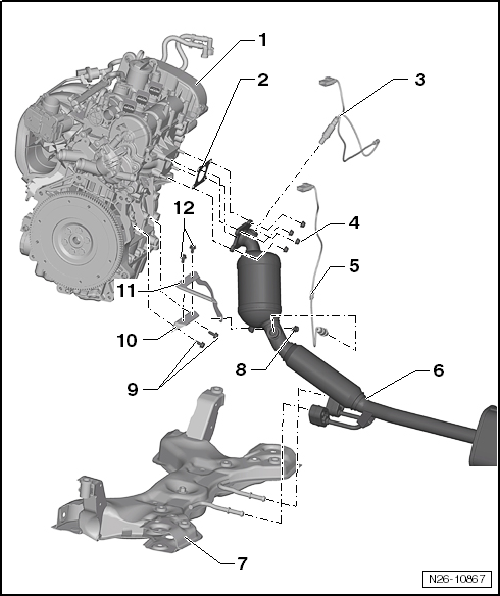
Tightening sequence:
Assembly overview - Emission control, vehicles with underbody emission control
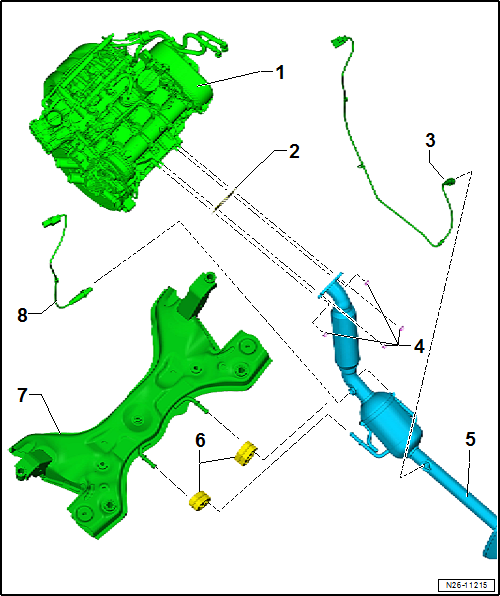
- Engine
- Gasket
- replace after removal
- Lambda sensor 1 after catalytic converter -GX7-
- Grease only the thread with "G 052 112 A3"; "G 052 112 A3" must not get onto the slots of the probe body
- Remove and install
- If leaking, cut open the sealing ring and replace it
- 50 N·m
- Nut
- 23 N·m
- Exhaust front pipe
- Remove and install
- Mounting
- Replace if damaged
- Subframe with bracket
- Removing and installing → Suspension, Axles, Steering
- Lambda sensor 1 before catalytic converter -GX10-
- Grease only the thread with "G 052 112 A3"; "G 052 112 A3" must not get onto the slots of the probe body
- Remove and install
- If leaking, cut open the sealing ring and replace it
- 50 N·m
Removing and installing catalytic converter
Required Special Tools, Test and Measuring Equipment and Auxiliary Items
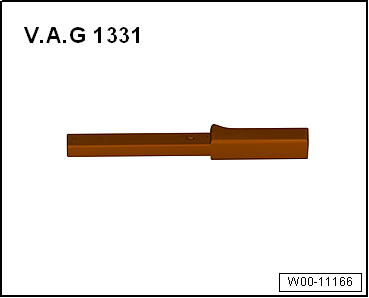
- Torque Wrench -V.A.G 1331-
Removing
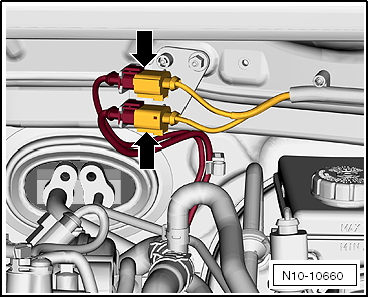
- Unlock and disconnect the lambda sensor connectors -arrows-.
Connector color brown - lambda sensor 1 upstream of catalytic converter -GX10-
Connector color black - lambda sensor 1 downstream of catalytic converter -GX7-
- Clip connector out of bracket.
- Route out wiring harness.
- If necessary, separate the exhaust system "Separating exhaust pipes/mufflers".
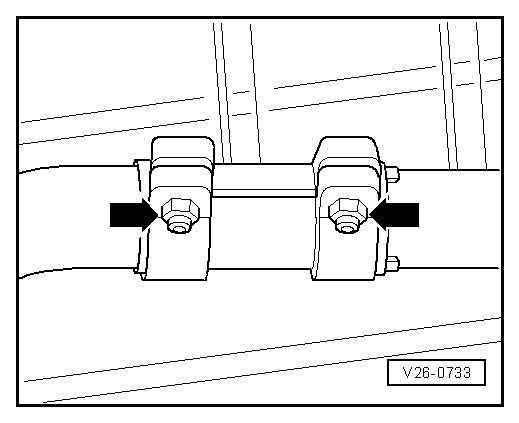
- If fitted, loosen clamp sleeve -arrows-.
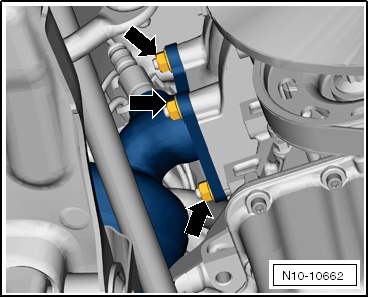
- Unscrew fastening nuts -arrows- and pull catalytic converter off the studs.

Note
4 pieces.
Vehicles with close-coupled emission control:
- Unscrew bolt -8-.
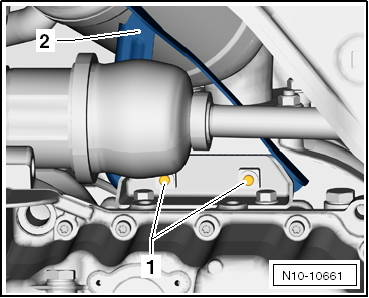
- Unscrew fastening bolts -1-.
- Remove bracket -2-.
Continued for all vehicles:
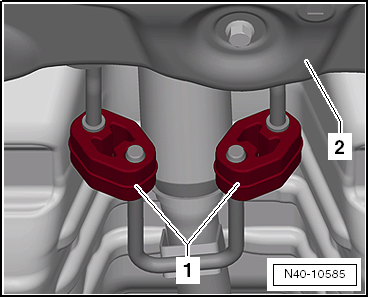
- Pull retaining rings -1- for exhaust pipe off engine carrier -2-.
Installing
Installation is carried out in the reverse order. Observe the following:
Observe installation sequence.
Observe the installation position of the clamp sleeve "Installation position of clamp sleeve".

Note
- After assembly work on the exhaust system, make sure that the exhaust system is not under tension and has sufficient clearance to the body. If necessary, loosen the double clamp and align the muffler and exhaust pipe so that there is sufficient clearance to the body everywhere and the mountings are evenly loaded.
- Replace self-locking nuts.
- Before installing the lock nuts, treat the stud bolts with high-temperature bolt paste -N 052.112.00- according to TL 521 12.
Tightening torque:
