Checking and adjusting the steering head
1. Stand the vehicle on a level surface
WARNINGSecurely support the vehicle so that there is no danger of it falling over.
NOTE:
Place the vehicle on a suitable stand so that the front wheel is elevated.
2. Check:
- Steering head Grasp the bottom of the front fork legs and gently rock the front fork.
3. Remove:
- Upper bracket Refer to "STEERING HEAD" on page 4-52.
4. Adjust:
- Steering head
a. Remove the lock washer "1", the upper ring nut "2", and the rubber washer "3".
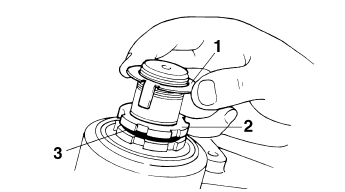
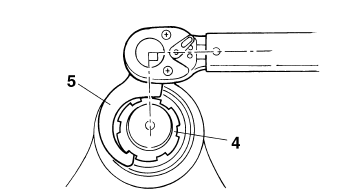
b. Tighten the lower ring nut "4" with a steering nut wrench "5".
NOTE:
Set the torque wrench at a right angle to the steering nut wrench.

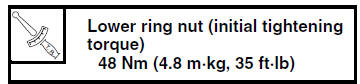
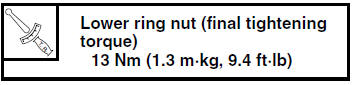
c. Loosen the lower ring nut "4" completely, and then tighten it to specification with a steering nut wrench.
WARNING Do not overtighten the lower ring nut.
d. Check the steering head for looseness or binding by turning the front fork all the way in both directions. If any binding is felt, remove the lower bracket and check the upper and lower bearings.
Refer to "STEERING HEAD" on page 4-52.
e. Install the rubber washer "3".
f. Install the upper ring nut "2".
g. Finger tighten the upper ring nut "2", and then align the slots of both ring nuts. If necessary, hold the lower ring nut and tighten the upper ring nut until their slots are aligned.
NOTE:
Make sure the lock washer tabs "a" sit correctly in the ring nut slots "b".

5. Install:
- Upper bracket Refer to "STEERING HEAD" on page 4-52.
Test yourself
A quick Yamaha YZF-R125 quiz: every answer comes with an explanation and a link to the manual page.