Removal, Installation and Inspection of Fuel Rail and Injectors
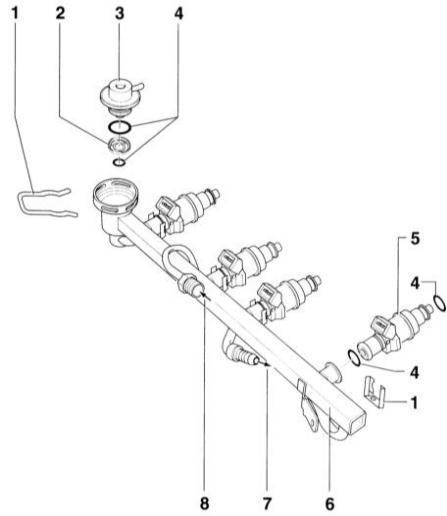 Fuel Rail with Injectors 1 - retaining clip Make sure it is correctly positioned on the injector and rail. 2 - strainer 3 - fuel pressure regulator 4 - O-ring Replace if damaged 5 - injector 6 - fuel rail 7 - fuel return connection 8 - fuel supply connection
REMOVAL
PROCEDURE
1. Disconnect the vacuum hose and unplug the connector of the changeover valve on the intake manifold. Remove the spark plug connectors.
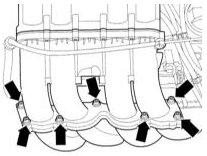
2. Unscrew the Torx-head bolts (indicated by arrows) and swing the upper part of the intake manifold aside.
CAUTION
The illustration shows the 1.8 L engine.3. Disconnect the vacuum hose from the fuel pressure regulator.
CAUTION
The fuel system is under pressure! When opening the system, fuel may spray out; collect it with a rag. Wear safety goggles. Do not smoke or use open flames, risk of fire! Keep a fire extinguisher ready.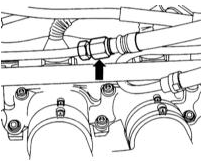
4. Disconnect the supply line from the fuel rail, catching the escaping fuel with a rag.
5. Unplug the connector to the injectors.
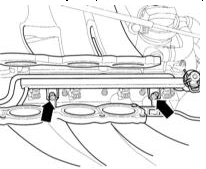
6. Remove the fuel rail mounting bolts and lift the fuel rail with the injectors out of the exhaust manifold.
CAUTION
The illustration shows the 150 L engine.7. Remove the clamps of the injector and fuel rail connection. Pull the injectors out of the fuel rail. The injectors are only inserted, not secured.
CAUTION
Do not swap injectors; install them in their original positions.INSTALLATION
CAUTION
When installing the injectors, take care not to damage the O-rings and the injectors in the cylinder head. Always replace the O-rings with new ones. Do not remove the plastic front bushings from the injectors.8. Lightly lubricate the O-rings with clean engine oil before installation.
9. Insert the injectors vertically into the fuel rail until they stop and secure them with the clips.
10. Carefully insert the rail with the injectors into the intake manifold and press it in until it stops.
11. Install the mounting bolts, lightly press the fuel rail by hand toward the intake manifold, and tighten the bolts to 10 N·m.
12. Connect the injector electrical connectors.
13. Secure the supply line to the fuel rail.
14. Connect the vacuum line to the fuel pressure regulator.
15. Secure the upper part of the intake manifold with a new gasket.
16. Connect the vacuum hose and the connector of the switching valve on the intake manifold.
17. Connect the electrical connectors of the spark plugs. Injector Check
Fuel injectors are solenoid valves opened and closed by the engine control unit, which determines the injection timing and duration depending on crankshaft speed, throttle position, incoming air mass, intake air temperature, coolant temperature and oxygen content in the exhaust gas, based on information received from sensors mounted on and around the engine. Injectors spray fuel in a cone-shaped pattern. After fuel injection, the injector valve closes with leakage, which may cause starting problems with a hot engine. If the injectors are faulty, the engine may keep running after the ignition is switched off, in dieseling mode.
18. Before checking the injectors, check the condition and operation of the engine control system fuse, the crankshaft position sensor and the fuel pump relay. Checking Voltage Supply to the Injectors
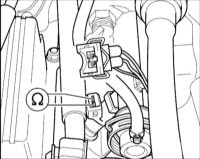
19. Disconnect the electrical connector from the No. 1 cylinder injector.
20. Connect a test LED to the connector terminals. When the engine is cranked with the starter, the LED should flash.
21. Check the voltage supply to the other fuel injectors in the same way. The LED does not flash on any cylinder.
22. Connect the test LED between terminal No. 1 of the injector voltage supply connector and vehicle ground. Connect terminal No. 2 of the electrical connector to vehicle ground.
23. Crank the engine with the starter. The LED should flash. Otherwise, check the entire injector power supply circuit. The LED does not flash on only one or several cylinders.
24. Check the condition of the injector power supply circuit, locate and repair any open circuit or short to ground. Also check the operation of the engine control unit. Checking Resistance
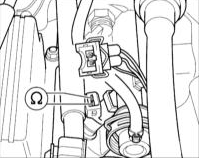
25. Disconnect the electrical connectors from the injectors one at a time and, using an ohmmeter, check the injector resistance, which should be between 12 and 17 Ohm.
CAUTION
On an engine warmed up to normal operating temperature, the injector resistance increases by 4 – 6 Ohm.26. If the injector resistance differs from the specified value, replace the injector. Checking Spray Pattern and Valve Leakage
27. Disconnect the four-pin electrical connector from the coolant temperature sensor.
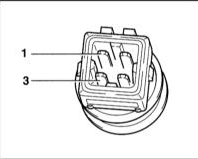
28. Short terminals 1 and 3 of the sensor with a 15 Ohm resistor.
29. Remove the fuel rail together with the injectors without disconnecting the fuel hoses.
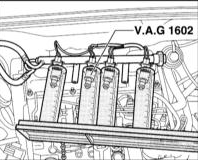
30. Insert the injectors into measuring cylinders, such as VAG.
1602.
31. Ask an assistant to crank the engine with the starter for several seconds. While the starter is operating, the injectors should spray fuel. Check the fuel spray pattern, which should be cone-shaped and the same for all injectors.
32. Switch off the ignition and check the injector leakage. No more than two drops of fuel should leak from the injectors within 1 minute.
33. Install the fuel rail together with the injectors on the engine. Before installation, check the condition and lubricate the injector O-rings.
34. Connect the electrical connector to the coolant temperature sensor.
35. Connect the multi-pin electrical connector to the ignition coil control unit.
36. Install the upper engine cover. Fuel Pressure Regulator Check
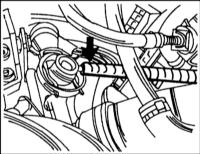
37. For accurate fuel pressure measurement, use special gauge VAG1318 with additional parts, which allows the reference values to be measured. Idle fuel pressure is 2.5 bar. When the vacuum hose is removed at the point shown by the arrow, the pressure rises to 3.0 bar. After the engine stops, the pressure should be at least 2.3 bar. The pressure should drop to 2.0 bar after 10 minutes. Coolant Temperature Sensor Check
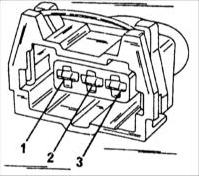
38. The sensor performs a dual function. First, it signals the coolant temperature in the engine and, second, it connects to the remote temperature gauge on the instrument panel. Sensor 2 is located on the rear side of the cylinder head. If air conditioning is installed, the second temperature sensor -1- is located nearby. To check, proceed as follows:
39. Disconnect the sensor connector.
40. Connect the ohmmeter to two terminals of connector 1 and
3. On a cold engine at room temperature, the ohmmeter reading should be between 1.5 and 3.0 kOhm. If not, install a new sensor. Intake Air Temperature Sensor Check The sensor is fitted only on engines with a turbocharger. The sensor is located next to the throttle control unit.
41. Disconnect the sensor connector.
42. Connect an ohmmeter to the sensor contacts. With the engine cold and at room temperature, resistance must be 1.6 – 2.8 kΩ. If not, replace the sensor. Checking the mass air flow meter: If you do not have sufficient experience with electrical measurements, only the power supply to the meter and the connection to the control unit can be checked. Mass air flow meters differ between engines with and without a turbocharger. On engines without a turbocharger, the meter is built into the air filter housing. An LED test probe is required.
43. Disconnect the connector from the mass air flow meter.
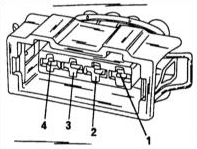
44. Connect the test probes of the LED test light between contact 3 of the connector and ground.
45. Assistant must operate the starter (start the engine). If the LED lights up, voltage is supplied to the meter.
46. To check the control unit connections, switch off the ignition and disconnect the connector from the control unit. Now check the continuity of the circuits.
47. On the connector of an engine without a turbocharger, connect the ohmmeter between pin 1 of the control unit connector and contact 2 of the mass air flow meter connector. In addition, measure the resistance between contact 9 and contact
2. In both cases there must be continuity (0 Ω).
Test yourself
A quick Audi A3 quiz: every answer comes with an explanation and a link to the manual page.