Drive Shaft Boot Replacement
1. Remove the drive shaft and clean it.
2. Cut the clamp securing the inner joint boot.
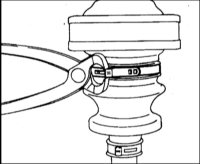
3. Remove the joint ring cover with a drift.
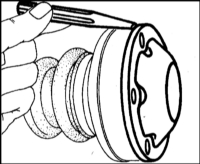
4. Remove the joint ring boot and move the drive shaft aside.
5. Wipe the joint grease off with a rag.
6. Spread the snap ring with pliers and remove it.

7. Press the drive shaft out of the inner joint (2) using the drift (1). Place the ball hub on the plate (3).

8. Inspect the joint for contamination or damage. If necessary, replace with a new one. It is recommended not to replace the joint if possible.
9. Clean the joint. To do this, disassemble it. In this case, mark the position of the ball hub, cage and joint element relative to each other on the end faces.
* Observe extreme cleanliness during assembly.
10. Remove the inner protective boot (transmission side) over the splined shaft.
11. If necessary, cut the clamp securing the boot at the outer boot and remove the boot over the drive shaft. Make sure dirt does not get into the joint.
Installation
To replace the boot, use a repair kit. On high-mileage vehicles, it is also recommended to replace the second protective boot.
INSTALLATION
1. Thoroughly clean the constant velocity joint in assembled condition.
2. Install the new protective boots. Protect the sharp edges of the drive shaft with a suitable sleeve or tape so the boots are not damaged during installation.

3. Fill the joint with new grease.
* Special grease is included in the "Protective Boot" repair kit.
4. Install the inner joint onto the drive shaft.
5. Clamp the drive shaft in a vise using the clamping fixture (1).

7. Press the joint on using the appropriate tube (2) until it stops.
8. Remove the clamping fixture.
9. Install a new snap ring using pliers. Check that it is seated in the groove.
10. Fill the outer joints and protective boots with special grease. Make sure dirt does not get into the joint. The amount of grease is given in Specifications.
11. Apply a thin layer of "Curil T" or "Stucarit Dicht-Gel 309/4" sealant to the sealing surfaces of the cover. Press the cover in with the retaining ring.
12. Apply a thin layer of "Curil T" or "Stucarit Dicht-Gel 309/4" sealant to the sealing surfaces of the protective boot. Press the boot in with the retaining ring.
13. Secure the protective boot with a clamp. Make sure the lock of the large clamp sits between two holes of the constant velocity joint.
14. Install the outer joint boot and secure it with a clamp on the large diameter.
15. Slide the boots over the thickened section of the drive shaft and secure them with clamps.
16. Install the drive shaft.
Test yourself
A quick BMW 1 quiz: every answer comes with an explanation and a link to the manual page.