Removal and Installation of Drive Shaft and Rear Axle Final Drive
REMOVAL
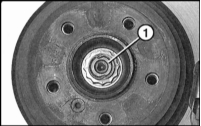
1. Loosen the hub retaining nut (1).
* The nut is tightened quite tightly. Therefore, for safety reasons, loosen the nut with the vehicle standing on its wheels.
2. Mark the position of the front wheels relative to the hub with paint. This ensures the balanced wheel returns to its original position. Loosen the wheel bolts with the vehicle standing. Raise and support the vehicle on stands. Remove the front wheels.
3. Remove the driveshaft at the rear axle final drive flange, refer to the Section Removal and Installation of Driveshaft.
4. Remove the rear stabilizer bar. To do this, remove the stabilizer nuts on the left and right sides of the link. Disconnect the rubber mounts at the rear suspension beam and remove together with the stabilizer bar.
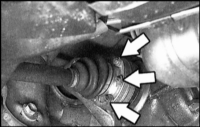
5. Remove the bolts securing the drive shafts to the rear axle differential and remove the drive shafts (arrows in the accompanying illustration). Suspend the drive shafts from the body with wire.
* Do not let the drive shafts drop down. Otherwise the outer constant velocity joint will be overloaded.
6. Place a garage jack with a wooden block under the rear axle final drive.
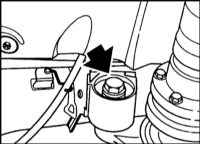
7. Remove the nut.
8. Remove the main muffler, refer to the Section Replacing the Main Muffler.
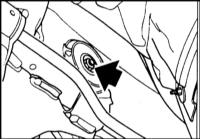
9. Remove the nuts on the right and left sides.
10. Lower the rear axle final drive and separate it from the driveshaft flange.
11. Press the drive shaft out of the wheel hub. Refer to the accompanying illustration.
* A suitable puller, such as BMW, is required for this. Attach the puller bridge to the wheel hub with two bolts and screw the spindle fully into the drive shaft.
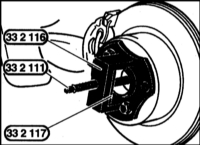
12. Remove the drive shaft.
INSTALLATION
1. Install the drive shaft and suspend it with wire.
2. Insert the shaft using BMW tool, e.g. spindle 332 118 with nut 332 115. To do this, first fully screw the spindle into the bridge. Screw the threaded element onto the spindle and drive shaft. On the other side, screw the nut onto the spindle until it stops against the bridge. This pulls the drive shaft into the hub. Make sure the splines of the shaft and the hub grooves align before inserting the shaft.
3. Lightly lubricate with oil and screw on the flanged nut.
4. Install the rear axle final drive and secure with new self-locking nuts. Tightening torques are given in Specifications.
5. Install the main muffler. Refer to Main Muffler Replacement.
6. Connect the propeller shaft to the rear axle final drive. Refer to Propeller Shaft Removal and Installation.
7. Connect the drive shaft to the rear axle final drive and tighten the mounting bolts with a torque wrench. Do not forget to install the washer plates. Tightening torques depend on bolt type and size and are given in Specifications.
8. Remove the wire from which the drive shaft was suspended.
9. Secure the stabilizer. Tighten the stabilizer link nuts to 40 N·m.
10. Install the front wheels. Do not lubricate wheel bolts with oil. Install the wheels so the marks made earlier align. Lower the vehicle onto the wheels. Tighten the wheel bolts in a crisscross pattern to 100 N·m.
11. Lightly lubricate the flanged nut with oil and tighten to the torque given in Specifications.
12. Stake the flanged nut. To do this, strike the nut flange with a drift so it enters the groove of the drive shaft.
13. Tighten the wheel bolts in a crisscross pattern to 100 N·m.
14. Check the oil level in the rear axle final drive. If necessary, top up. Refer to Differential Fluid Replacement.
Test yourself
A quick BMW 1 quiz: every answer comes with an explanation and a link to the manual page.