Driveshaft Removal and Installation
REMOVAL
1. Raise and support the vehicle on stands.
2. Remove the exhaust system.
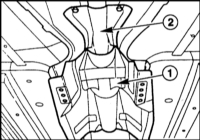
3. Remove the mounting bolts and remove the heat shields (1), (2) from the underbody.
4. Remove the mounting bolts and remove the driveshaft universal joint flange at the manual transmission. Hold the shaft from rotating using a standard strap wrench.
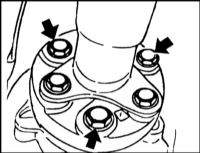
5. Remove the driveshaft mounting nuts at the rear axle final drive flange.
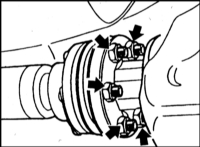
6. Pry the constant velocity joint at the flange out of the slots using a screwdriver.
* Do not allow the driveshaft to move into the joint. This may crush the protective boot of the constant velocity joint.
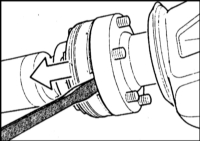
7. Clamp the center bearing and remove the nuts.
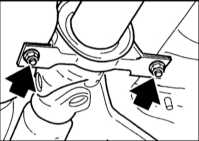
8. Lower the driveshaft at the center bearing and remove it from the centering pin at the transmission.
* Cover the constant velocity joint with a polyethylene bag to protect it from contamination.
Installation
If vibration or noise comes from the driveshaft, it must be balanced.
* The driveshaft is balanced over its entire length. It may only be replaced as a complete assembly.
INSTALLATION
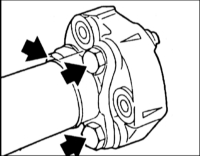
1. Replace the flange of the shaft if it is worn. To do this, remove the bolts (arrows in the accompanying illustration). Install the new flange so that the arrows marked on the circumference point in the direction of the flange spokes.
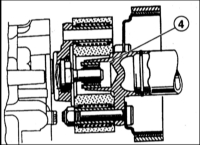
2. Before installation, inspect the centering element (4) on the driveshaft flange. If necessary, lubricate the element with "Molykote Longtherm 2" grease. Replace a damaged centering element with a new one.
3. Pull the constant velocity joint (1) fully in. If there is no grease, fill the joint with grease. For this purpose use only grease recommended by BMW.
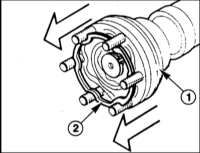
4. Replace the O-ring (2). Beforehand, wipe the grease from the sealing surfaces of the joint and the drive flange with alcohol.
5. Slide the driveshaft with the extended joint onto the rear axle final drive flange.
* Do not move the constant velocity joint during assembly, as grease may force out the O-ring and the joint will become unsealed.
Pull the shaft to the final drive flange. Install new self-locking nuts and tighten them to 70 N·m.
6. Tighten the flange bolts. Tightening torque for M8 bolts 45 N·m, M10 - 70 N·m, M12 - 80 N·m
7. Tighten the center bearing mounting bolts to 22 N·m.
8. Secure the heat shield.
9. Install the exhaust system, refer to the Section Cleanliness Rules When Working on the Fuel System.
10. Lower the vehicle onto its wheels.
Test yourself
A quick BMW 1 quiz: every answer comes with an explanation and a link to the manual page.