Powertrain
Installation - Transfer Case
In this manual: Powertrain
15steps
~90min
4/5difficulty
Done 0 of 15
Materials
| Name | Specification |
|---|---|
| Motorcraft® 4x4 High-Temperature Front Axle and Hub Bearing Grease XG-11 |
WSS-M1C267-A1 |
NOTICE: Do not overgrease the driveshaft components. Using excessive grease may damage the driveshaft components.
Lubricate the transfer case internal splines with grease.
Material: Motorcraft® 4x4 Front Axle and Hub Bearing High-Temperature Grease / XG-11 (WSS-M1C267-A1)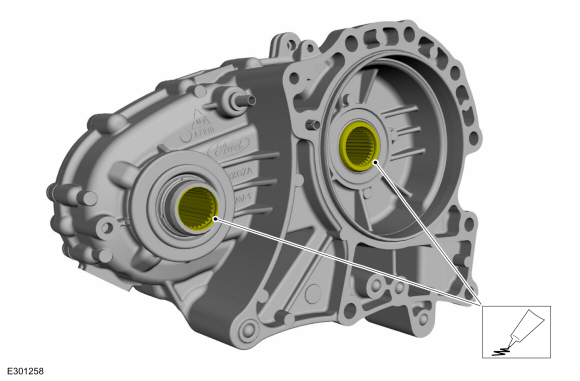
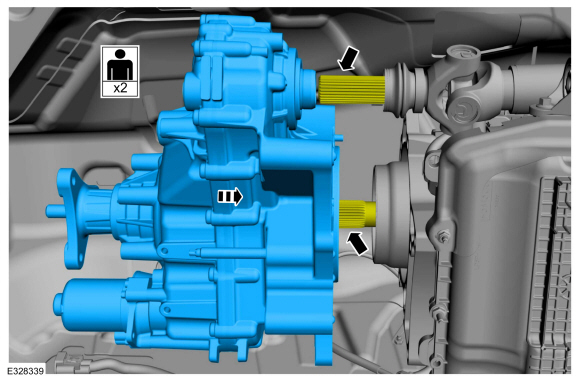
- Connect the transfer case to the transmission output shaft and the driveshaft. Position the transfer case on the transmission.
- Install new transfer case mounting bolts.
Torque: 159 lb-in (18 N·m)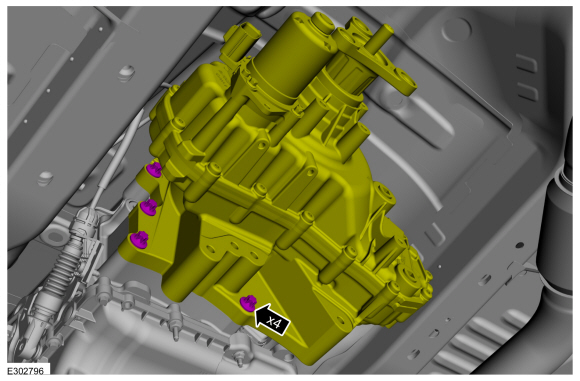
- Install new transfer case mounting bolts.
Torque: 159 lb-in (18 N·m)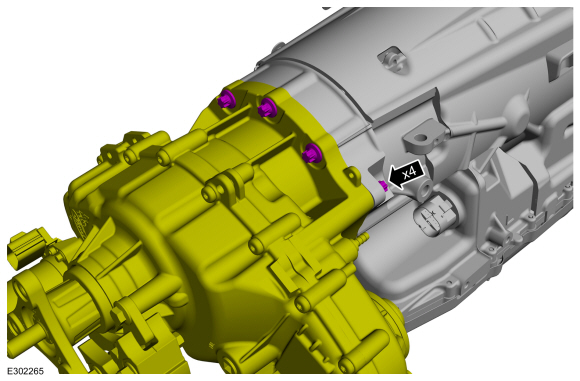
- Connect the transfer case wiring harness connector.
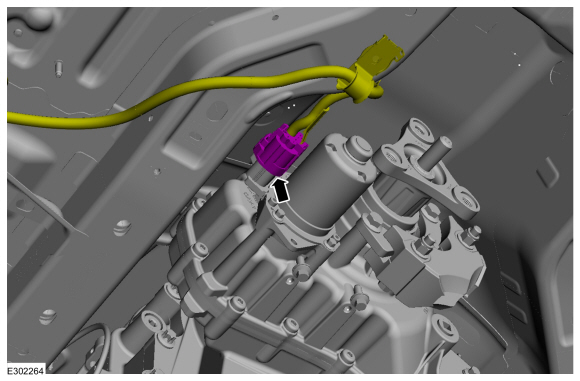
- Connect the transfer case vent hose.
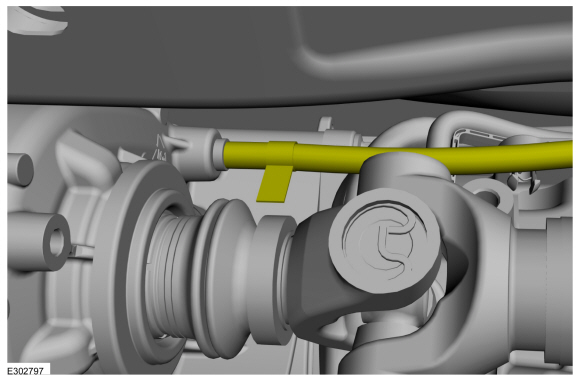
- Install the transmission crossmember.
Refer to: Transmission Mount Insulator (307-01A Automatic Transmission - 10-Speed Automatic Transmission - 10R60, Removal and Installation).
Refer to: Transmission Mount Insulator (307-01B Automatic Transmission - 10-Speed Automatic Transmission - 10R80, Removal and Installation).
Refer to: Transmission Mount Insulator (307-01C Automatic Transmission - 10-Speed Automatic Transmission - 10R80 MHT, Removal and Installation). - Inspect the driveshaft flex coupling for damage. If the internal windings (threads) are visible, replace the flex coupling as necessary.
Refer to: Driveshaft Flex Coupling (205-01 Driveshaft, Removal and Installation).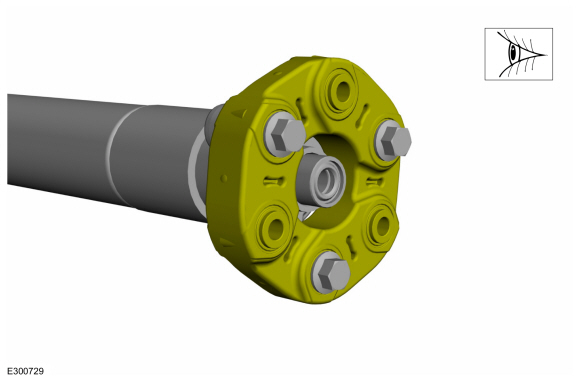
- Inspect the driveshaft pilot bushing for damage and clean off any contamination. Replace with the same type as necessary.
Refer to: Driveshaft Pilot Bushing (205-01 Driveshaft, Disassembly and Assembly).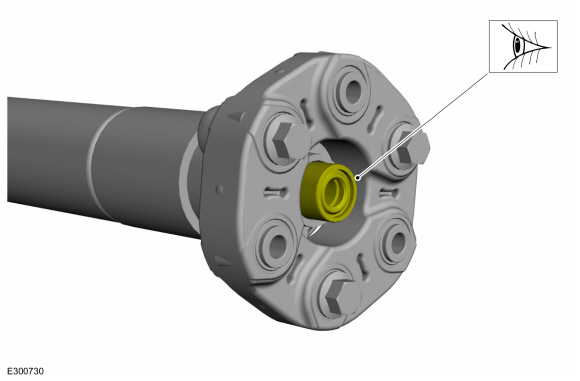
NOTICE: Make sure the mating surfaces are free of contamination, including removing any blue Loctite from any mating surface.
Clean and inspect the mating surfaces of the flexible driveshaft connection. Remove any contamination or excess grease from the transfer case flange and the pilot bore.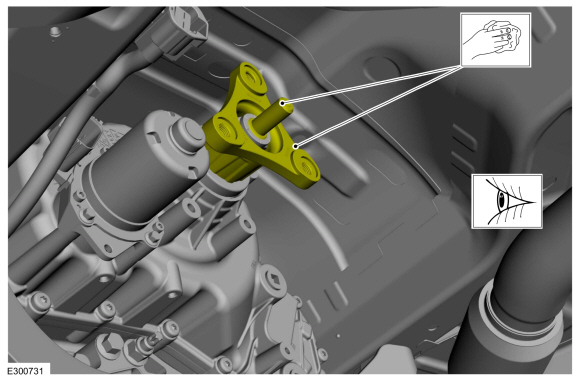
NOTICE: Do not bend the driveshaft, as this may damage it.
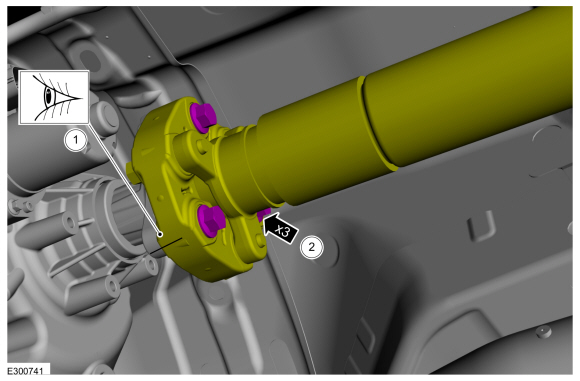
- Align the mark on the driveshaft flex coupling with the transfer case flange.
- Install a new driveshaft flex coupling onto the transfer case flange bolts.
Torque: 81 lb-ft (110 N·m)
- If equipped, install the transfer case heat shield.
Torque: 21 lb-ft (28 N·m)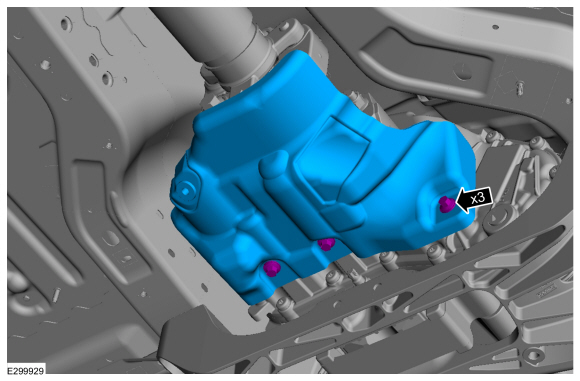
- Check the transfer case fluid level.
- Using the diagnostic tool, perform the active torque coupling check. Configuration procedure. The transfer case X-digit alphanumeric bar code is located on the label attached to the transfer case.
- Perform the transfer case clutch learn procedure.
Test yourself
A quick Ford Explorer quiz: every answer comes with an explanation and a link to the manual page.
Was this page helpful?