Quick Start
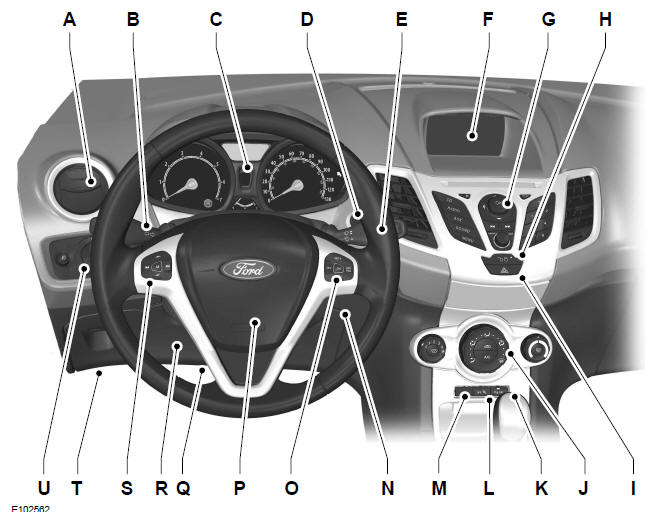
Instrument panel overview, left-hand drive
Right-hand drive
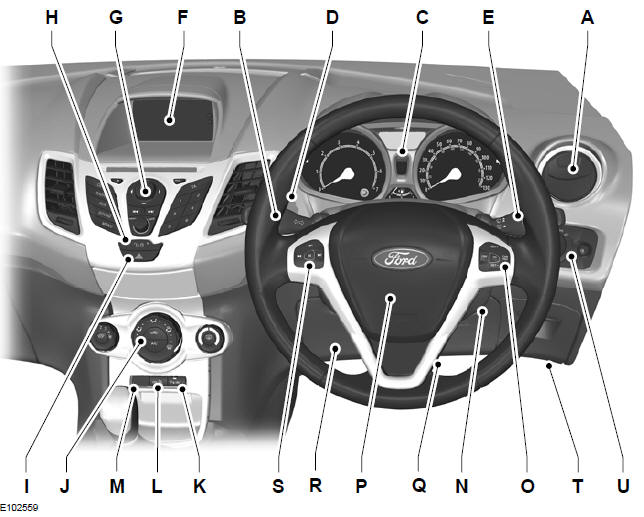
- Air vents. See Air vents
- Multifunction lever: Indicators. See Indicators (page 52). Headlights (high beam). See Lighting control (page 49). See Voice control (page 44). See Trip computer (page 72).
- Instrument cluster. See Instruments (page 62). See Warning and indicator lamps (page 62).
- Start button. See Keyless starting (page 93).
- Wiper lever. See Wipers and washers (page 45).
- Multifunction display.
- Audio unit. See Radio overview (page 169).
- Door lock button. See Locking and unlocking (page 36).
- Hazard warning light switch. See Hazard warning lights (page 51).
- Heating, ventilation and air conditioning controls. See Heating, ventilation and air conditioning
- Warning lamp or parking aid switch. See Parking aid
- Passenger airbag off warning lamp. See Passenger airbag deactivation
- Electronic Stability Program (ESP) switch. See Using the Electronic Stability Program
- Ignition switch.
- Cruise control. See Using the cruise control
- Horn.
- Steering column adjustment. See Steering column adjustment
- Driver's knee airbag. See Operating principles
- Audio system controls. See Audio system controls
- Bonnet release lever. See Opening and closing the bonnet
- Light switch. See Lighting control (page 49). Front fog lights. See Front fog lights (page 50). Rear fog light. See Rear fog light
Locking and unlocking
Unlocking the vehicle
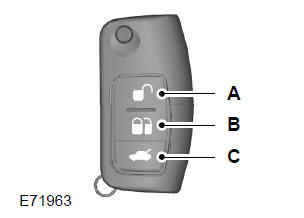
- Unlocking
- Locking
- Boot lid unlock
Press the unlock button once to unlock the vehicle. See Programming the remote control (page 32).
Press the lock button once to activate the central locking.
Press the lock button twice within three seconds to activate the double locking system.
Press the boot lid unlock button twice within three seconds to unlock the boot lid.
See Locking and unlocking (page 36).
Keyless system
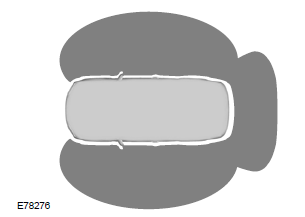
Passive locking and unlocking requires a valid passive key to be within one of the three exterior detection zones.
Locking the vehicle
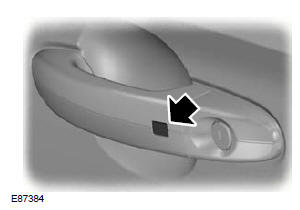
The lock buttons are located on both front doors.
Press the lock button once.
Unlocking the vehicle
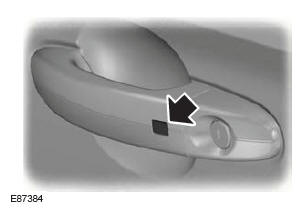
Press the lock button once.
See Keyless entry (page 38).
Starting the vehicle without the key
 Press the start button
once.
Starting the vehicle with an automatic transmission
Note: Releasing the brake pedal while starting the engine will abort engine cranking and return the ignition to on.
1. The gear selector must be in P or N.
2. Press the brake pedal fully down.
3. Briefly press the start button.
Starting the vehicle with a manual transmission
Note: Releasing the clutch pedal while starting the engine will interrupt engine cranking and return the system to ignition on.
1. Press the clutch pedal fully down.
2. Briefly press the start button.
See Keyless starting
Adjusting the steering column
WARNING
Never adjust the steering column while the vehicle is moving.
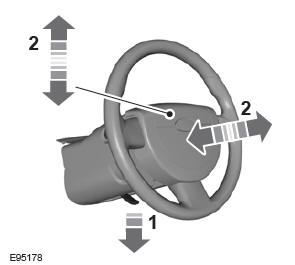
WARNING
Make sure the locking lever is fully engaged after returning it to its original position.
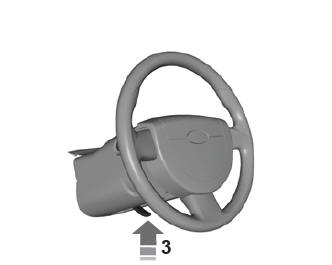
See Steering column adjustment (page 43).
Manual heating, ventilation and air conditioning
Manual heating, ventilation and air conditioning
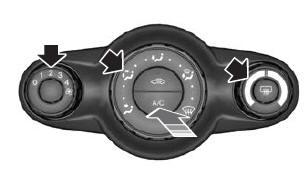
Open the centre and side vents.
Direct the centre vents upwards and the side vents towards the side windows.
Recommended settings for heating
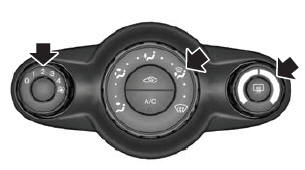
Close the centre vents and open the side vents.
Direct the side vents towards the side windows.
See Manual heating, ventilation and air conditioning
Automatic climate control
Recommended settings for cooling
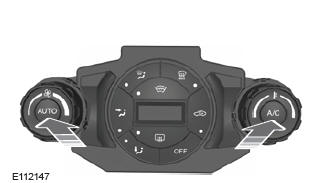
Set the temperature to 22°C (72°F).
Open the centre and side vents.
Direct the centre vents upwards and the side vents towards the side windows.
Recommended settings for heating
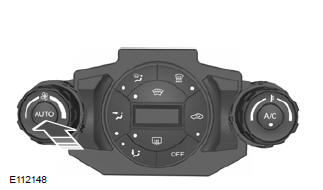
Set the temperature to 22°C (72°F).
Open the centre and side vents.
Direct the centre vents upwards and the side vents towards the side windows.
See Automatic climate control
Automatic lights
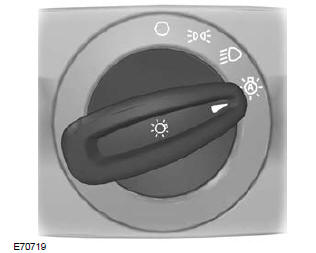
The headlamps will switch on and off automatically depending on the ambient light level.
See Lighting control
Turn Signals
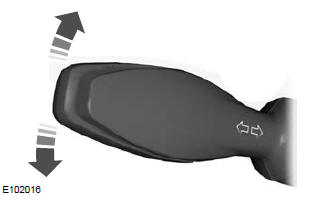
If the lever is briefly pushed up or down, the indicators will flash three times.
See Indicators
Automatic wipers
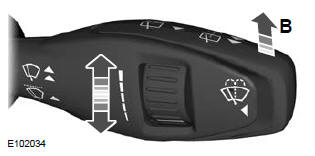
Move the lever up one position.
The rain sensor will continuously measure the amount of water on the windscreen and automatically adjust the speed of the windscreen wipers.
Adjust the rain sensor sensitivity using the dial.
See Windscreen wipers
Air Bag
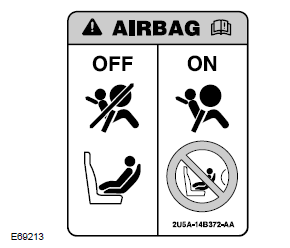
WARNING
To avoid the risk of death or injury to a child, never install a rear-facing child seat on the front passenger seat unless the passenger airbag is deactivated.
See Child safety (page 19).
See Passenger airbag deactivation (page 30).
Manual seat adjustment
Note: Do not hold the locking lever while moving the seat.
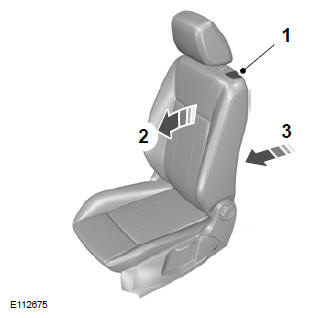
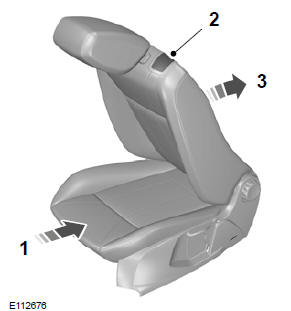
To move the seat, follow the sequence shown.
Folding the seatback forward - 3-door versions
Returning the seatback to its original position - 3-door versions
See Manual seat adjustment
Fuel filler flap
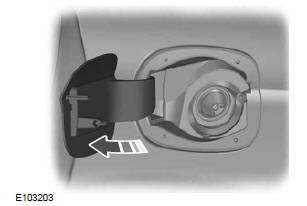
Naciśnij pokrywę, aby ją otworzyć. Otwórz pokrywę całkowicie, aż zaskoczy blokada.
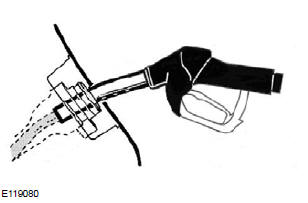
Wsuń końcówkę pistoletu dystrybutora w pierwsze nacięcie na dyszy i wyjmij ją. Oprzyj ją na pokrywie wlewu.
WARNING
Po zakończeniu tankowania odczekaj co najmniej 10 sekund przed wyjęciem pistoletu dystrybutora, aby resztki paliwa spłynęły do zbiornika.
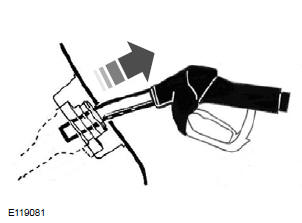
Lekko unieś pistolet dystrybutora, aby go wyjąć.
See Fuel filler flap
Test yourself
A quick Ford Fiesta quiz: every answer comes with an explanation and a link to the manual page.