Powertrain
Direct Clutch
In this manual: Powertrain
3steps
~28min
3/5difficulty
2special tools
Done 0 of 3
Special Tool(s)
Material
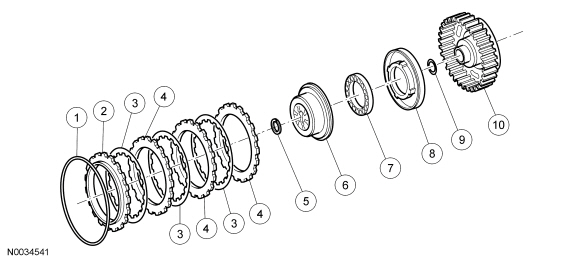
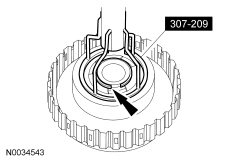
Disassembly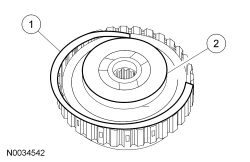
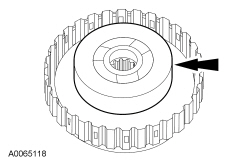
 Assembly
 |
Compressor, Spring Washer 307-209 |
 |
Dial Indicator Gauge With Holding Fixture 100-002 (TOOL-4201-C) |
Material
| Item | Specification |
|---|---|
| Motorcraft® MERCON® LV Automatic Transmission Fluid XT-10-QLVC (US); CXT-10-LV12 (Canada) | MERCON® LV |
| Item | Part Number | Description |
|---|---|---|
| 1 | 7D483 | Selective retaining ring |
| 2 | 7B066 | Direct clutch pressure plate |
| 3 | 7B164 | Friction plates |
| 4 | 7B442 | Steel plates — forward clutch separator |
| 5 | 7H363 | Snap ring |
| 6 | 7H359 | Direct clutch balance piston |
| 7 | 7F235 | Direct clutch return spring |
| 8 | 7A262 | Direct clutch piston |
| 9 | 7H335 | Bearing — direct clutch thrust |
| 10 | 7F283 | Cylinder assembly — direct clutch |
Disassembly
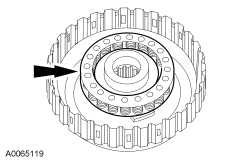
- Remove the direct clutch pressure, friction and steel plates.
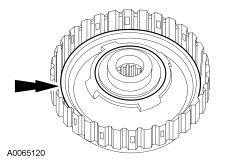
- Remove the selective retaining ring.
- Remove the plates.
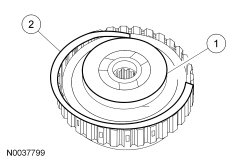
- Using the Spring Washer Compressor, remove the snap ring.
- Remove the direct clutch balance piston.
- Remove the direct clutch return spring.
- NOTICE: If damage is found on the direct clutch piston seals, install a new direct clutch piston.
Remove and inspect the direct clutch piston.
Assembly
- Soak the internal spline clutch plates in clean transmission fluid.
- Inspect the direct clutch piston bore surfaces for nicks or scratches. Install a new direct clutch piston if necessary.
- Lubricate with clean transmission fluid and install the direct clutch piston.
- Install the direct clutch return spring.
- Install the direct clutch balance piston.
- Using the Spring Washer Compressor, install the snap ring.
- Install the direct clutch pressure, friction and steel plates.
- Install the plates.
- Install the selective retaining ring.
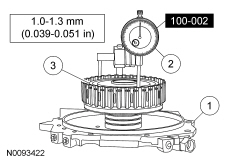
- Measure the clutch pack clearance.
- Install the direct clutch on the transaxle end cover.
- Install the Dial Indicator Gauge With Holding Fixture on the transaxle end cover and position the Dial Indicator plunger on the pressure plate.
- Using a suitable tool, lift up on both sides of the clutch pack and measure and record the clutch pack clearance on the Dial Indicator in 3 different areas. Average the measurements.
- Compare the direct clutch pack clearance to the specification (1.0-1.3 mm [0.039-0.051 in]). If the clutch pack clearance is not within specification, select and install the correct size retaining ring to obtain the specified clearance.
Part Number Thickness XS4Z-7D483-CA 1.15-1.25 mm (0.045-0.049 in) XS4Z-7D483-CB 1.35-1.45 mm (0.053-0.057 in) XS4Z-7D483-CC 1.55-1.65 mm (0.061-0.064 in) XS4Z-7D483-CD 1.75-1.85 mm (0.068-0.072 in) XS4Z-7D483-CE 1.95-2.05 mm (0.076-0.080 in) XS4Z-7D483-CF 2.15-2.25 mm (0.084-0.088 in)
Test yourself
A quick Ford Focus quiz: every answer comes with an explanation and a link to the manual page.
Was this page helpful?