Drip Panel. Removal and Installation
Special Service Tools / General Equipment
| Resistance Spot Welding Equipment | |
| 8 mm Drill Bit | |
| MIG/MAG Welding Equipment | |
| Spot Weld Drill Bit | |
| Locking Pliers |
Materials
| Name | Specification |
|---|---|
| Seam Sealer TA-2-B, 3M™ 08308, LORD Fusor® 803DTM |
- |
Removal
NOTICE: Battery electric vehicles (BEV), hybrid electric vehicles (HEV) and plug-in hybrid electric vehicles (PHEV) contain a high-voltage battery. Before cutting or welding near the high-voltage battery, it must be removed to prevent damage.
- Possible cut points.
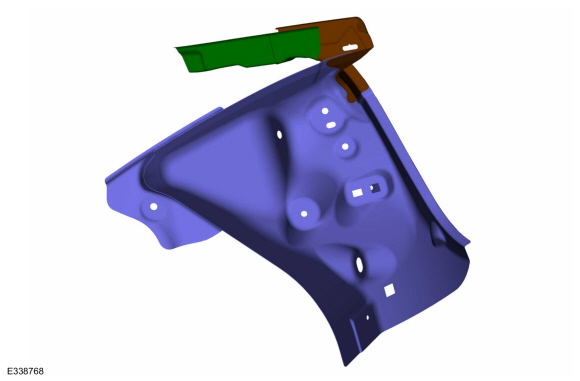
- De-power the SRS.
Refer to: Supplemental Restraint System (SRS) Disabling and Re-enabling (501-20B). - If necessary:
Restore the vehicle dimensions to the condition before the damage.
Refer to: Body and Frame (501-26). - Remove the rear panel and the quarter panel.
Refer to: Rear Panel and Reinforcement (501-30 Rear Body Sheet Metal Repairs, Removal and Installation).
Refer to: Left Quarter Panel (501-30 Rear Body Sheet Metal Repairs, Removal and Installation). - Remove the body plugs.
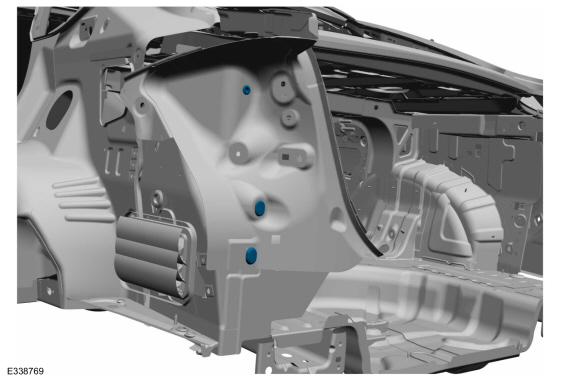
- Remove the welds.
Use common equipment: spot weld drill bit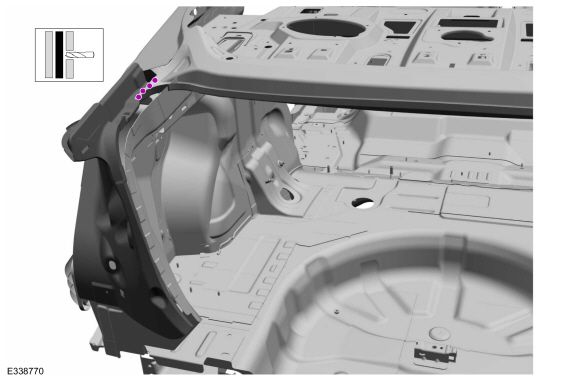
- Remove the welds and the drip panel.
Use the common equipment: spot weld drill bit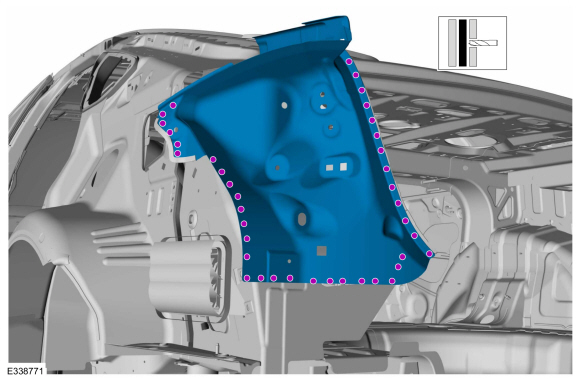
Installation
NOTICE: Battery electric vehicles (BEV), hybrid electric vehicles (HEV) and plug-in hybrid electric vehicles (PHEV) contain a high-voltage battery. Before cutting or welding near the high-voltage battery, it must be removed to prevent damage.
NOTICE: The high-voltage battery in a battery electric vehicle (BEV), hybrid electric vehicle (HEV) or plug-in hybrid electric vehicle (PHEV) can be affected and damaged by excessively high temperatures. Temperatures in the paint booths of some body shops may exceed 60 °C. Therefore, during paint work the paint booth temperature must be set to 60 °C or lower, with a bake time of 45 minutes or less. A temperature above 60 °C or a bake longer than 45 minutes requires removing the high-voltage battery from the vehicle before placing it in the paint booth.
NOTICE: If the paint curing temperature exceeds 60 °C, the charge port indicator ring on plug-in vehicles must be removed.
- Drill out the plug weld holes in the replacement drip panel.
Use the common equipment: 8 mm drill bit.
- Install, position, clamp and weld the drip panel.
Use the common equipment: locking pliers
Use the primary equipment: resistance spot welding equipment.
Use the common equipment: MIG/MAG welding equipment
- Install the welds.
Use common equipment: MIG/MAG welding equipment
- Dress all welds to specification using standard metal finishing methods and materials.
- Seam sealing:
All seams must be sealed to production level.
Material: Seam Sealer / TA-2-B, 3M™ 08308, LORD Fusor® 803DTM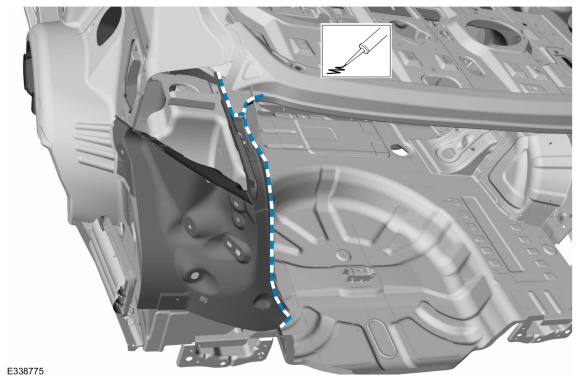
- Refinish the repair using a Ford-approved paint system.
- Install the body plugs.

- Install the quarter panel and the rear panel.
Refer to: Left Quarter Panel (501-30 Rear Body Sheet Metal Repairs, Removal and Installation).
Refer to: Rear Panel and Reinforcement (501-30 Rear Body Sheet Metal Repairs, Removal and Installation). - Restore corrosion protection.
Refer to: Corrosion Prevention (501-25 Body Repair - General Information, General Procedures). - Re-enable the SRS.
Refer to: Supplemental Restraint System (SRS) Disabling and Re-enabling (501-20B).
Test yourself
A quick Ford Fusion quiz: every answer comes with an explanation and a link to the manual page.