Rear Strut - Removal, Disassembly
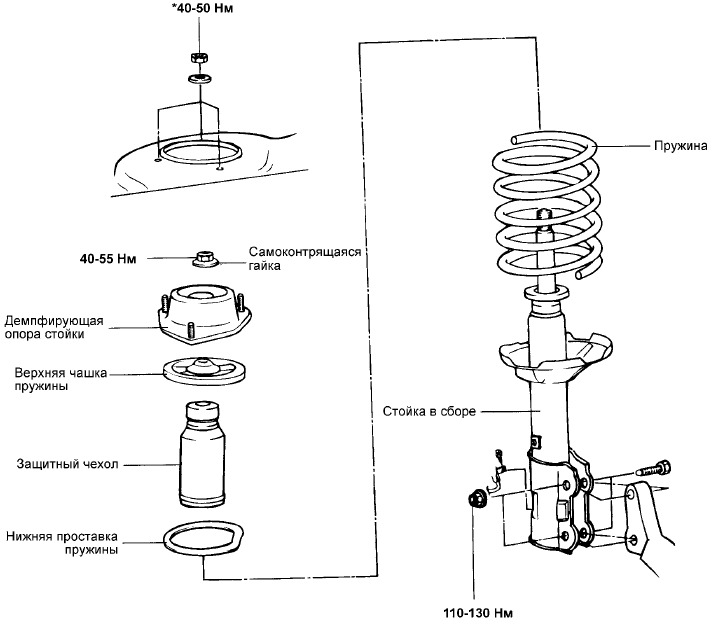
REAR STRUT - COMPONENTS
CAUTION
Replace self-locking nuts with new ones after removal.
REMOVAL
1. Loosen the bolts securing the rear seatback, then remove the rear seatback assembly.
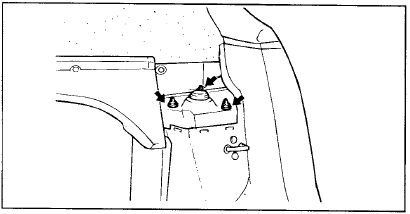
2. Remove the three nuts securing the rear strut damper mount (upper).
3. Remove the rear wheel.
4. Disconnect the brake hose and the wheel speed sensor wire from the rear strut.
5. Remove the stabilizer bar links.
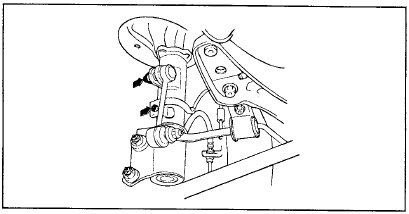
6. Remove the two bolts securing the rear strut to the rear axle knuckle.
Be careful not to drop the rear strut.
7. Remove the rear strut assembly from the vehicle.
DISASSEMBLY
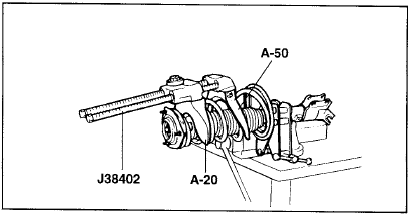
1. Using the special service tools (J38402, A-20 and A-50), compress the coil spring so that the load on the spring seats is minimized.
Do not use a pneumatic tool (impact wrench).
2. Remove the self-locking nut from the upper end of the shock absorber piston rod.
3. Remove the strut damper mount, upper spring seat, coil spring and dust cover from the strut assembly.
INSPECTION
1. Inspect the strut damper mount for wear or damage.
2. Inspect the rubber components for damage or deterioration.
3. Inspect the coil spring and strut assembly for wear or deformation (sagging and loss of stiffness).
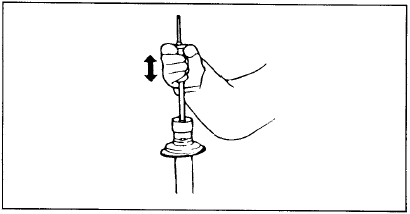
4. Inspect the shock absorber for abnormal resistance to piston rod movement and for abnormal noise.
Test yourself
A quick Hyundai Elantra CN7 quiz: every answer comes with an explanation and a link to the manual page.