Body (Interior and Exterior)
Rear Window Repair Procedures
In this manual: Body (Interior and Exterior)
13steps
~78min
3/5difficulty
Done 0 of 13
Removal
|
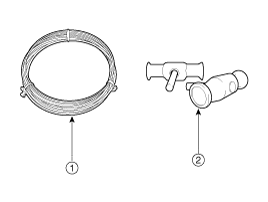
 Piano Wire
 Insert-Type Wire Retainer [Tool Assembly Illustration]
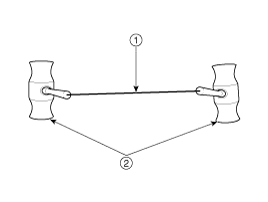
- Remove the sliding glass. (Refer to Sunroof - "Sliding Glass")
- Remove the roof side molding. (Refer to Body Moldings - "Roof Side Moldings")
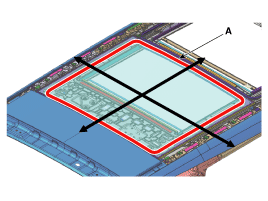
- Pull the piano wire (A) to the left and right, then apply force in the direction of the arrow to cut the remaining sealant.

- To apply force effectively to the cutting surface, make sure the wire is not too long.

- Make sure to wear gloves to protect your hands from possible injury.
- Be careful to protect your hands from burns caused by heat generated while working with the wire.
- Be careful not to break the wiring.

- Be careful not to damage the body.
- An assistant is required when using the power wire.

- Carefully remove the rear window (A) without damaging it.
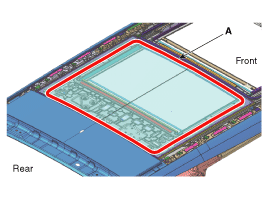
Installation
|

 Sealant Gun
- Install the roof side molding.
- Fully close the sliding glass by pressing the sunroof switch.
- Use a blade to cut away the remaining sealant (A) around the body panel.
- When cutting the remaining sealant around the body panel, leave sealant at a distance of approximately 2 mm from the surface.
- Make sure the body paint surface is not damaged.
- If damaged, apply paint or rust inhibitor for service.
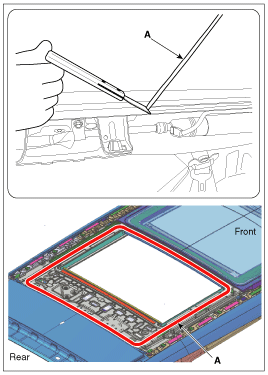
- If the rear window (A) is reused, use a blade to remove the remaining sealant (B) around the body panel.

- Use alcohol or a pneumatic gun to clean the edges of the body panel and the rear window.
- Using a sealant gun, apply sealant (B) around the body panel (A).
- When applying sealant with a sealant gun, make sure there are no gaps in the sealant bead to prevent water leakage.

- Install the rear window (A) loosely onto the body panel.
- Align the rear window (A) and the body panel before fully installing the rear window.
- Apply tape around the rear window so that the glass does not come loose.
- If too much sealant is applied, it may leak out of the body. Use alcohol or a cleaning agent to wipe off excess sealant.
- Install the rear window and park the vehicle on a level surface for at least 4 hours.
- If you need to drive the vehicle, be sure to drive SLOWLY for at least 8 hours after installation.
- Advise the driver to avoid aggressive driving for 2-3 days or driving on rough roads.
Test yourself
A quick Hyundai Genesis DH quiz: every answer comes with an explanation and a link to the manual page.
Was this page helpful?