MANUAL TRANSMISSION SYSTEM
Manual Transaxle Repair Procedures
In this manual: MANUAL TRANSMISSION SYSTEM
26steps
~176min
5/5difficulty
4special tools
Done 0 of 26
DEPOSIT
- Remove the air cleaner assembly. (Refer to Engine Mechanical System - "Air Cleaner")
- Disconnect the battery and battery tray. (Refer to Engine Electrical System - "Battery".)
- Remove the ECM. (Refer to Engine Control System - "ECM".)
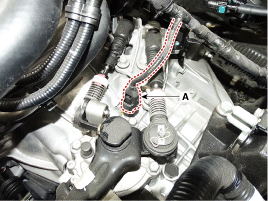
- Disconnect the back-up light switch connector (A).
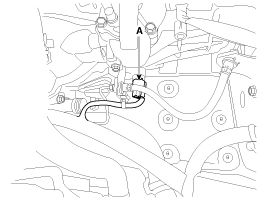
- Disconnect the neutral switch connector (A).
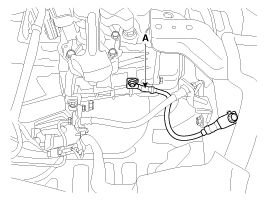
- Remove the transaxle ground cable (A).
Tightening Torque: 14.7 – 22 N·m
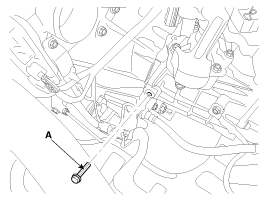
- Remove the clutch tube bracket bolt (A).
Tightening Torque: 14.7 – 22 N·m
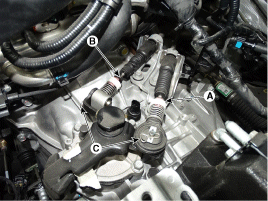
- Disconnect the shift cable (A) and select cable (B) after removing the retaining clip (C).
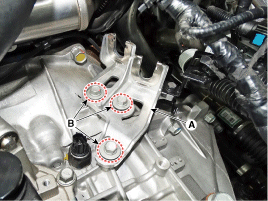
- Remove the control cable bracket (A) after removing the bolts (B - 3 EA).
Tightening torque: 14.7 ~ 22 N·m
- Remove the upper hood cover. (Refer to Body group - "Upper Cowl Cover")
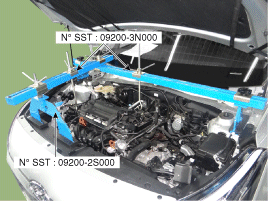
- Install the engine support fixture. (Refer to Special Service Tools; "Engine Mounting Support Member Tool Drawing".)
- Using the engine support fixtures (harness No.: 09200-38001 or 09200-3N000, support No.: 09200-2S000), carefully support the engine and transaxle assembly.
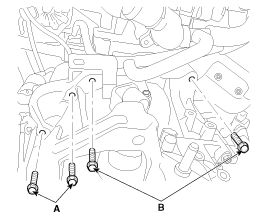
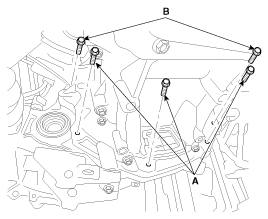
- Remove the upper transaxle mounting bolts (A - 2 EA) and starter motor bolts (B - 2 EA).
Tightening Torque: 14.7 – 22 N·m
- Remove the dust cover (A).
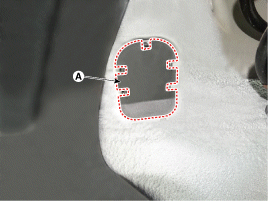
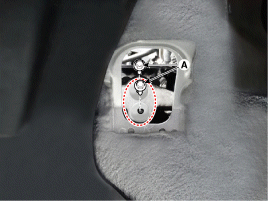
- Remove the transaxle bracket mounting bolts (A).
Tightening torque: 88.3 ~ 108 N·m
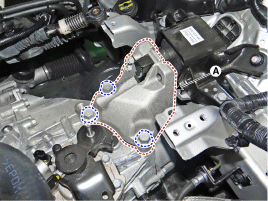
- Remove the support (A) from the transaxle.
Tightening torque: 58.9 ~ 78 N·m
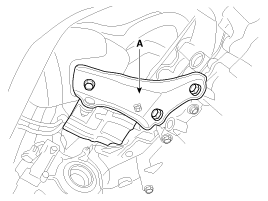
- Remove the engine room under cover. (Refer to Engine Mechanical System - "Engine Room Under Cover".)
- Separate the assembly from the drive shaft. (Refer to Axle and Propeller Shaft - "Drive Shaft".)
- Remove the drive shaft cover (A).
- Remove the clutch release cylinder assembly (B) after loosening the bolts (A - 2 EA).
Tightening Torque: 14.7 – 22 N·m
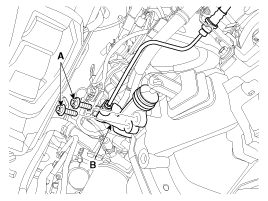
- Loosen the heat exchanger tube mounting bolts (A).
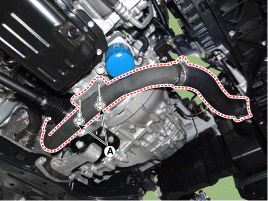
- Remove the roll stopper (A) after removing the mounting bolts (B - 2 EA, C - 1 EA). Tightening torque: (B) 49.0 ~ 69 N·m (C) 107.9 ~ 128 N·m
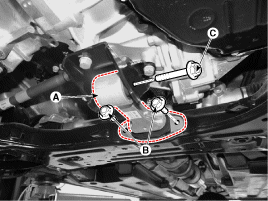
- Remove the roll stopper bracket (A).
Tightening torque: 49.0 ~ 69 N·m
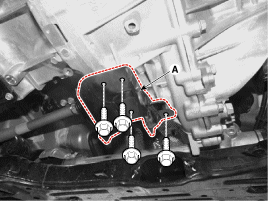
- Remove the mounting bolts (A - 3 EA, B - 2 EA) from the bottom of the transaxle and left side cover, then remove the transaxle assembly while supporting it with a jack. Tightening torque: (A) 43 ~ 49 N·m (B) 43 ~ 55 N·m
REMEDY
- To install, perform the removal procedure in reverse order.
- Add manual transaxle fluid after installing the transaxle. (Refer to Manual Transaxle System - "Transmission Fluid".)
Test yourself
A quick Hyundai i20 quiz: every answer comes with an explanation and a link to the manual page.
Was this page helpful?